Programming the CPLD#
CPLD Versions#
There are different versions available - for \(\leq\) Rev04:
LA4128V for old revisions and Rev04 with serial number UZ2021-002-001-200-0001 to UZ2021-001-001-004-0004
LC4256V for all other Rev04 with serial number UZ2022-001-001-401-0007 up to UZ2024-001-001-0401-0031
For UZ \(\geq\) Rev05:
MachXO2 LCMXO2-2000HC 5x D-slot CPLD
MachXO2 LCMXO2-4000HC 1x S3C
CPLD programs
Note that there are separate CPLD programs for each series and type in the repository. The folders are structured and named accordingly. Before programming, make sure the Diamond Programmer by Lattice is installed and clone the CPLD repository, see Install Lattice Toolchain (CPLD) for details.
JTAG programmers
Different JTAG programmers are used throughout the hardware revisions of the carrier board. The following diagram will help you determine which of the following step-by-step guides is appropriate for your UltraZohm system.
        flowchart TD;
A[JTAG programmer] -->|Carrier board revisions below Rev04 and most Rev04|B[Trenz TE0790 <br> for LA4128V or LC4256V] ;
A -->|Some Rev04 carrier board revisions|C[IsoJTAG <br> for LA4128V or LC4256V];
A -->|Carrier board revisions Rev05 and later|D[Onboard USB-C <br> for MachXO2];
Fig. 71 JTAG programmer guide#
If you are not sure whether your UltraZohm is equipped with the TE0790 or an IsoJTAG, simply remove the bottom cover of the UltraZohm case and take a look at the JTAG programmer board. If it is a green PCB, as shown in the figures in the Trenz TE0790 section below, it is a TE0790. If the PCB is purple, as shown in the IsoJTAG section below, it is an IsoJTAG.
Step-by-step for Trenz TE0790#
Remove the programmer (normally used for programming the Zynq) from X8 of the Carrier Board. The best way to access the programmer is to remove the bottom cover of the UltraZohm case (4 screws). The TE0790 is the small green PCB with the four DIP switches in the figure below.
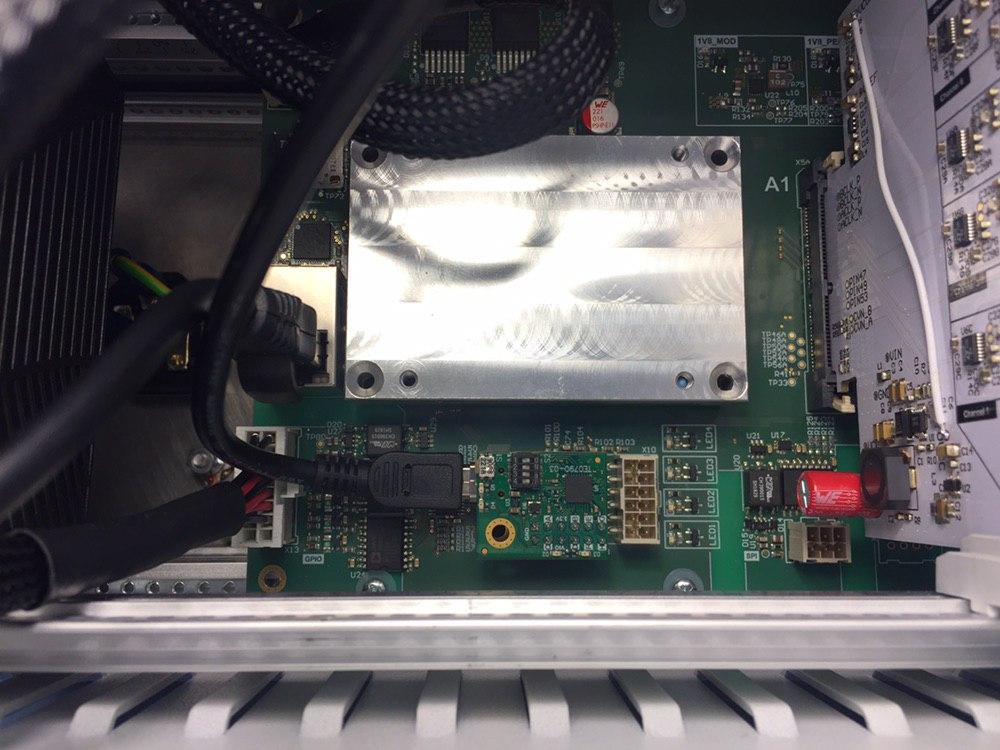
Set the DIP-switches S2 on the programmer to (1on-2off-3off-4off).
Plug the programmer onto X1. Make sure that the hole in the programmer aligns exactly with the mounting hole on the carrier board.
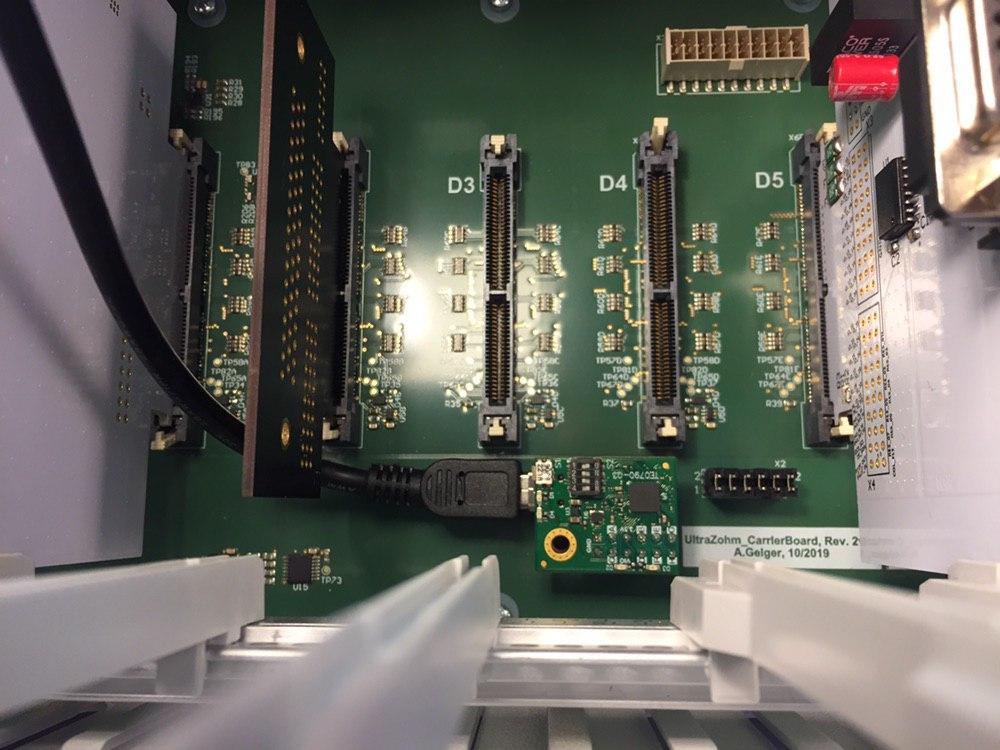
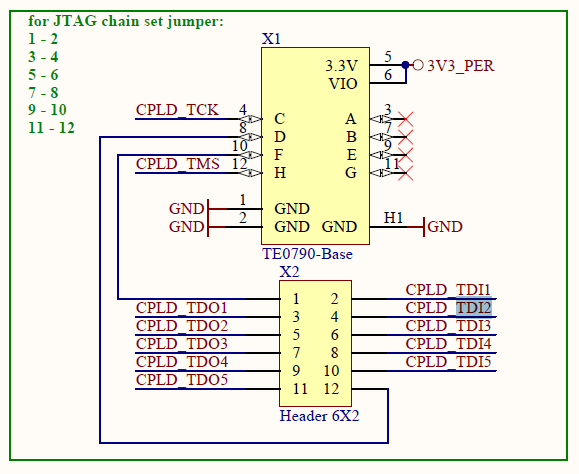
Have all jumpers on the Carrier Board plugged on to X2 to create the daisy chain. This step is not necessary for Rev04 and later.

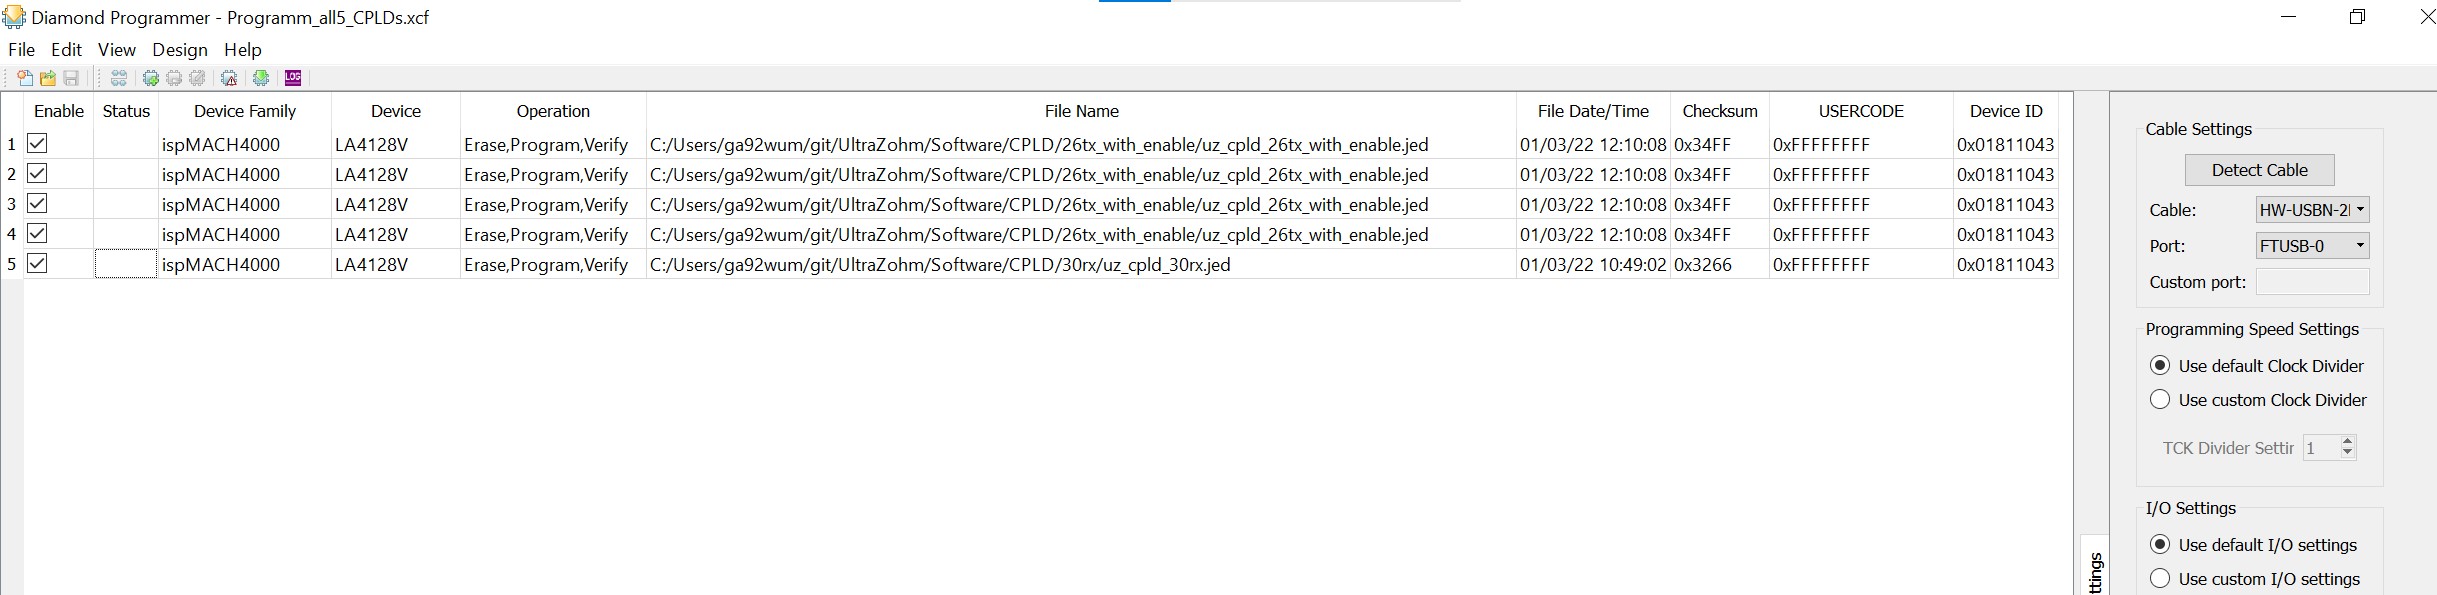
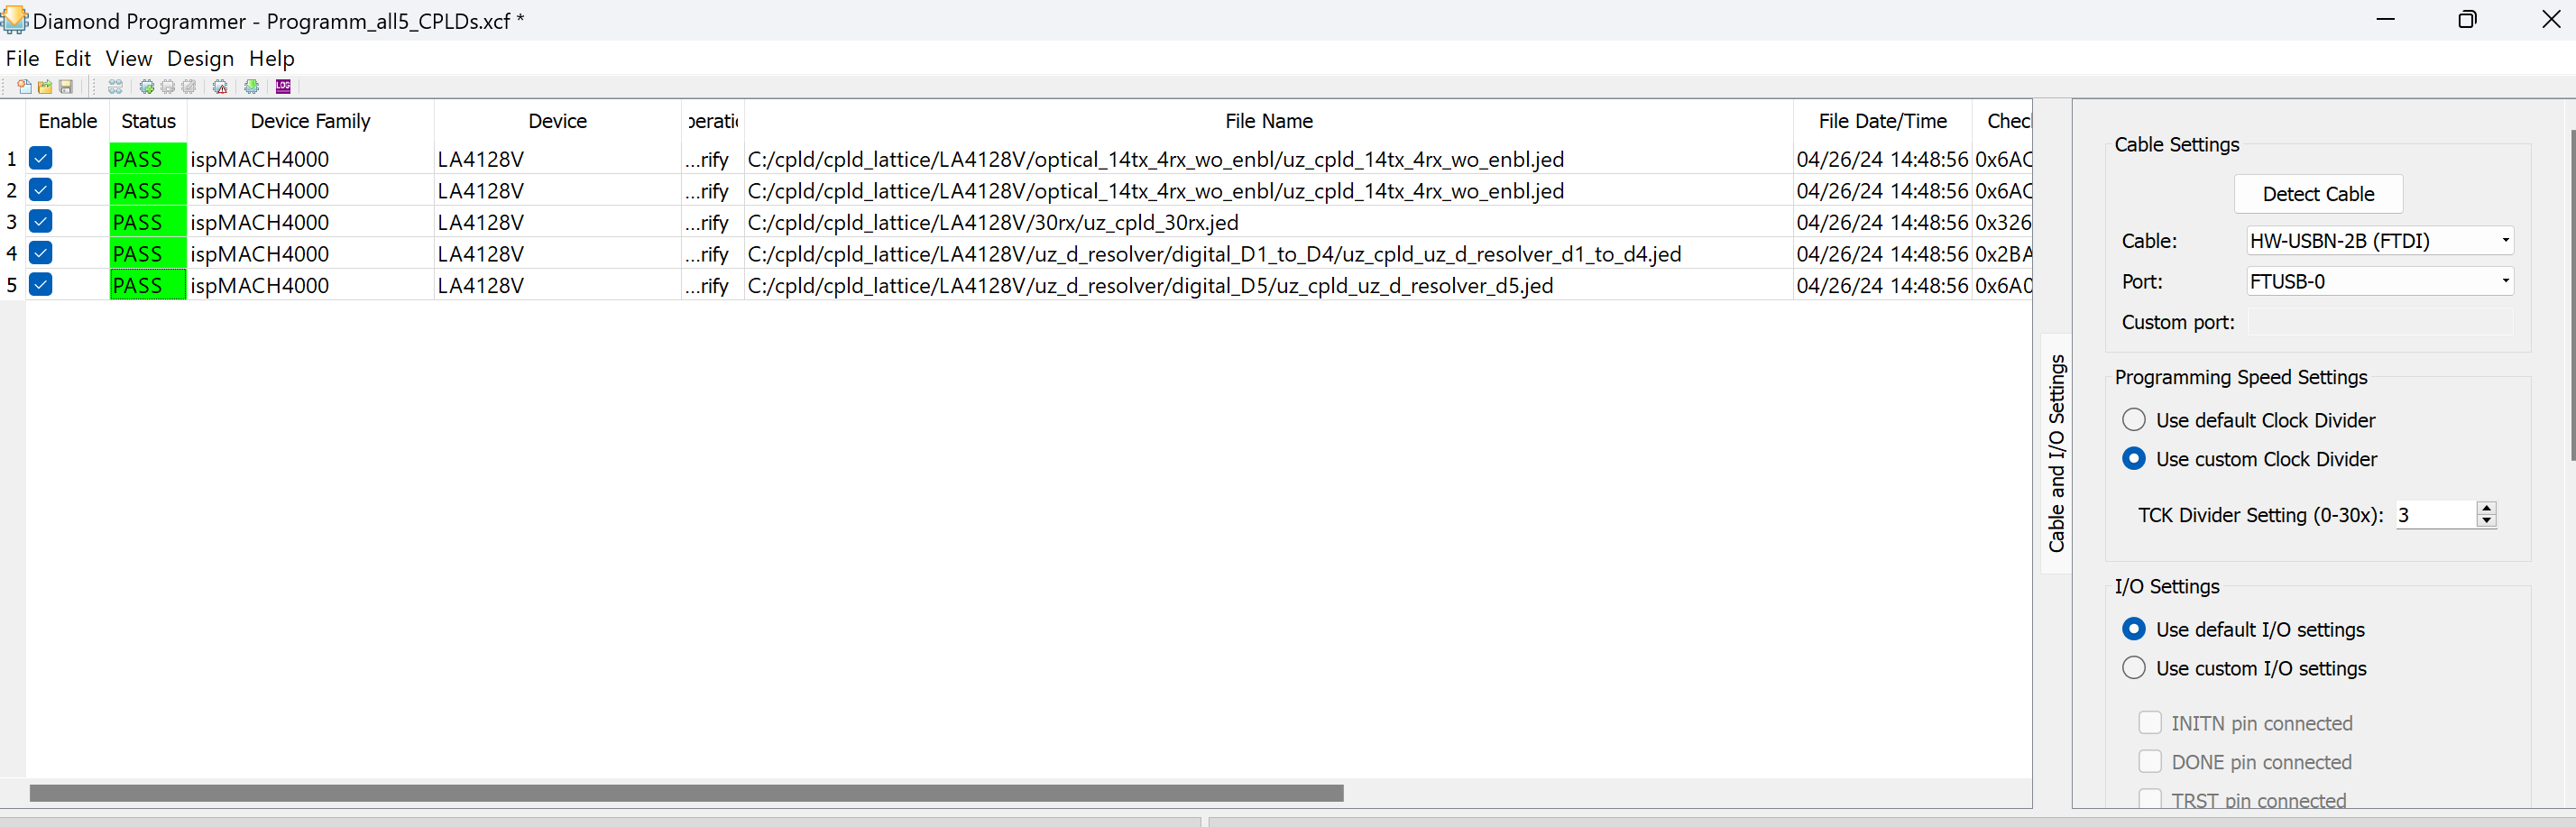
Start the Diamond Programmer by Lattice and open the file in the git repository
Programm_all5_CPLDs.xcf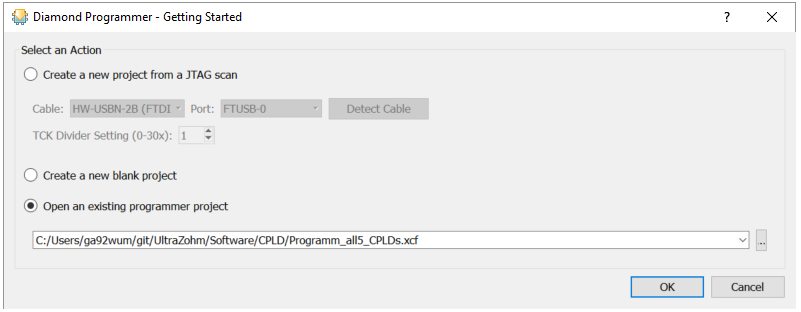
Choose the proper CPLD software and choose which CPLDs you want to program. The standard configuration is:
D1-D4 with 30Tx
D5 for the encoder with 30Rx
Note that it is possible to program only one of the CPLDs by the enable check box in each line.
Plug in the USB cable and turn on the power of the UltraZohm. The programmer on X1 should light up.
Click on “Program”, after successful programming it should look like this:

Turn off the UltraZohm. Remove the programmer from X1 of the Carrier Board, put the DIP switches back in their original position (1on-2off-3off-4on) and plug it back to X8 next to the Zynq processor. Make sure that the mounting hole in the programmer aligns exactly with the hole on the carrier board.
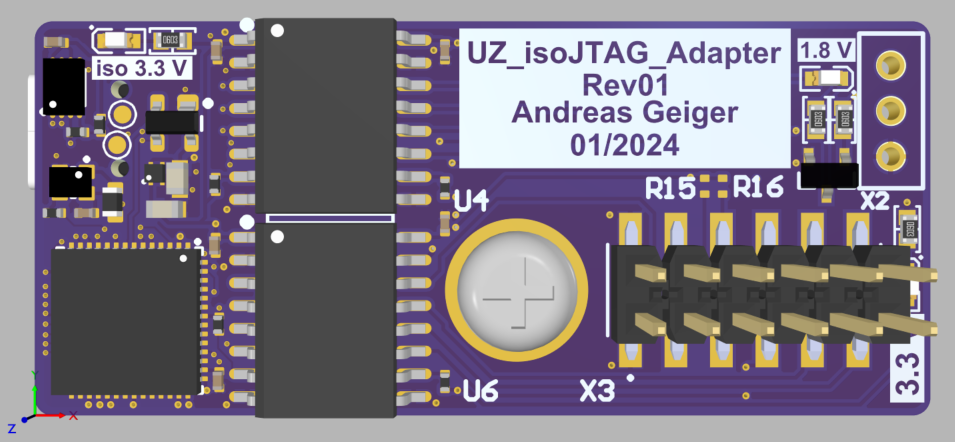
Step-by-step for IsoJTAG IsoJTAG_Adapter#
The IsoJTAG programmer is permanently connected to the SoM and the D-slot CPLDs.
Plug the USB cable into JTAG connector on the UltraZohm front panel. Start the Diamond Programmer by Lattice and open the file in the git repository
Programm_all5_CPLDs.xcfwith regard to the installed CPLD.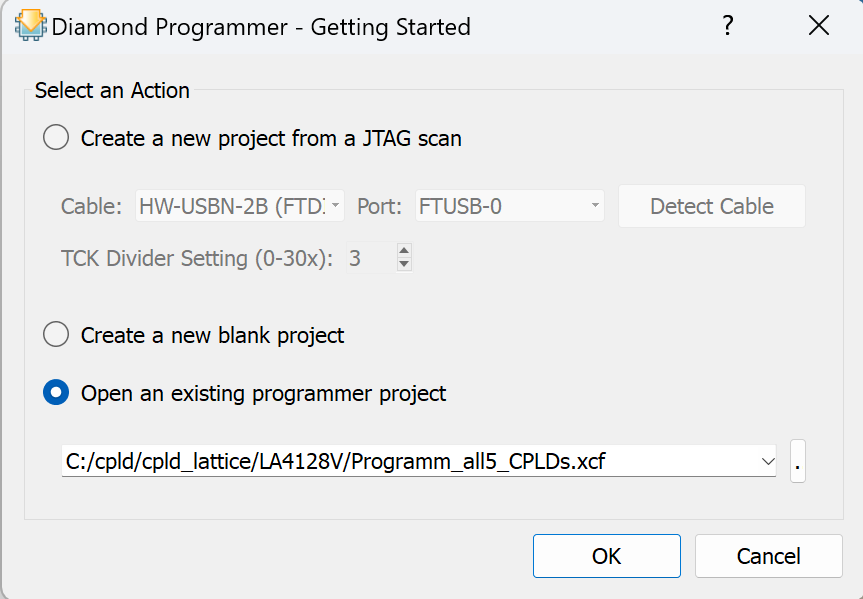
In this example the CPLD LA4128V is installed on the carrier board.
Choose the proper CPLD software and choose which CPLDs you want to program. The standard configuration is:
D1-D4 with 30Tx
D5 for the encoder with 30Rx
Note that it is possible to program only one of the CPLDs by the enable check box in each line.
Turn on the power of the UltraZohm.
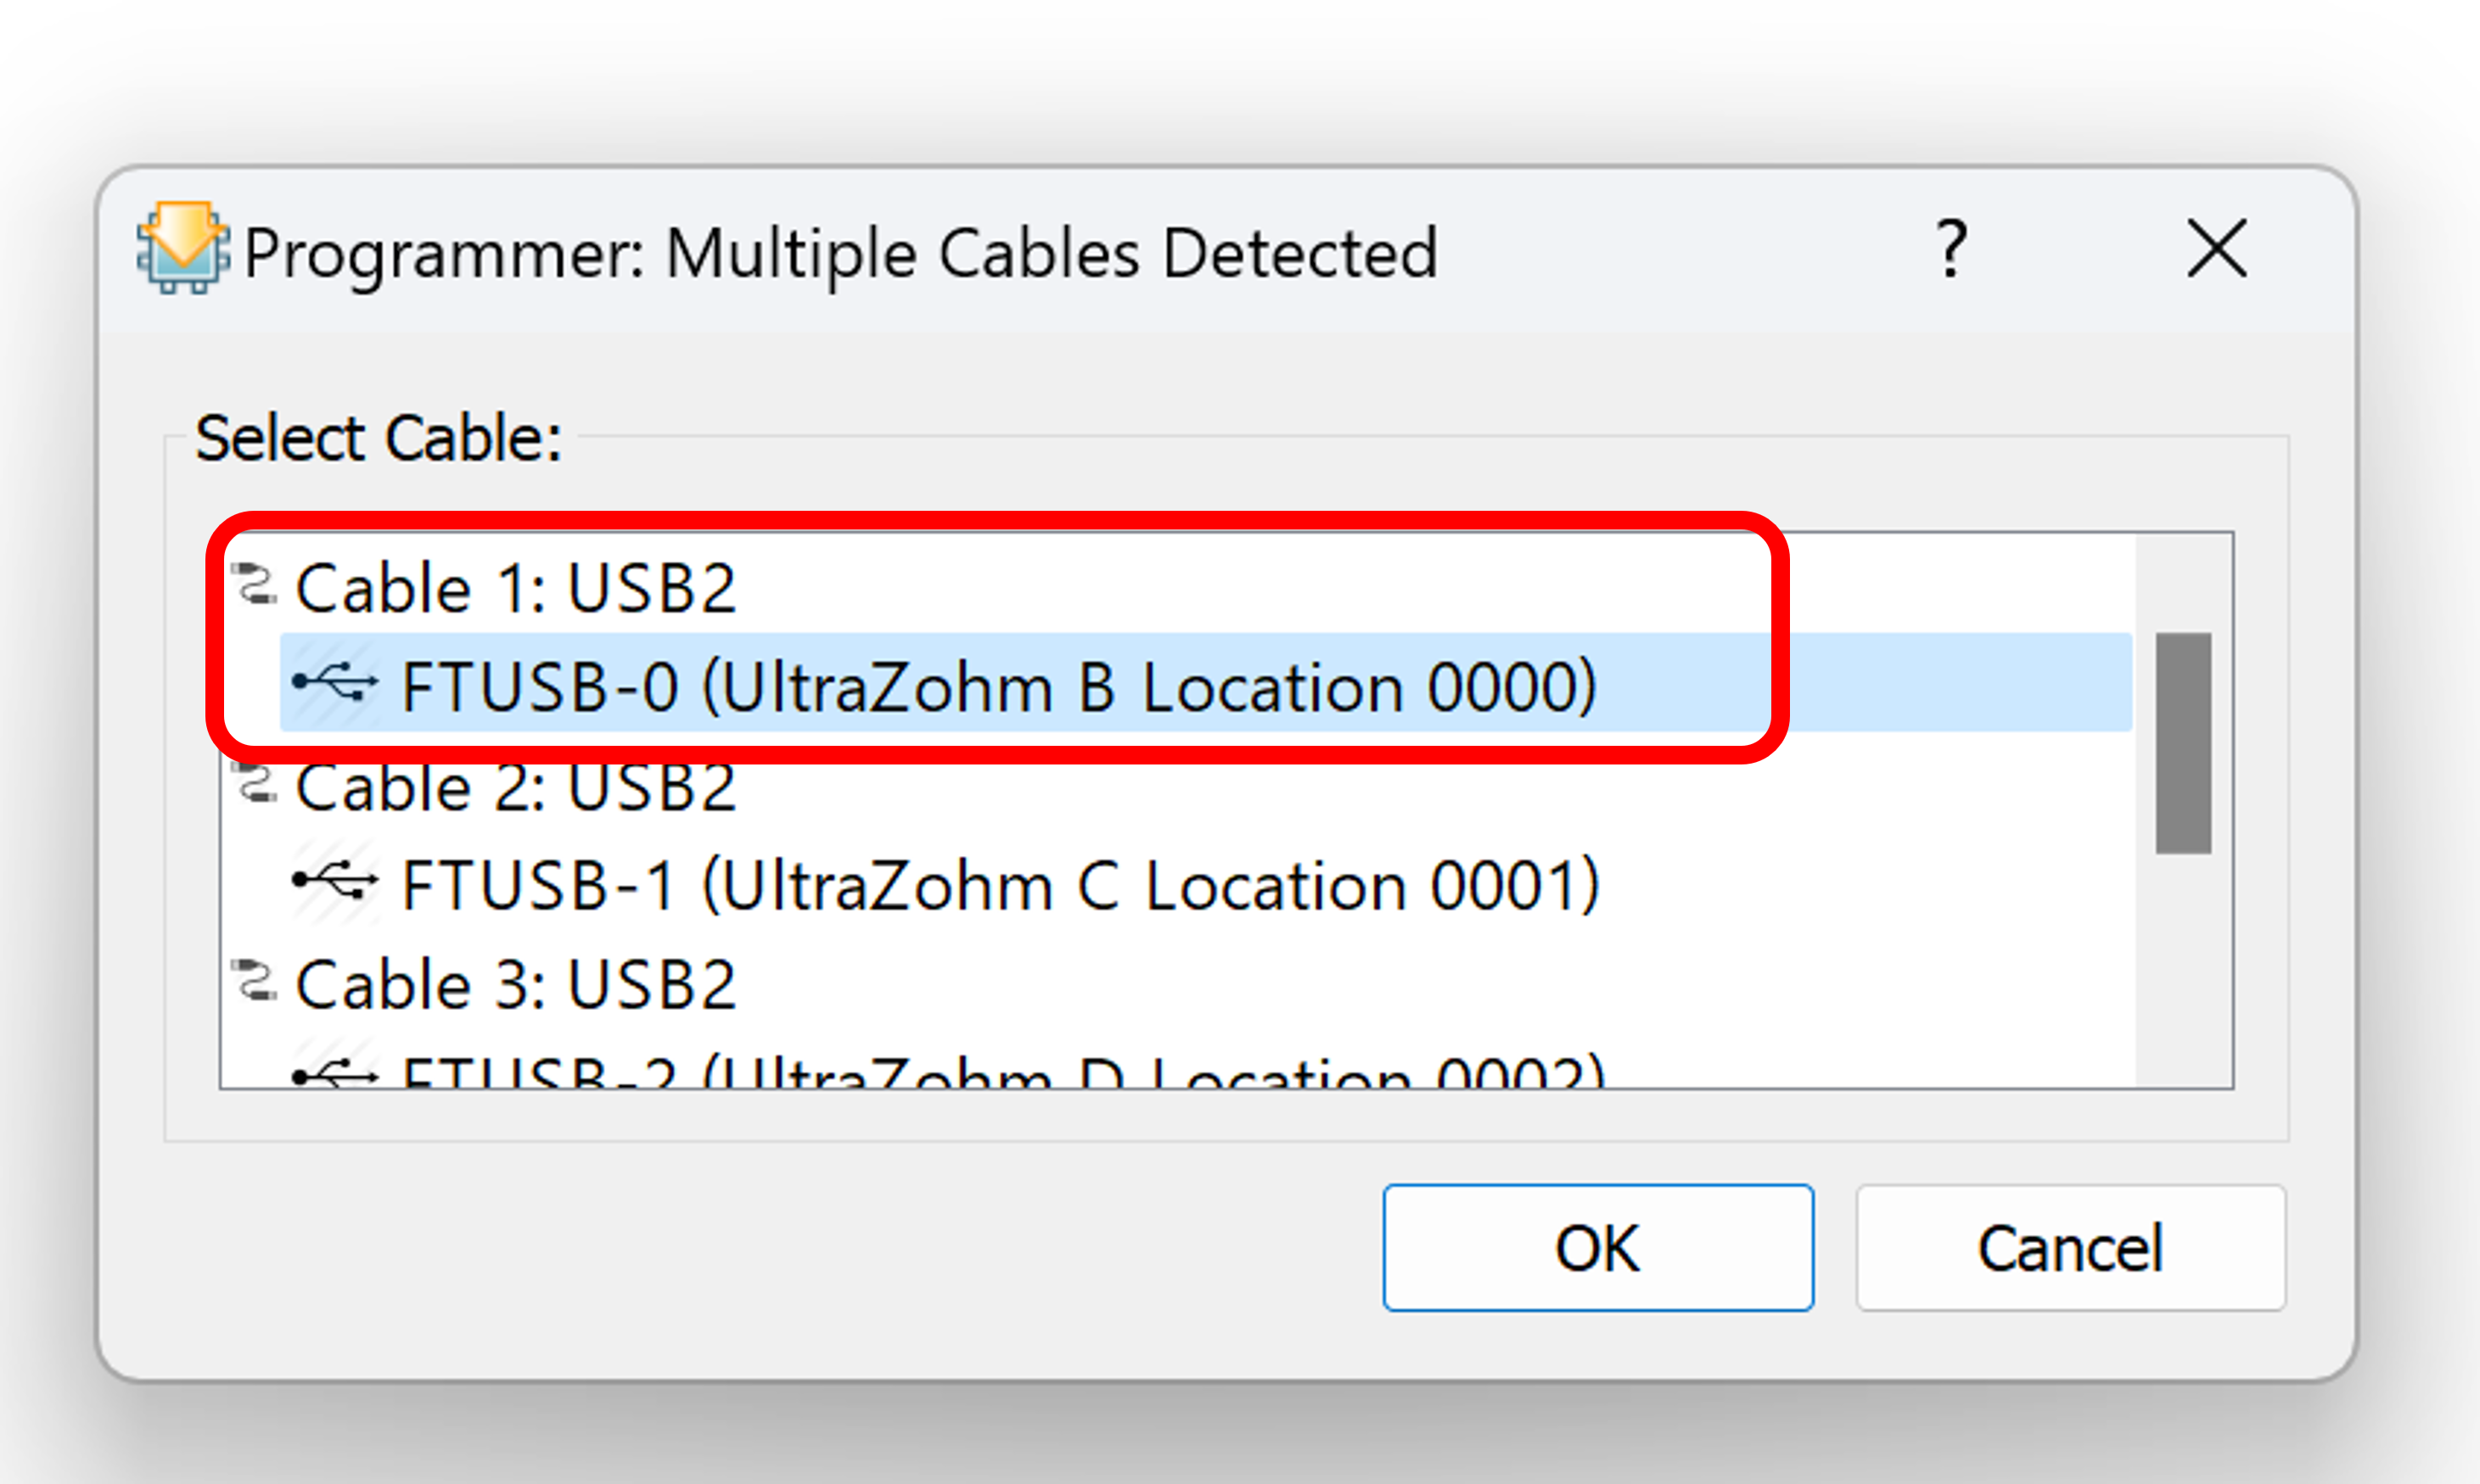
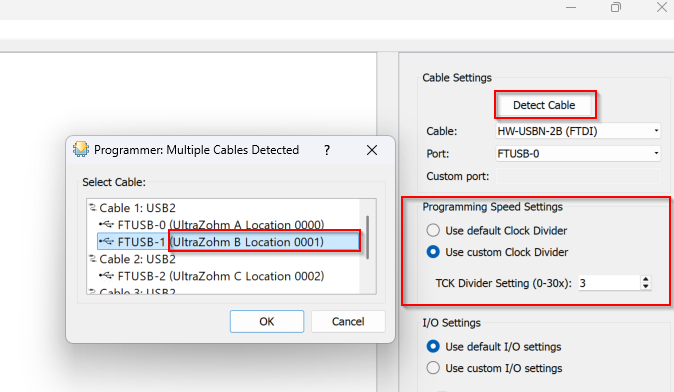
Click Detect cable and set the right port for UltraZohm B Location. Depending on the OS, the mapping can differ (in this case the UltraZohm B Location Port is mapped on FTUSB-0).
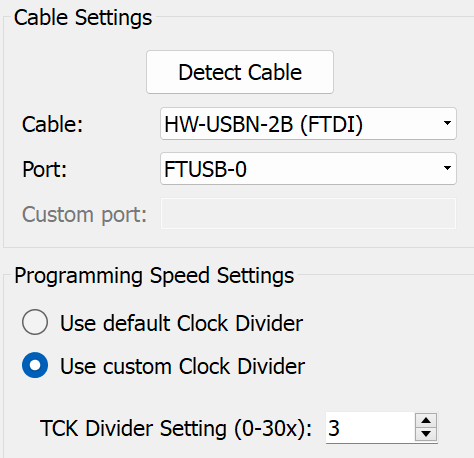
Setup a custom clock divider TCK 3.
Click on “Program”, after successful programming it should look like this:
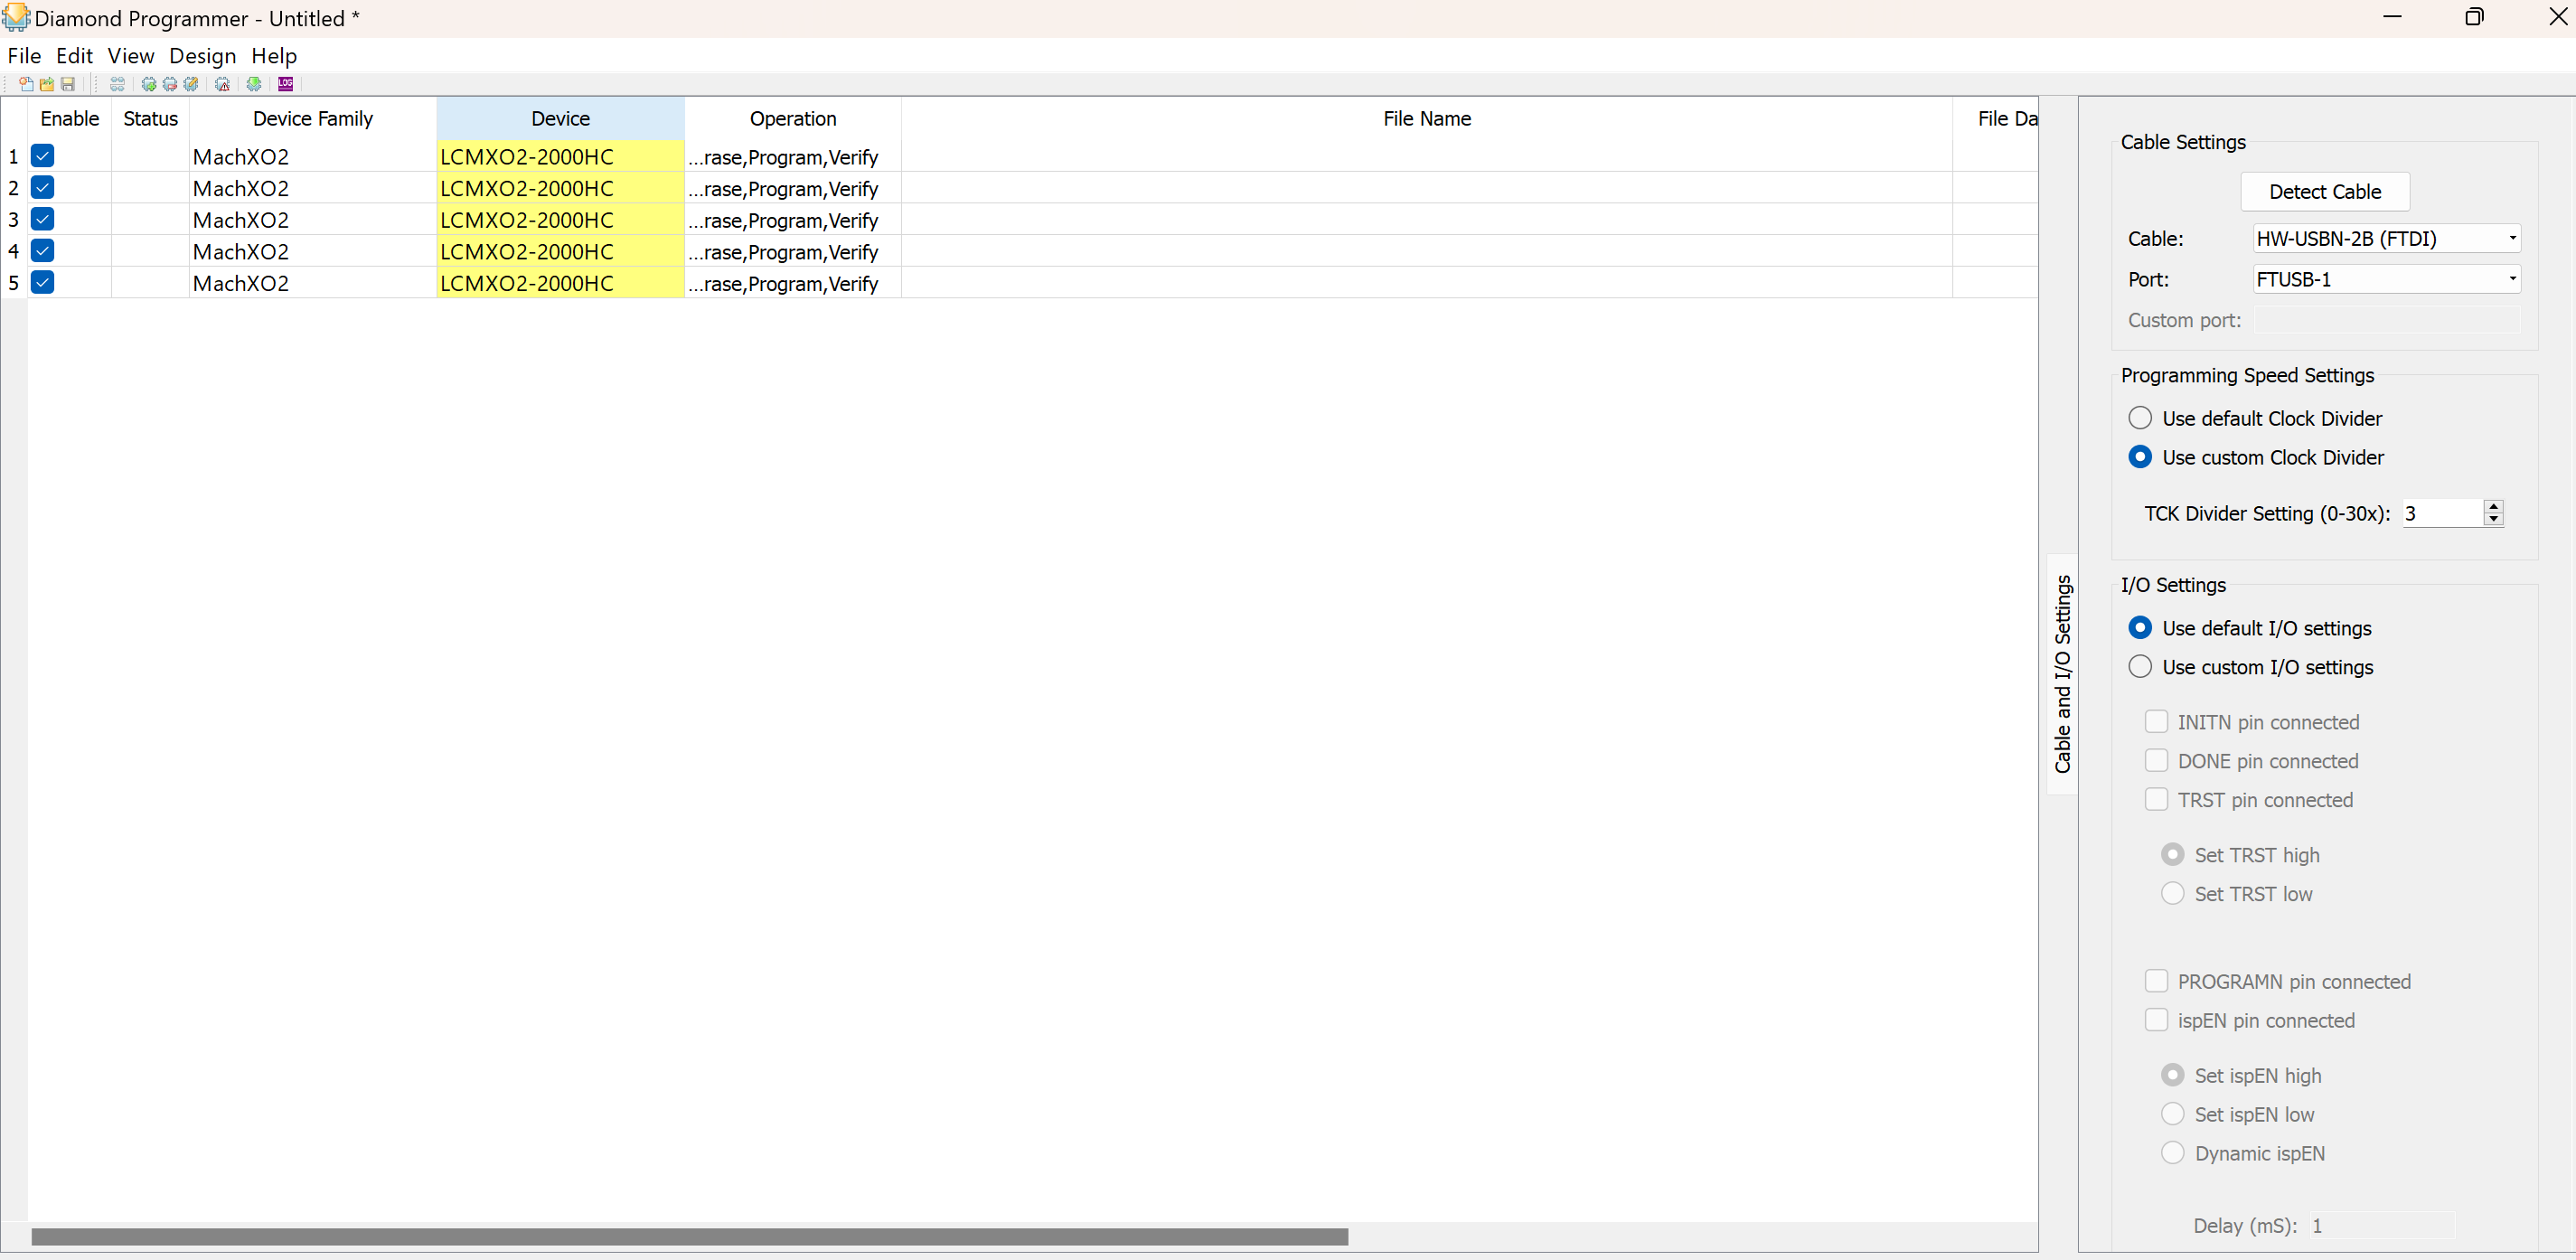
Step-by-step for MachXO2#
- For programming MachXO2 CPLDs, the settings must be equivalent to Step-by-step for IsoJTAG uz_per_jtag
Set up a custom clock divider TCK 3.
Click Detect cable and set the right port for UltraZohm B Location.
Depending on the OS, the mapping can differ (in this case the UltraZohm B Location Port is mapped on FTUSB-1).
D-Slot CPLD#
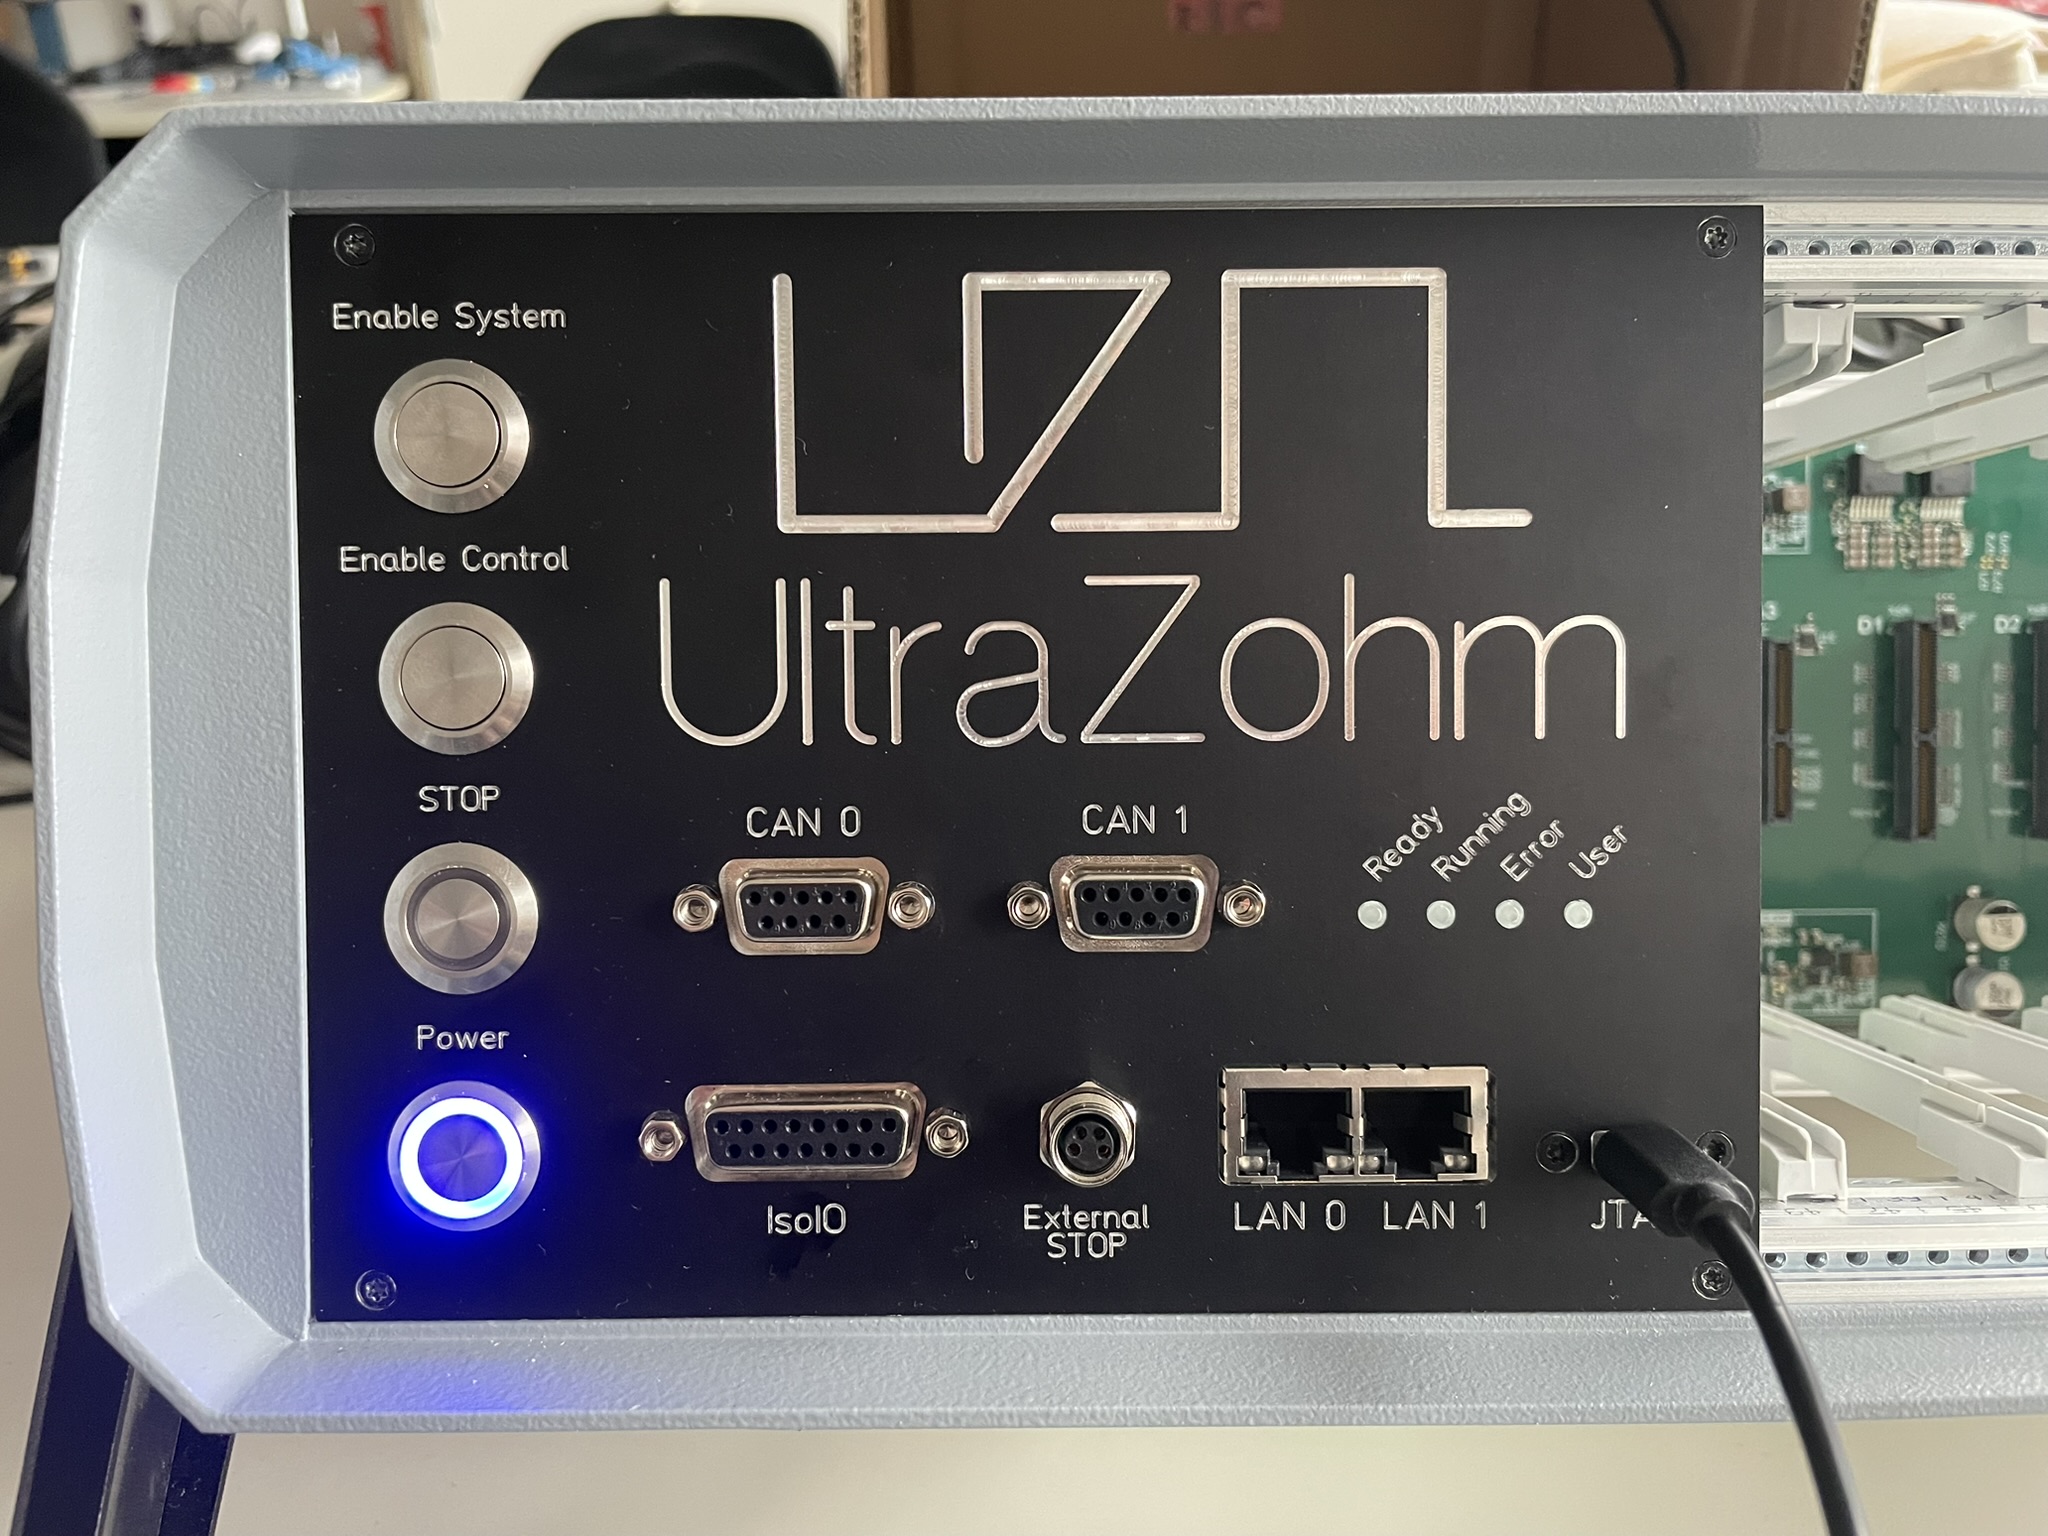
Powering On the UZ
Connect the device to a 230V power source using the port on the back.
Press the Power Button to turn on the Carrier.
The green power button and red stop button will indicate that the system is on.
Connect your computer to the USB-C slot on the front panel.
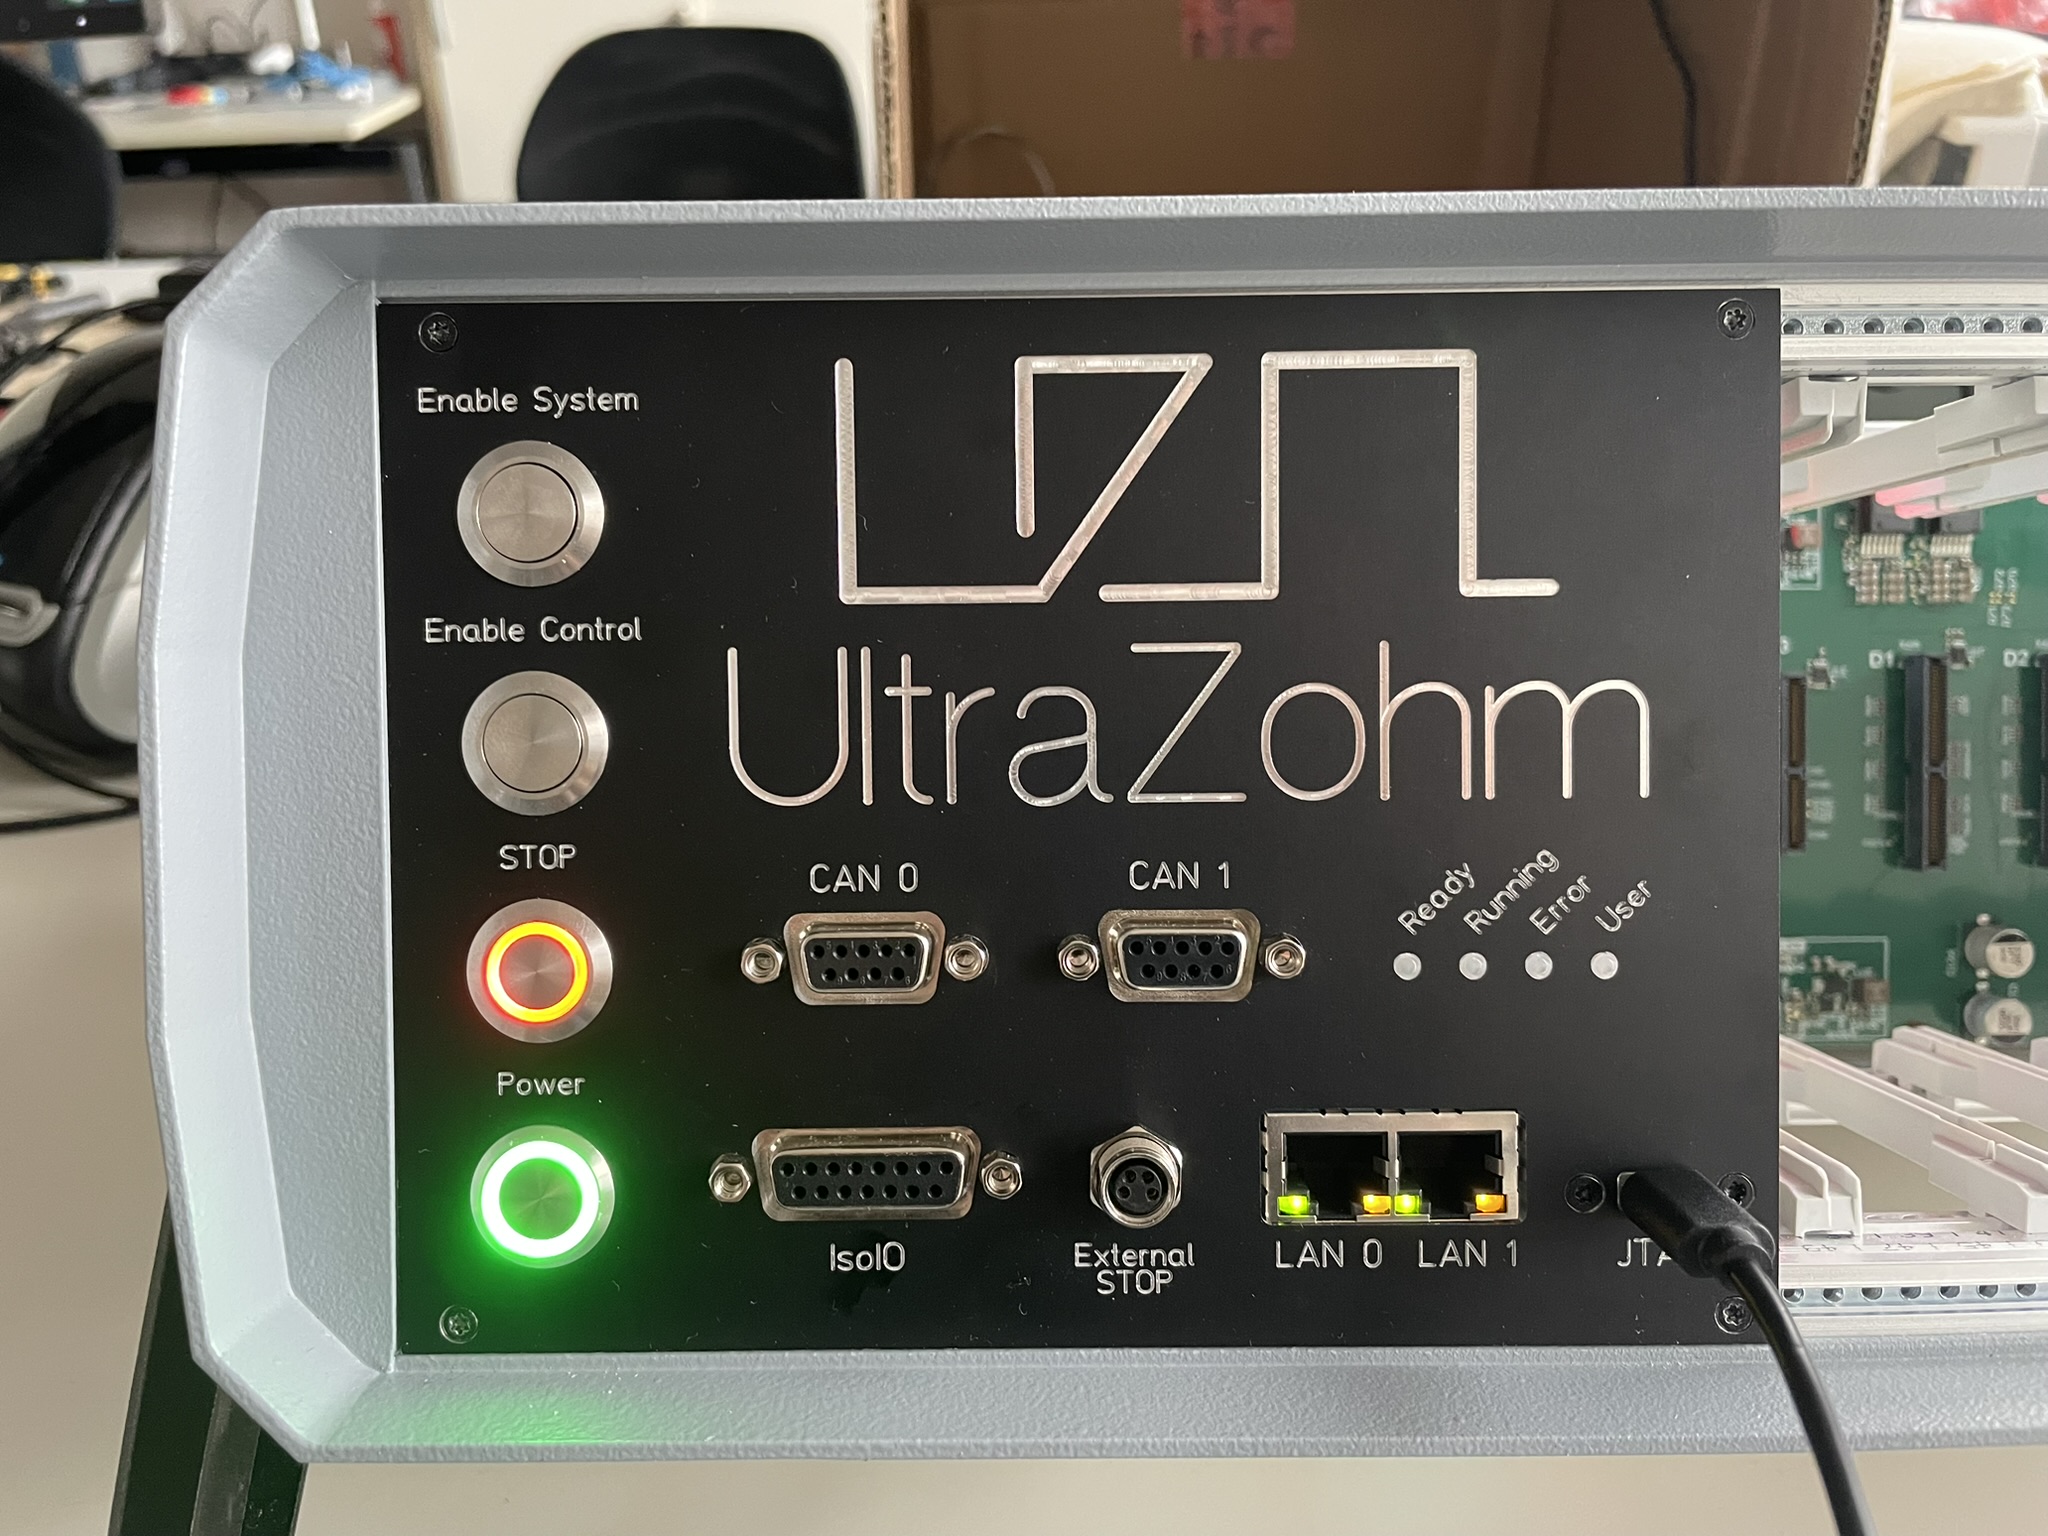
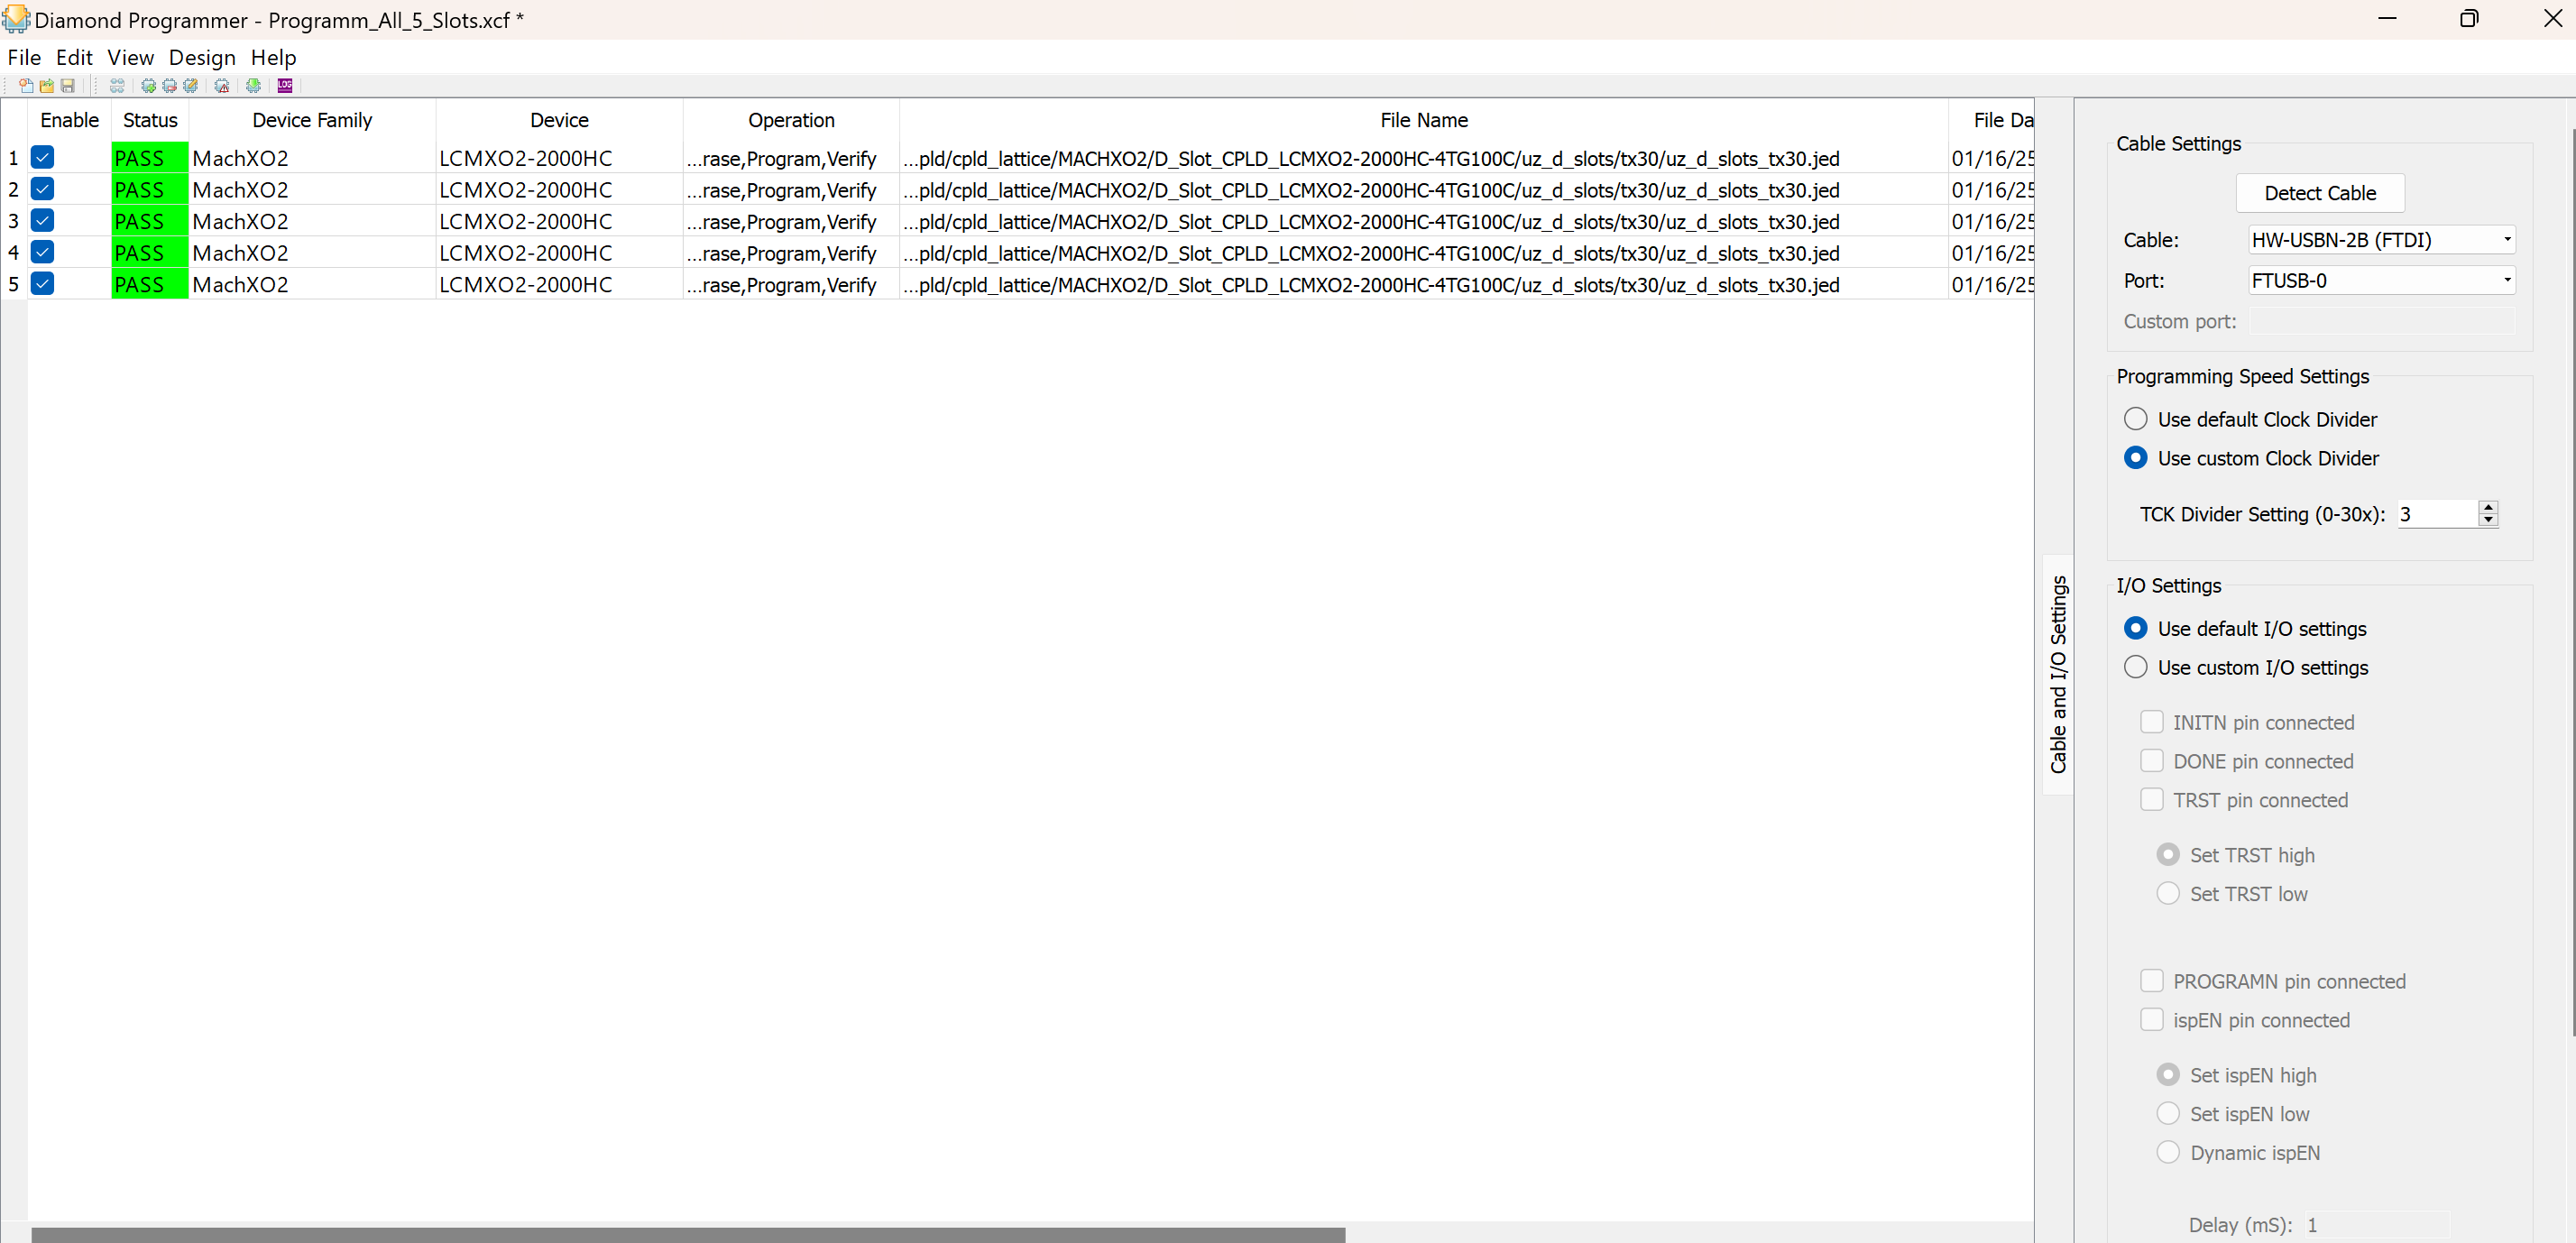
Perform a JTAG Scan on the UZ to ensure the correct configuration.

The scan should detect five CPLDs, confirming the correct package.
The programming files are now ready for selection. If programming is successful, a green “PASS” checkbox will confirm the process.
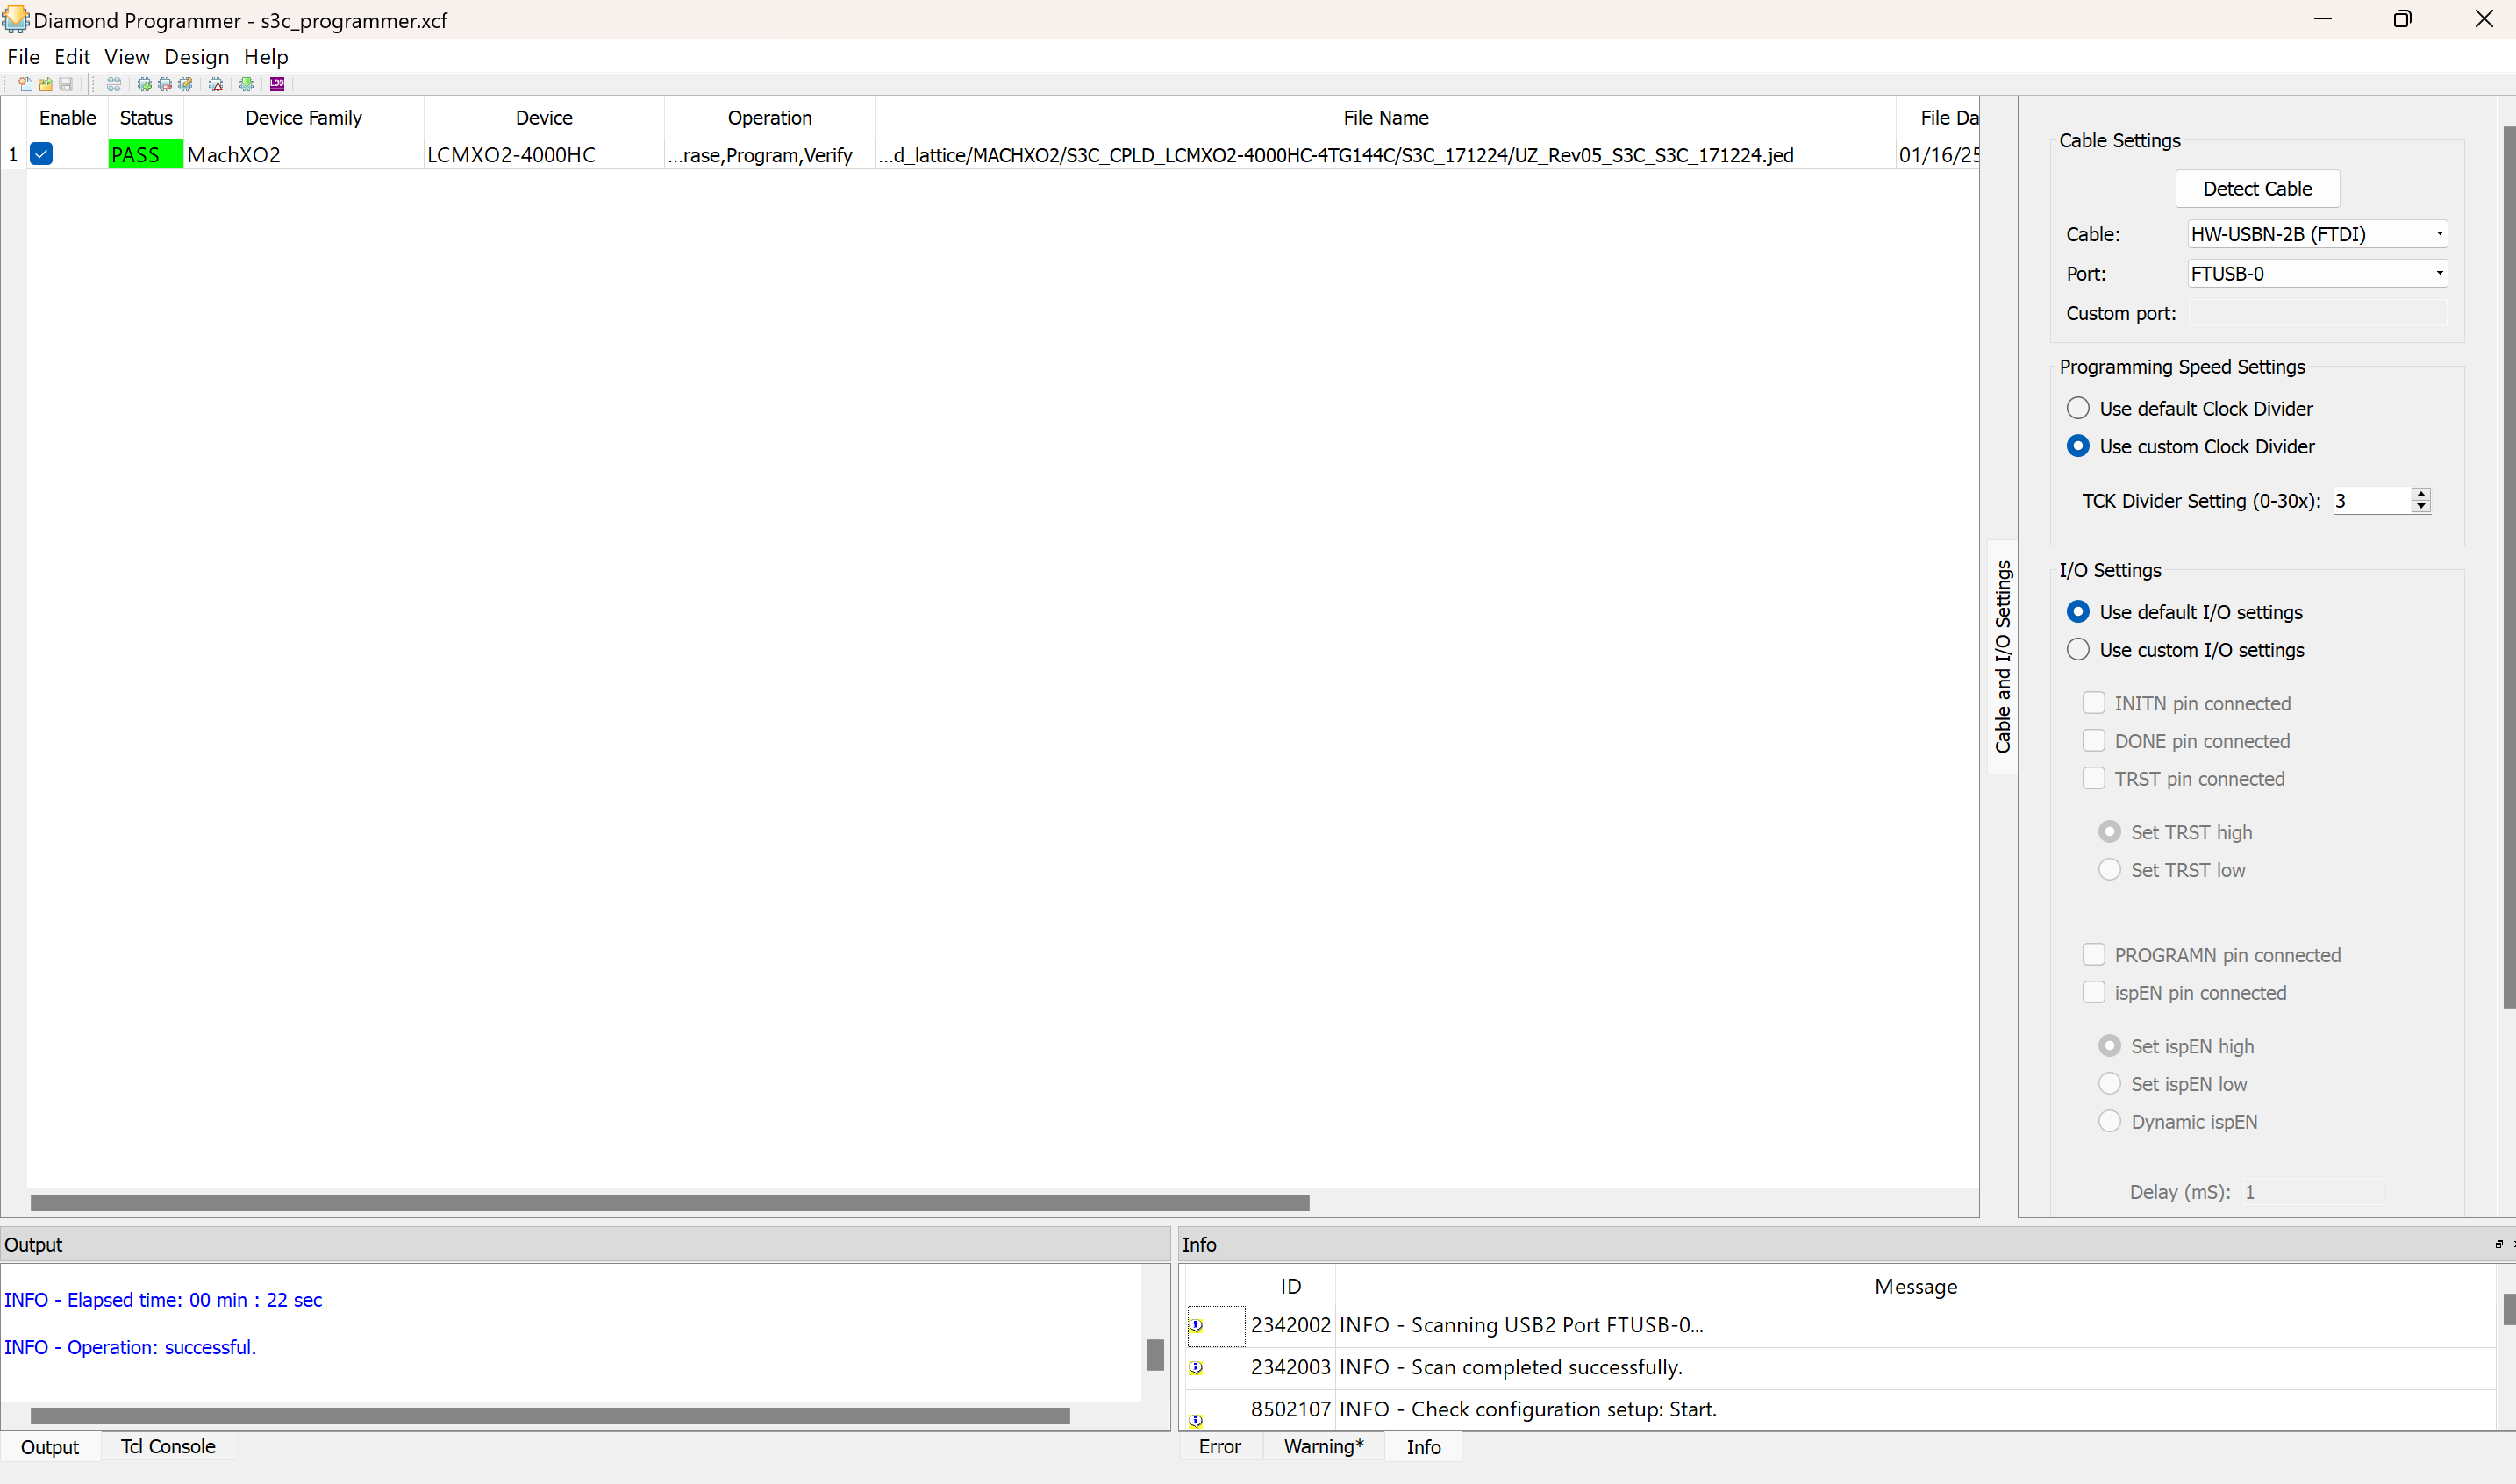
S3C#
Powering On the UZ
Connect the device to a 230V power source using the port on the back.
The blue power button will indicate that the system is off.
Connect your computer to the USB-C slot on the front panel.
Perform a JTAG Scan on the UZ to ensure the correct configuration.

The scan should detect one CPLD, confirming the correct package.
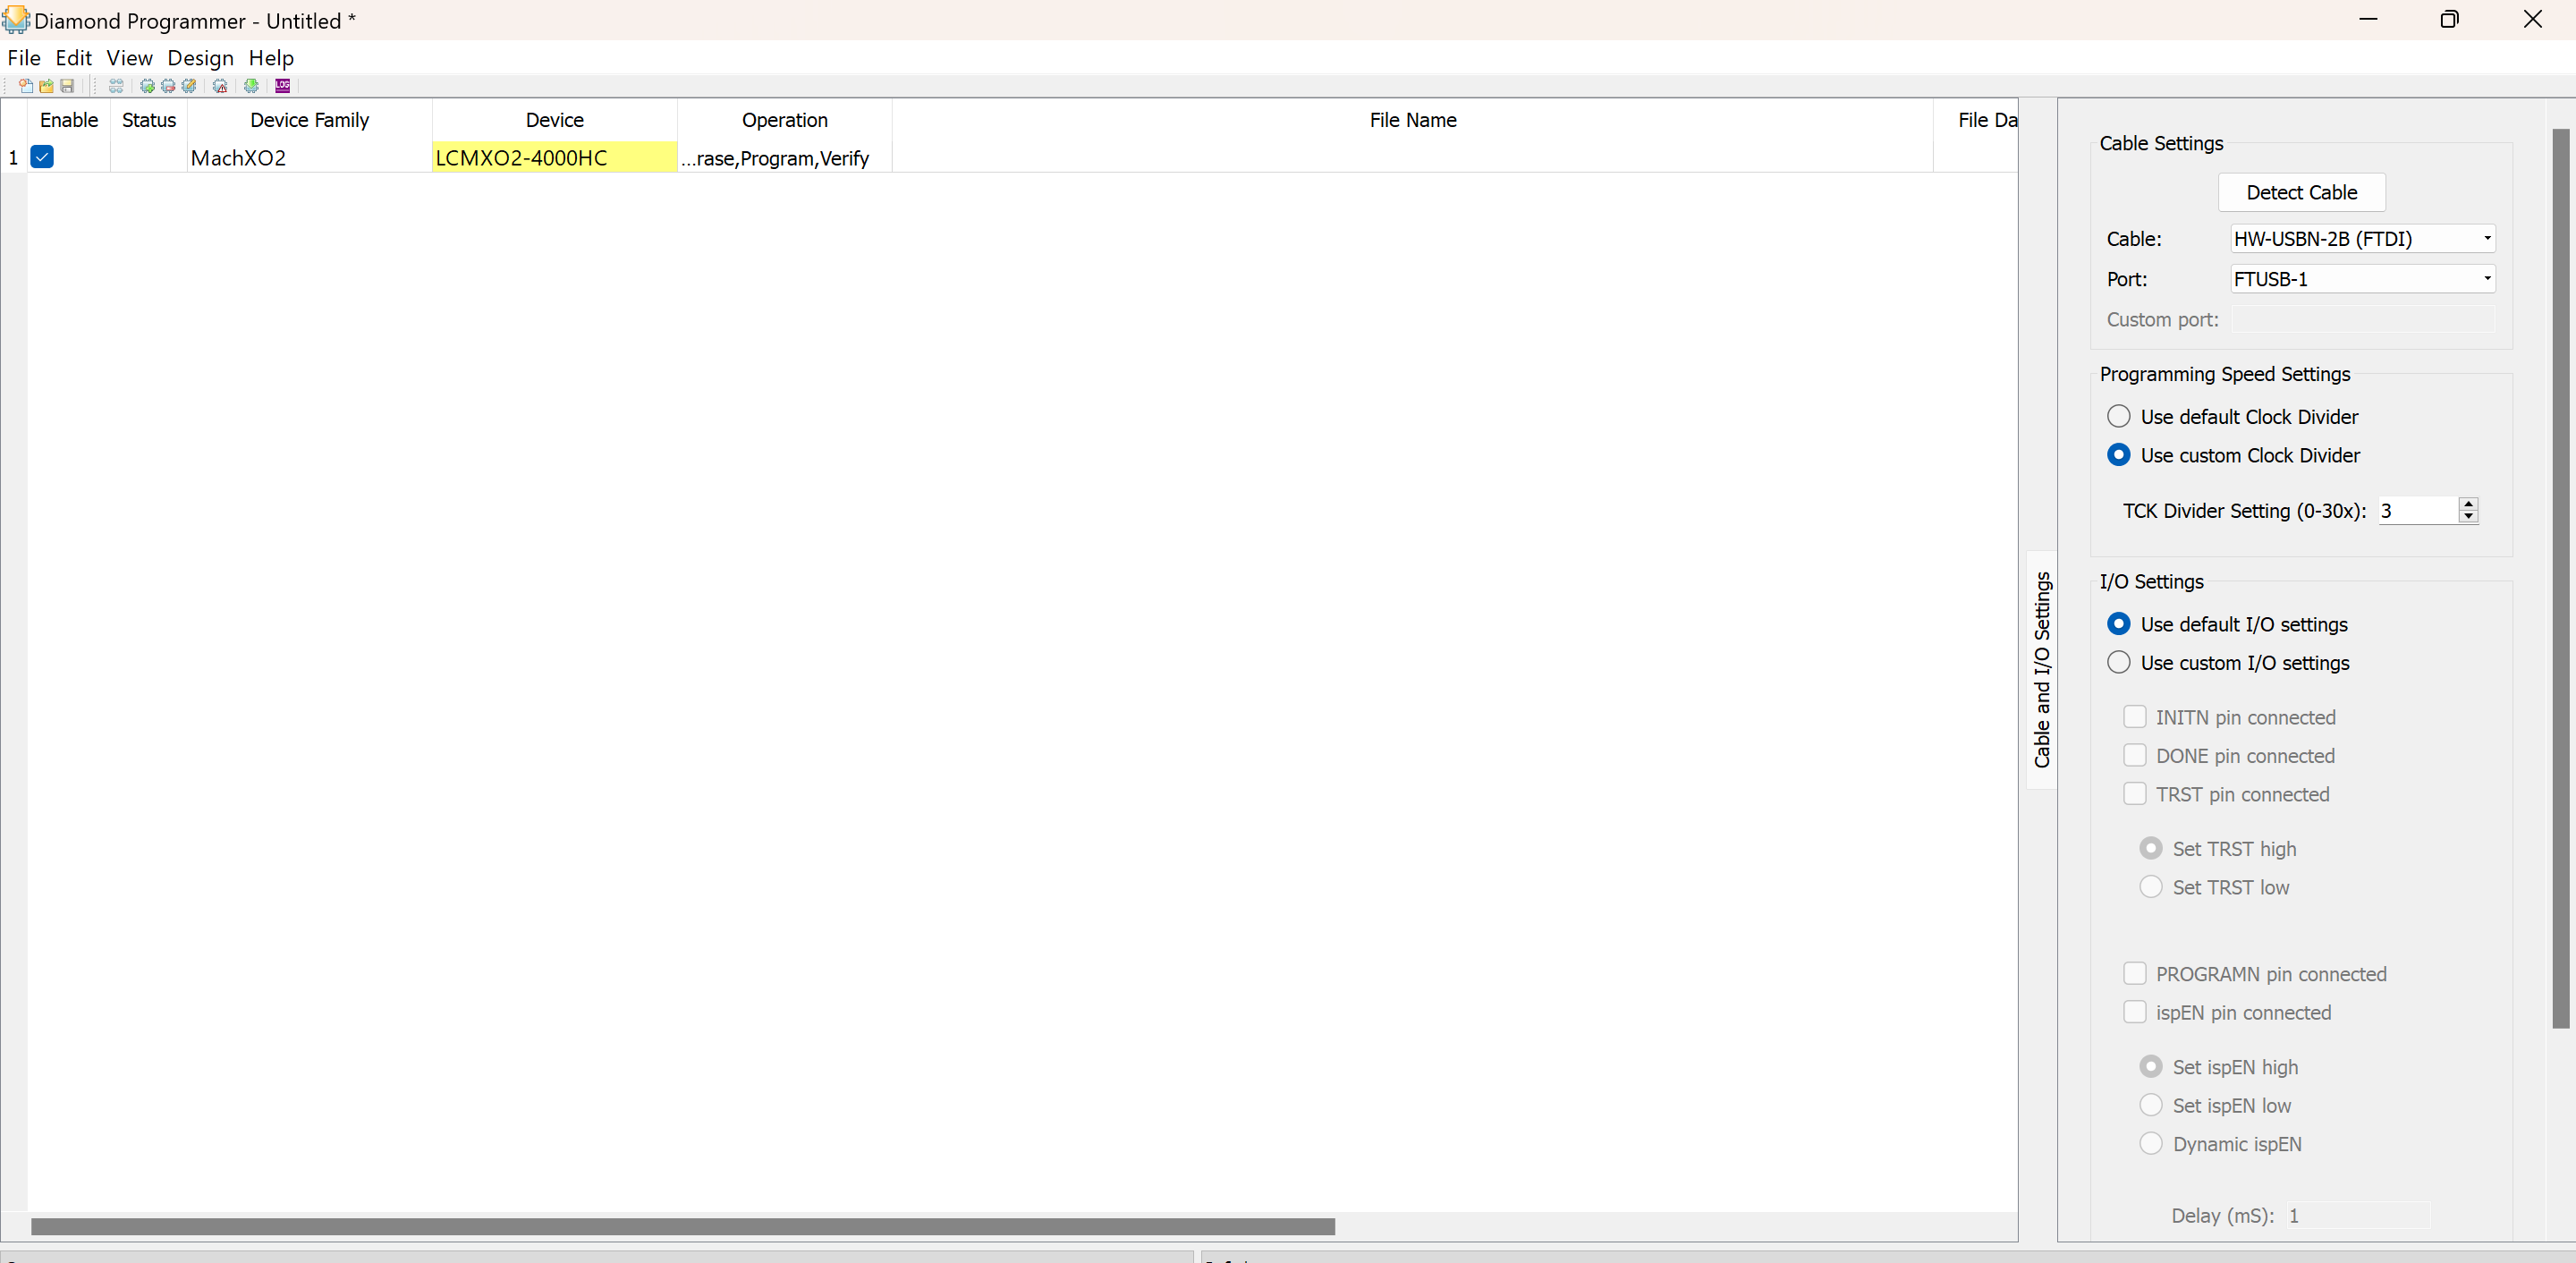
The programming file is now ready for selection. If programming is successful, a green “PASS” checkbox will confirm the process.
Known issues#
Not possible to find the CPLDs#
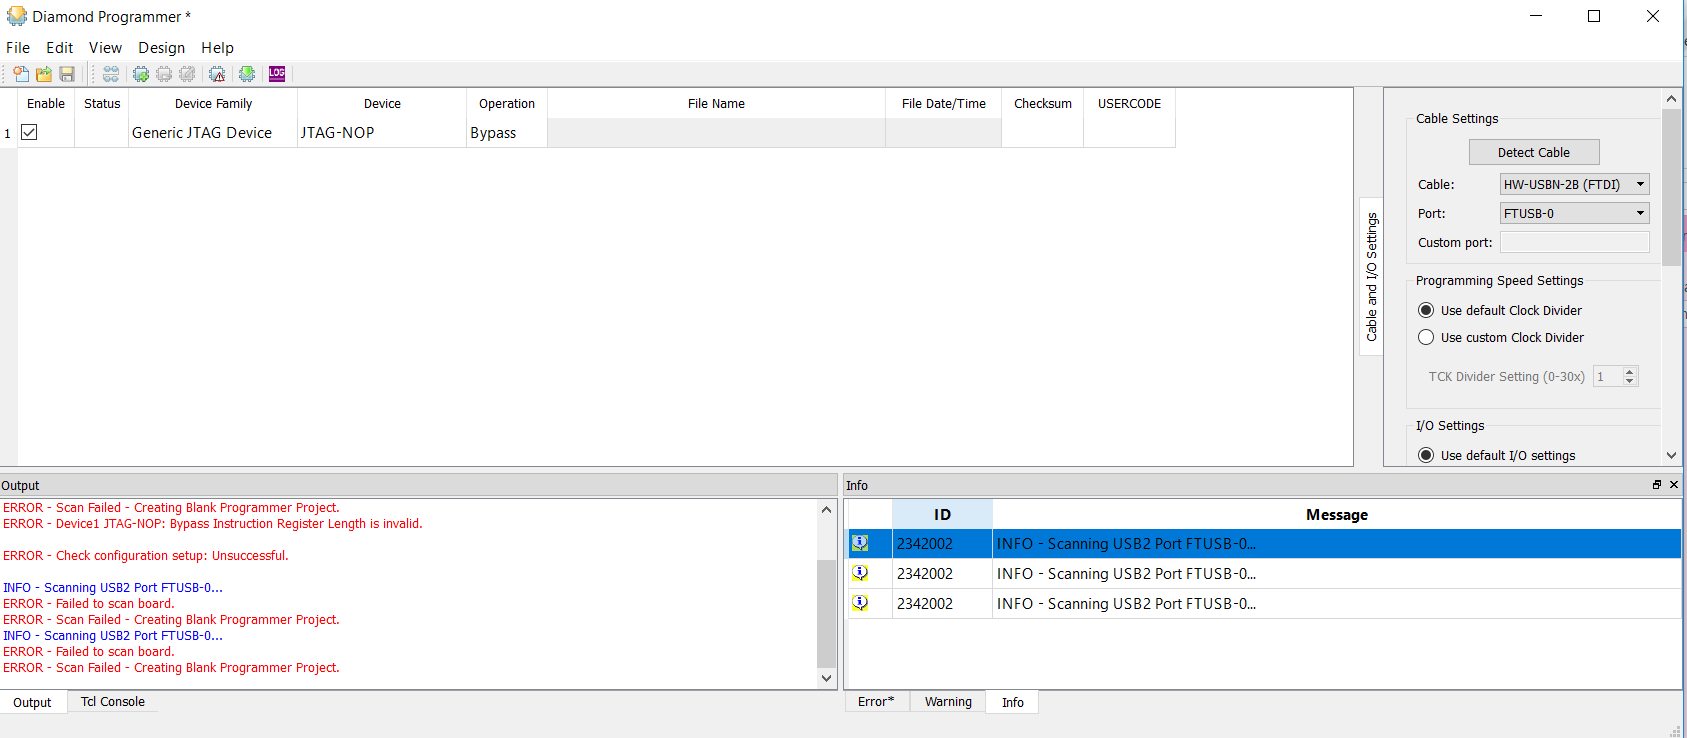
Close all Vivado and Vitis instances and retry. Restart your PC and retry.