Binary Export (to SD)#
To be able to work with the UltraZohm without flashing it before each usage, a bootable binary can be generated.
This binary replaces the default BOOT.bin and the custom code executes after power-cycle of the UltraZohm.
Generate boot image#
Open the UltrZohm workspace in Vitis
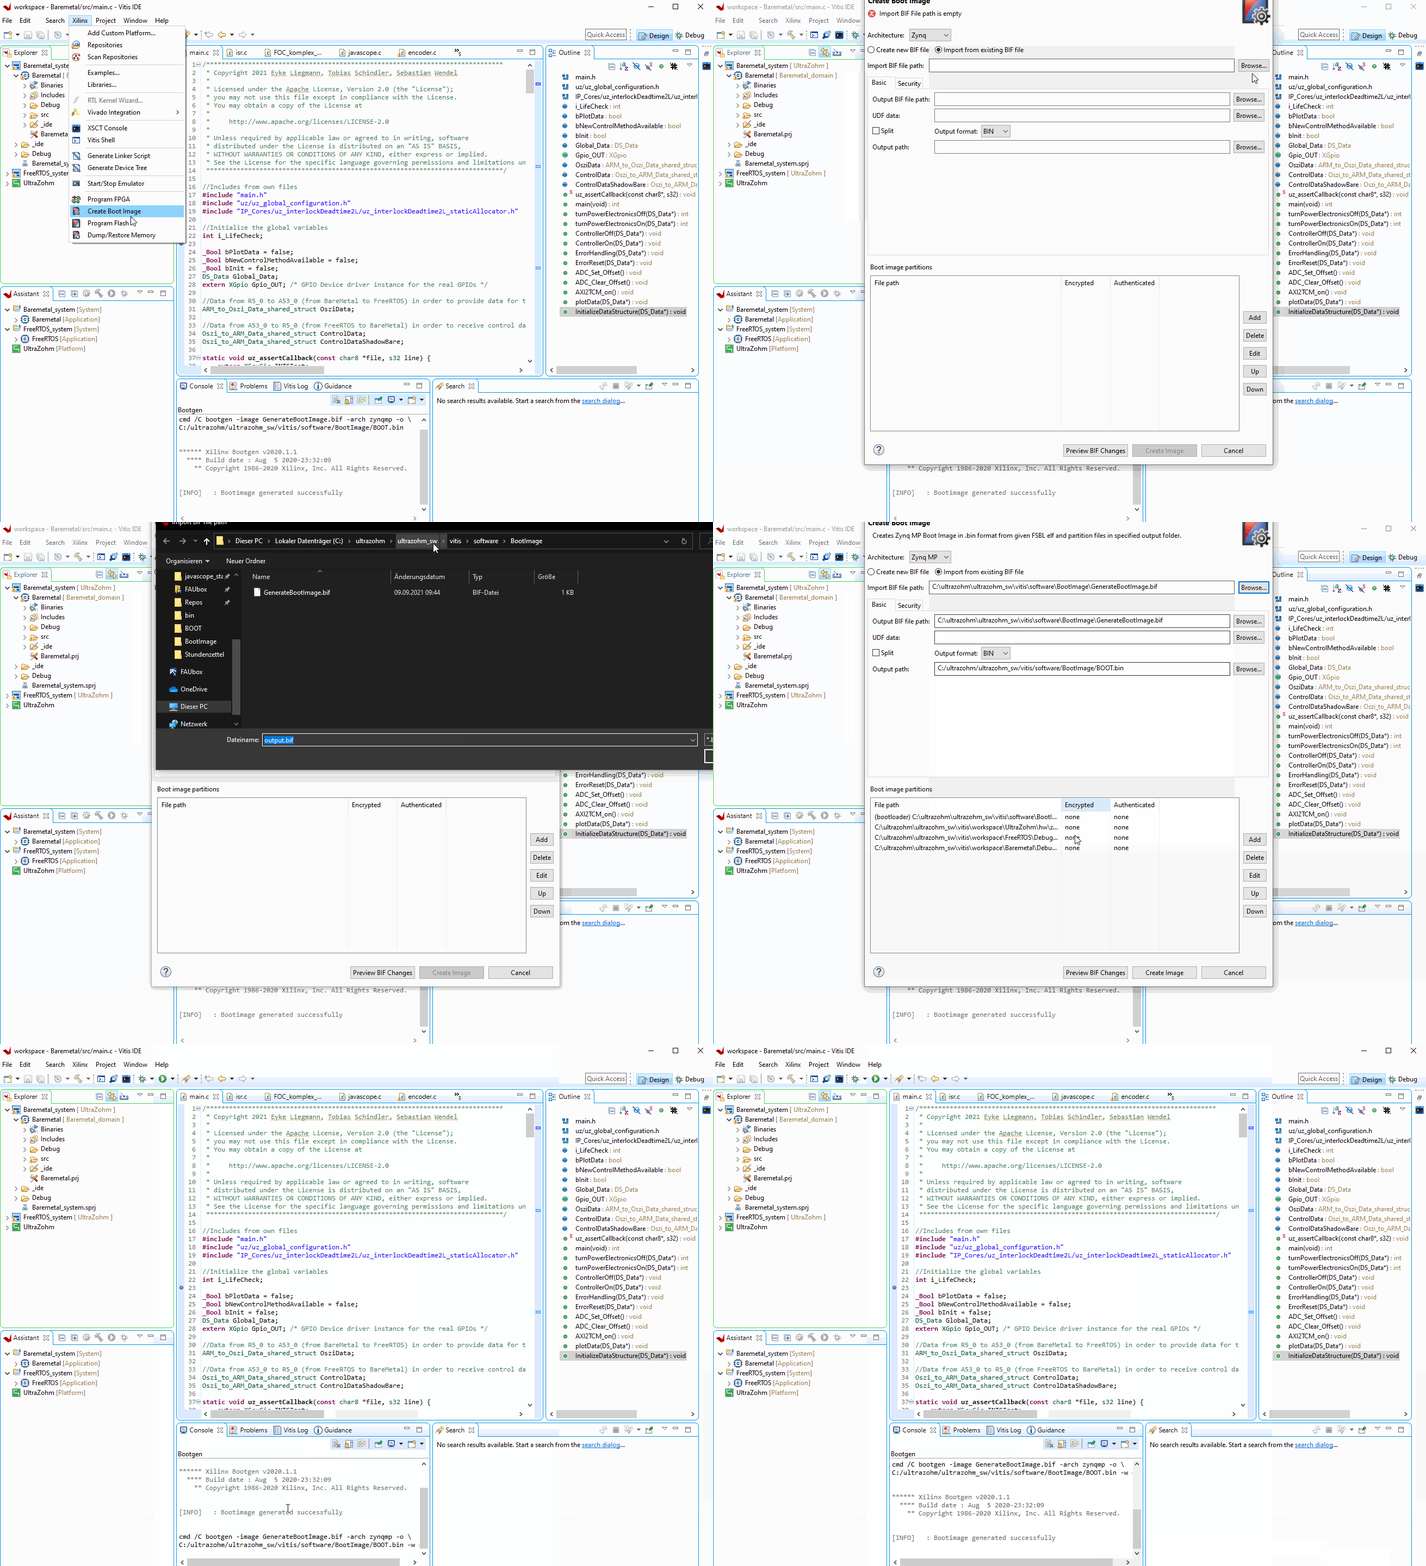
In the top menu, select``Xilinx`` ->
Create Boot ImageSelect
Import from existing BIF file(radio buttons)Set the
Import BIF file pathto~vitis\software\BootImage\GenerateBootImage.bif(see Fig. 37)

Fig. 37 Select existing BIF file.#
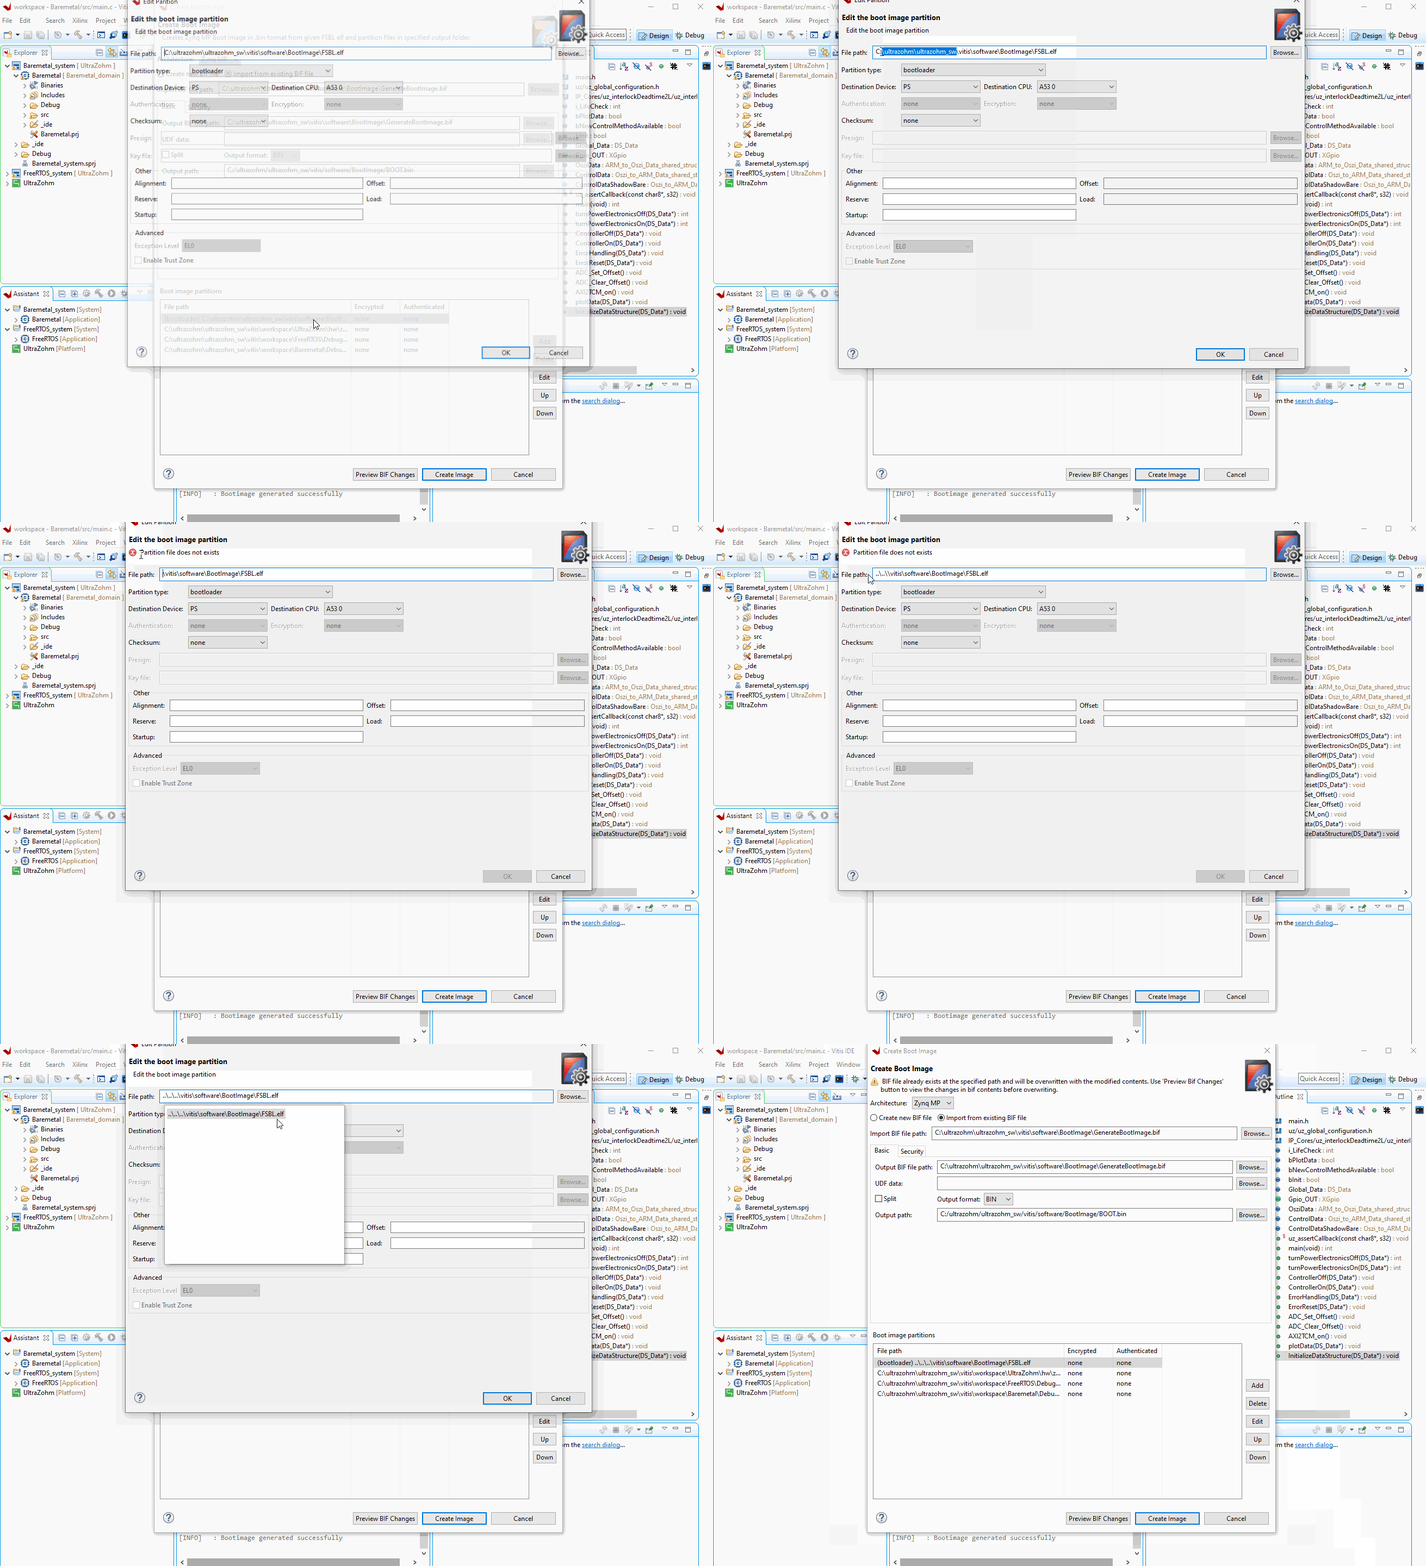
Adjust the file paths at
Boot image partitions(see Fig. 38) since the .BIF file uses absolute pathsSelect each of the boot partitions, select
Editand browse to their absolute path on the local machineAlternative: Change the path to the boot image partitions in the corresponding sub-menu (see Fig. 38)
Option 1: Exchange everything before
\vitiswith the path to the UZ-repoOption 2: Exchange everything before
\vitiswith as much “.." as you have folder-levels to your repo-path. If you have the correct number, Vitis stops writing “partition file does not exist”

Fig. 38 Adjust paths of boot image partitions.#
Select
create Image
Change BOOT.bin on SD-Card#
Shut-down the UltraZohm
Unplug the power connection and make sure that power is off
Remove the SD-Card
Connect the SD-Card to the local machine
Copy
BOOT.binfrom theuz-repo\vitis\software\BootImagefolder to the SD-Card of the UltraZohm (replace the existingBOOT.binPlug in the power connection and power-cycle the UltraZohm