HDL-Coder (HDL)#
This page includes introductory information about the usage of the HDL Coder. The HDL-Coder generates Verilog and VHDL code from MATLAB functions, Simulink models, and State flow charts to create IP cores for the FPGA of the UltraZohm. Please refer to the official documentation for detailed descriptions:
https://de.mathworks.com/help/hdlcoder/getting-started-with-hdl-coder.html?s_tid=CRUX_lftnav
https://de.mathworks.com/help/hdlcoder/hdl-code-generation-from-simulink.html
https://de.mathworks.com/help/hdlcoder/gs/create-hdl-compatible-simulink-model.html
https://de.mathworks.com/help/hdlcoder/ug/constant-multiplier-optimization.html
Timing#
There are three different aspects regarding the timing when dealing with IP cores:
Timing of the FPGA logic (Static timing) (see, e.g., this slide deck)
Timing of the data
Data throughput
The static timing is required to make sure that the implemented algorithm is calculated correctly in the FPGA. It is related to the clock frequency of the IP core. Different operations in the FPGA logic take a specific time (path delay) to propagate through the logic (e.g., propagation delay). If the clock period is shorter than the required path delay, the timing is violated and the IP core does not function properly. This is indicated by having a negative total slack time in Vivado. The HDL-Coder estimates the path delay with the critical path estimation, which is the chain of logic with the highest path delay. A common approach to fixing timing violations is adding delay blocks in Simulink (pipeline). A delay block acts as a buffer since the value is hold for one clock cycle. See https://www.mathworks.com/help/hdlcoder/speed-optimization.html for more details.
The timing of the data makes sure that in a chain of operations, the correct values from the previous step are used. This is critical if blocks in Simulink are used that require multiple clock cycles in the FPGA, e.g., trigonometric functions using CORDIC or math functions like square root. Since the calculation of the math function takes multiple clock cycles, it is necessary that all following calculations only use valid inputs. See the following Mathworks pages:
https://www.mathworks.com/help/hdlcoder/ug/Resolve-numerical-mismatch-with-delay-balancing.html
https://www.mathworks.com/help/hdlcoder/ug/delay-balancing.html
The data throughput determines how long it takes to calculate the algorithm one time after new inputs are applied and the calculated result is available at the output of the IP core. This is the combination of calculation steps, number of clock cycles that these calculation steps and the achieved clock rate.
Tutorial#
In this tutorial, an IP core is created that multiplies two integer values and returns the result. The result of this tutorial is the AXI Test IP.
Start Matlab (2022a used in the following)
Set up the path to Vivado, see Mathworks hdlsetuptoolpath
hdlsetuptoolpath('ToolName','Xilinx Vivado','ToolPath','/tools/Xilinx/Vivado/2020.1/bin');
Create a new Simulink Model
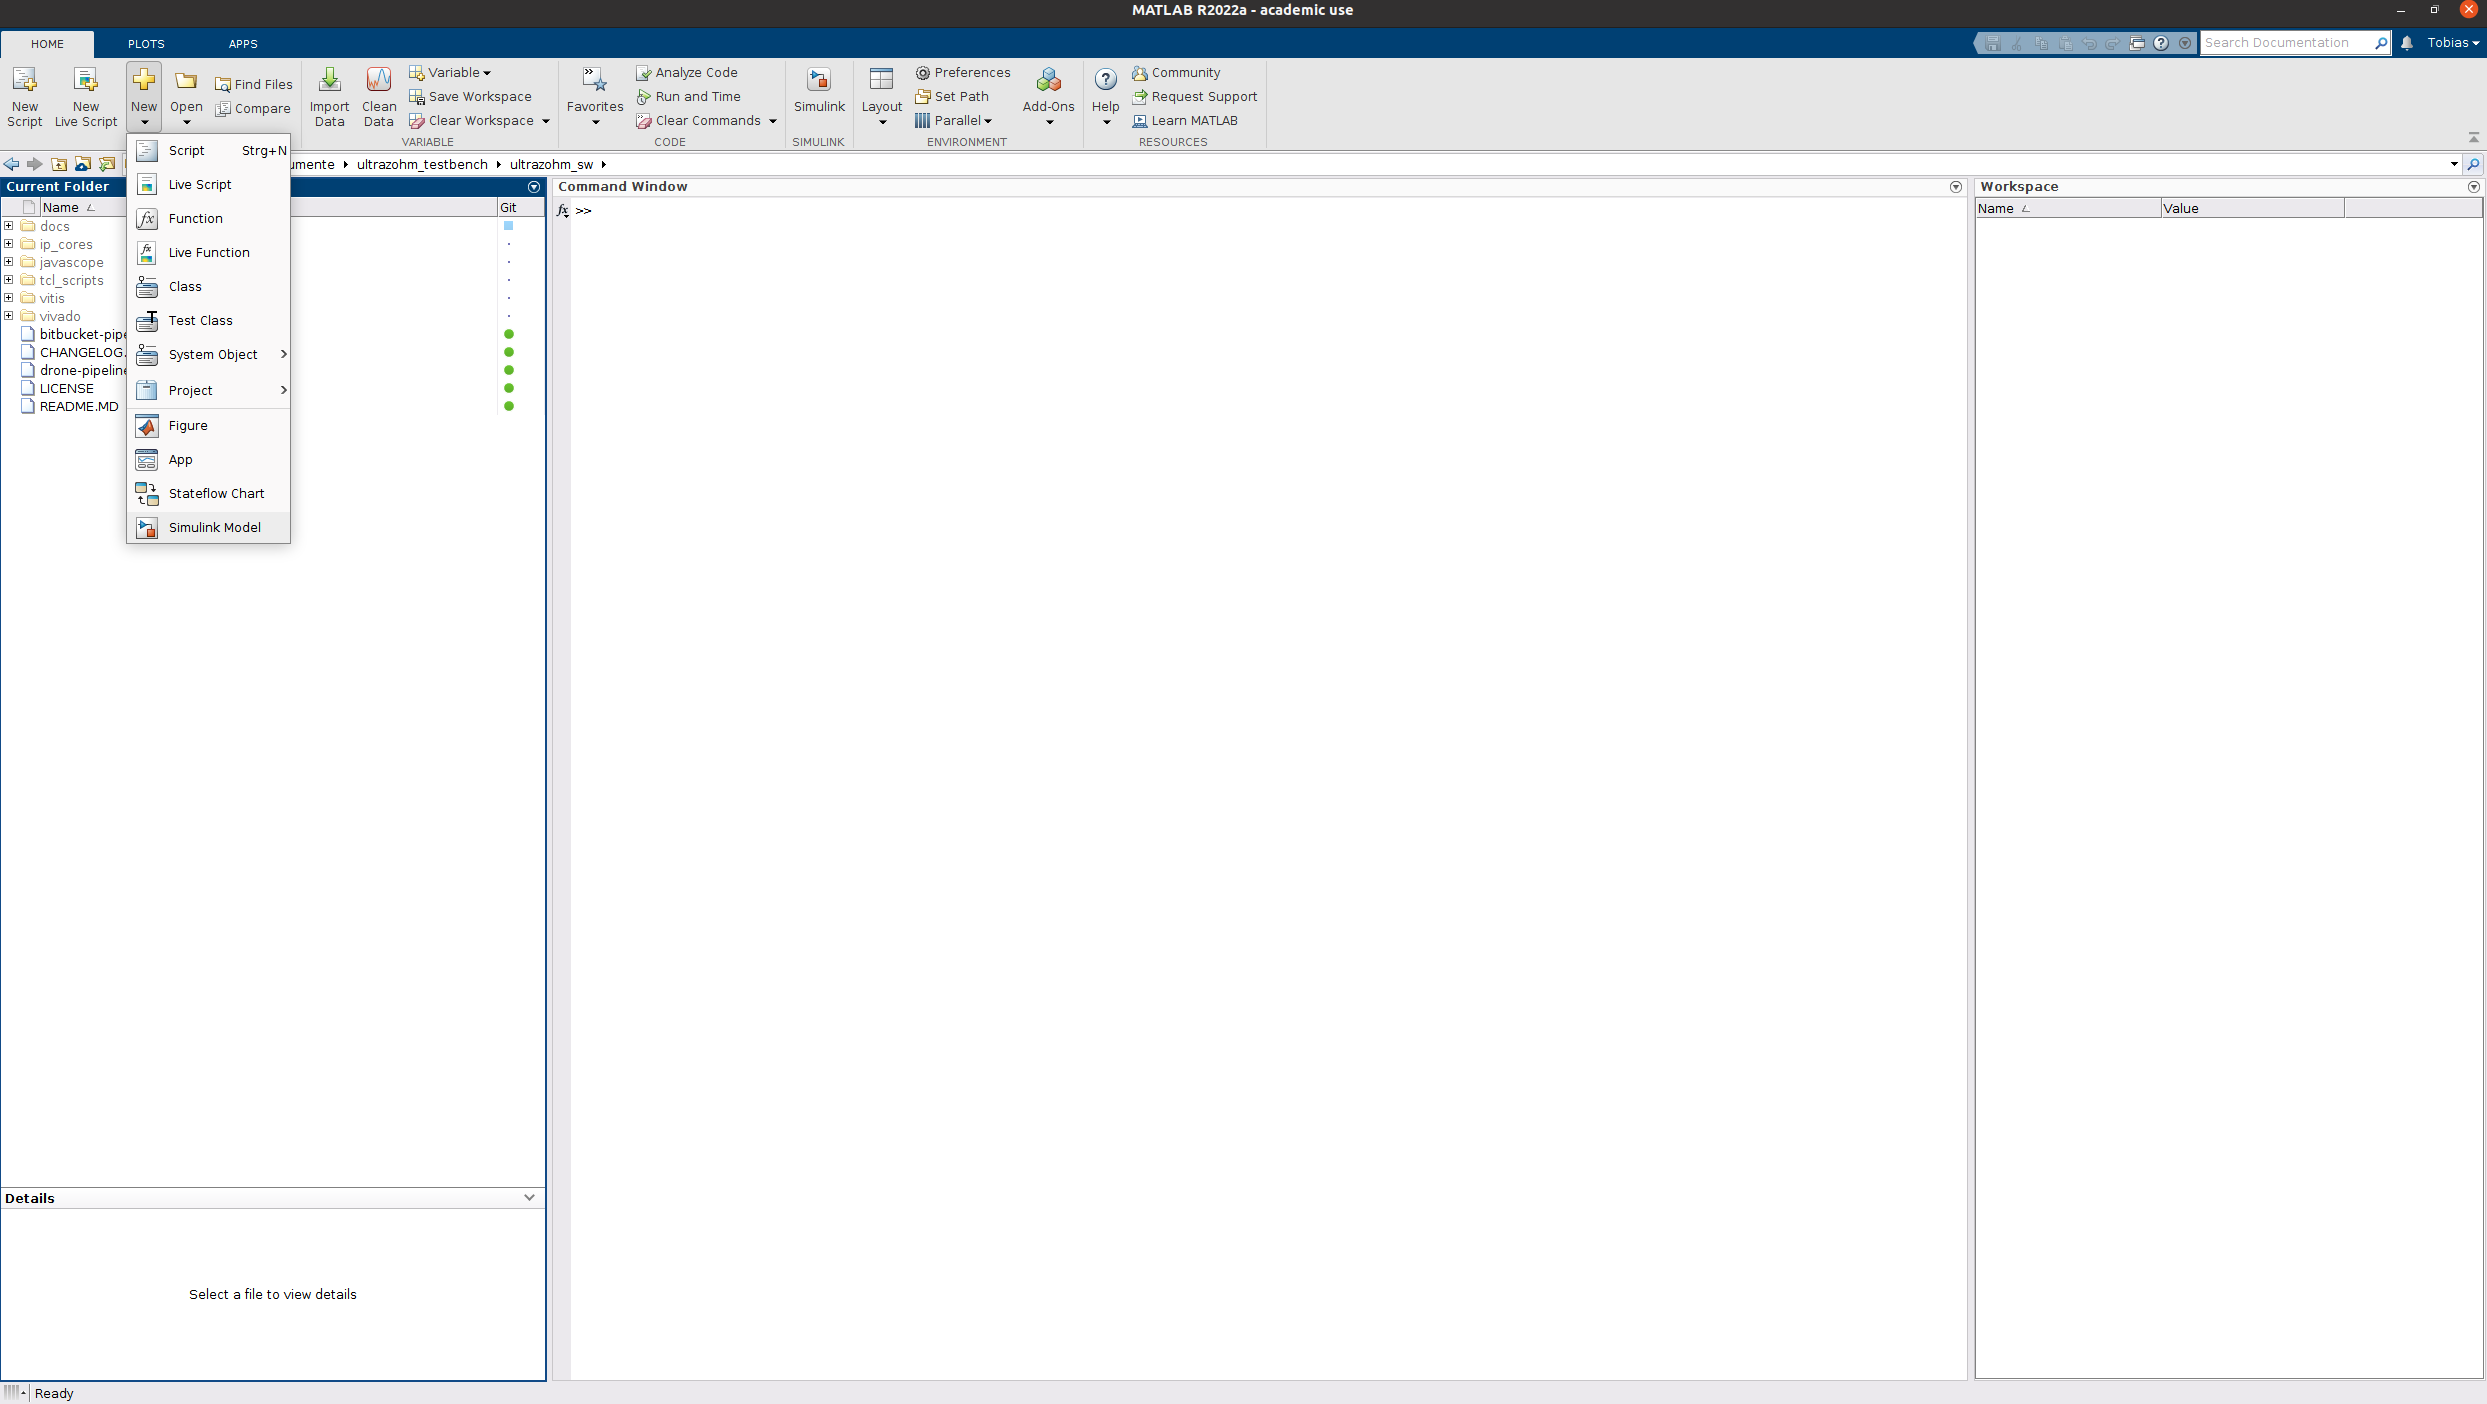
New Model dialog opens
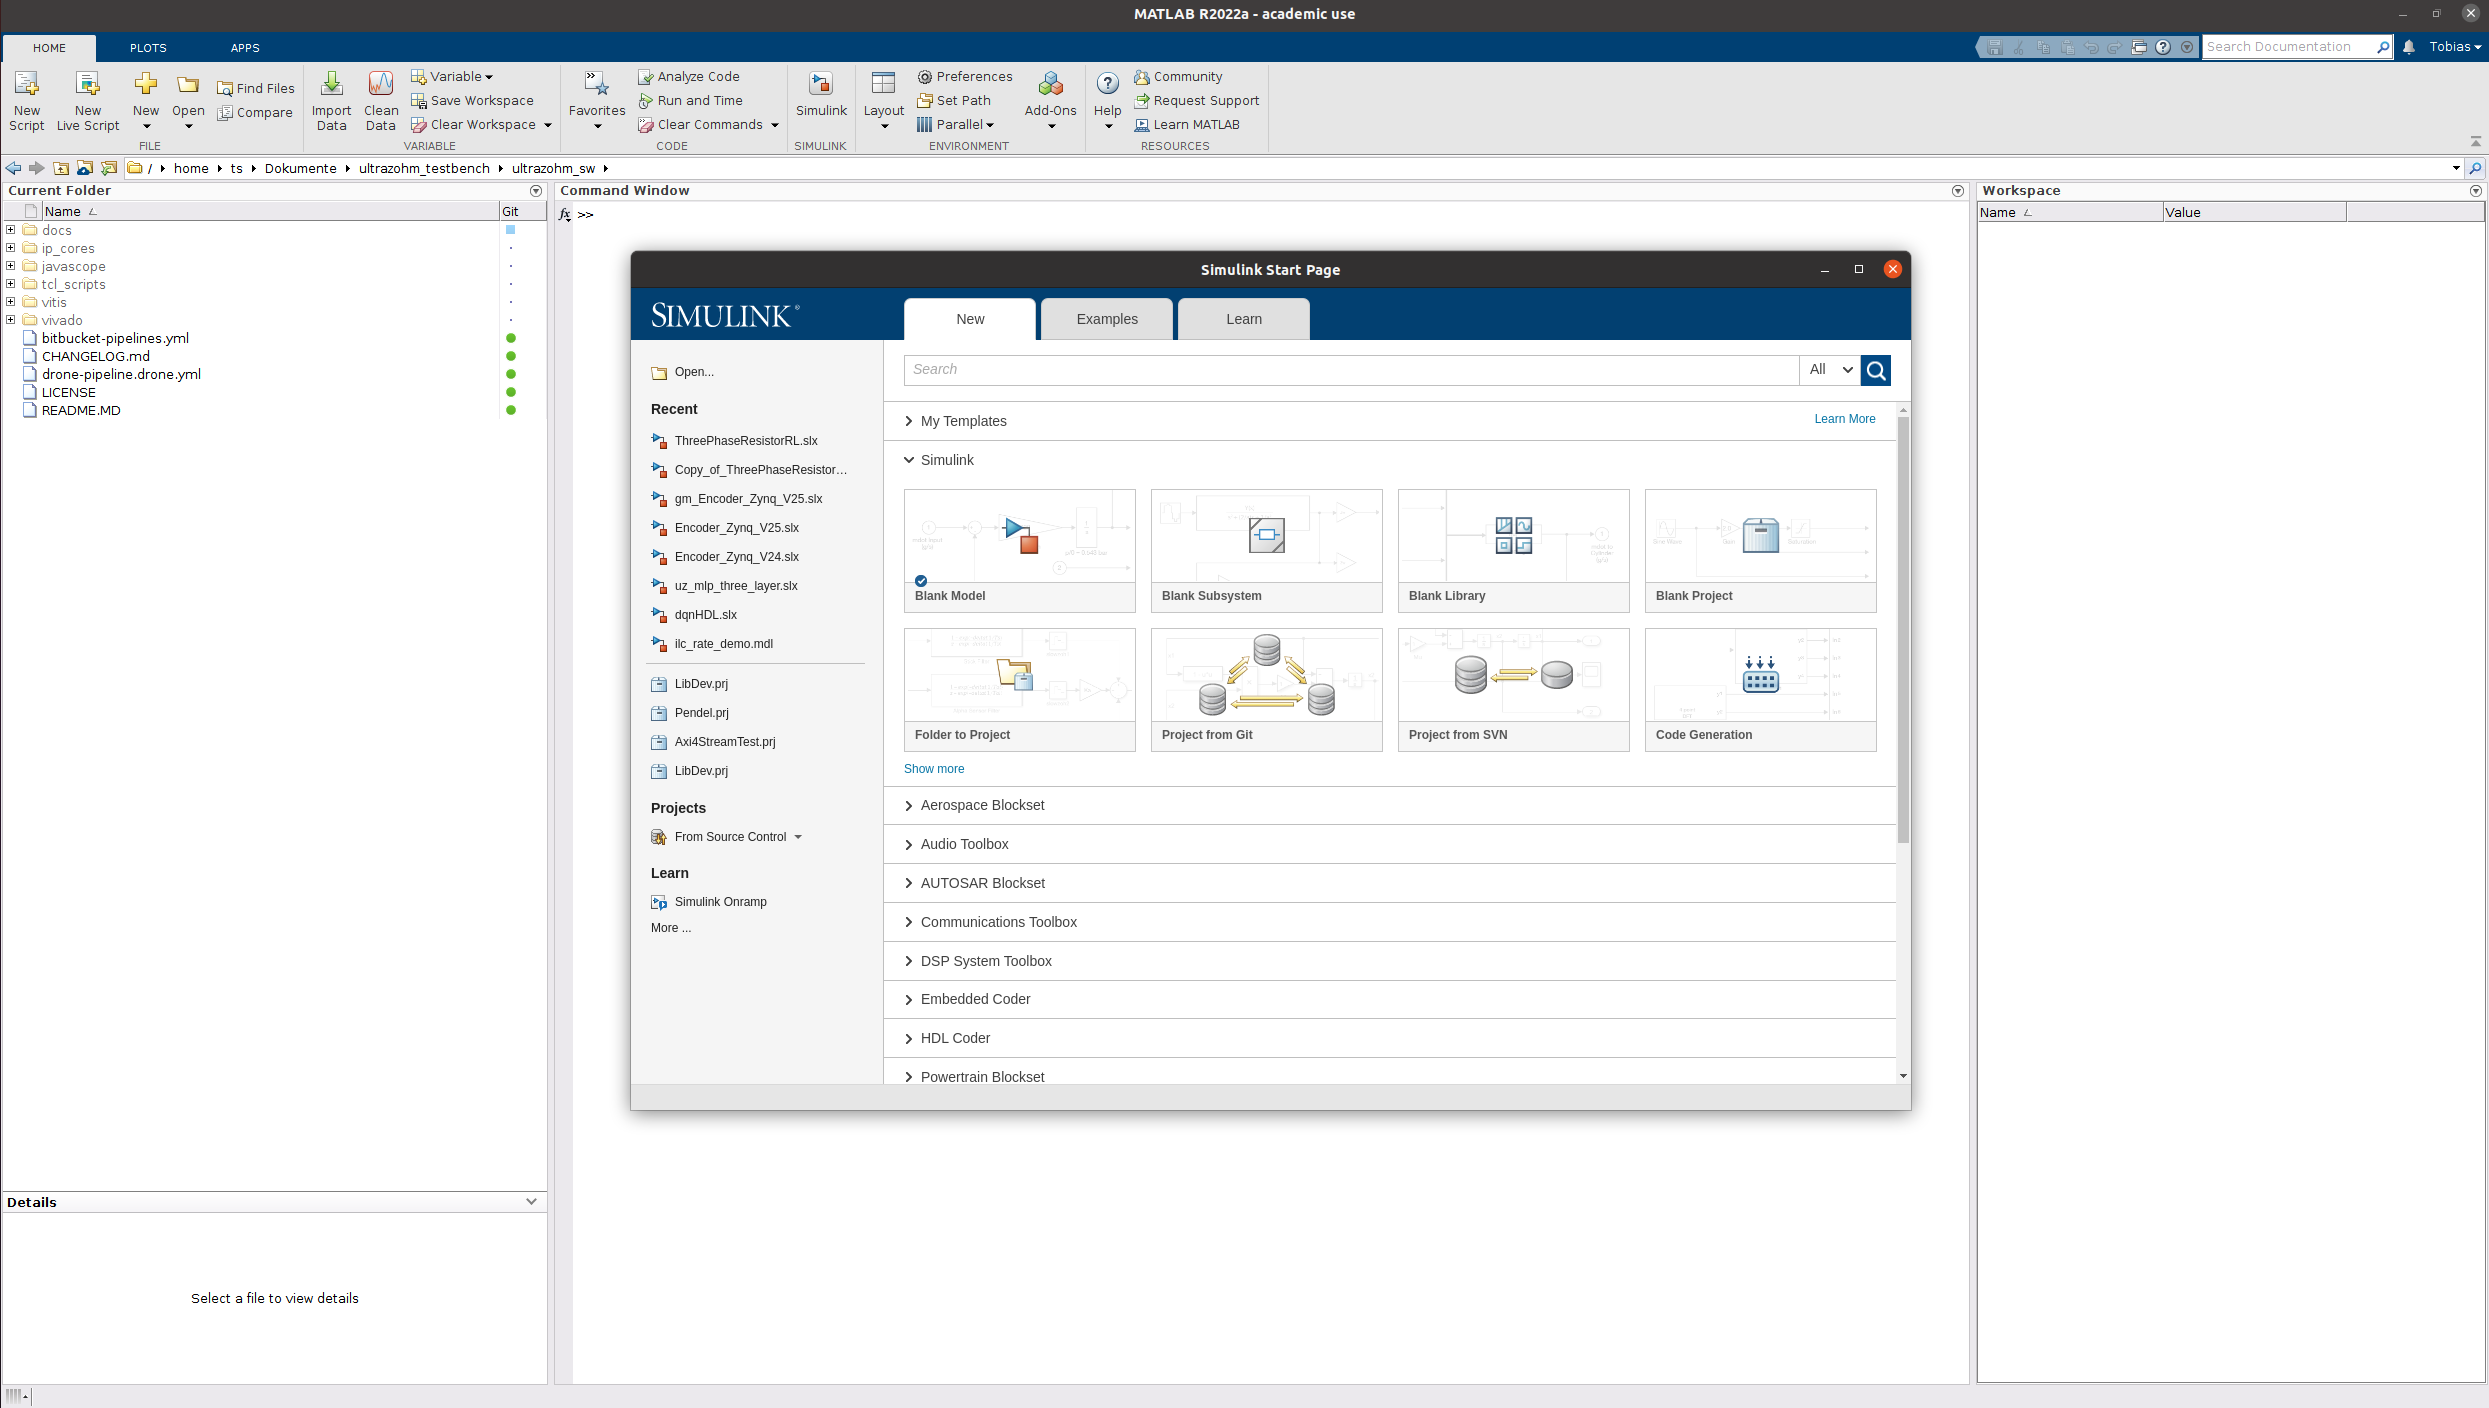
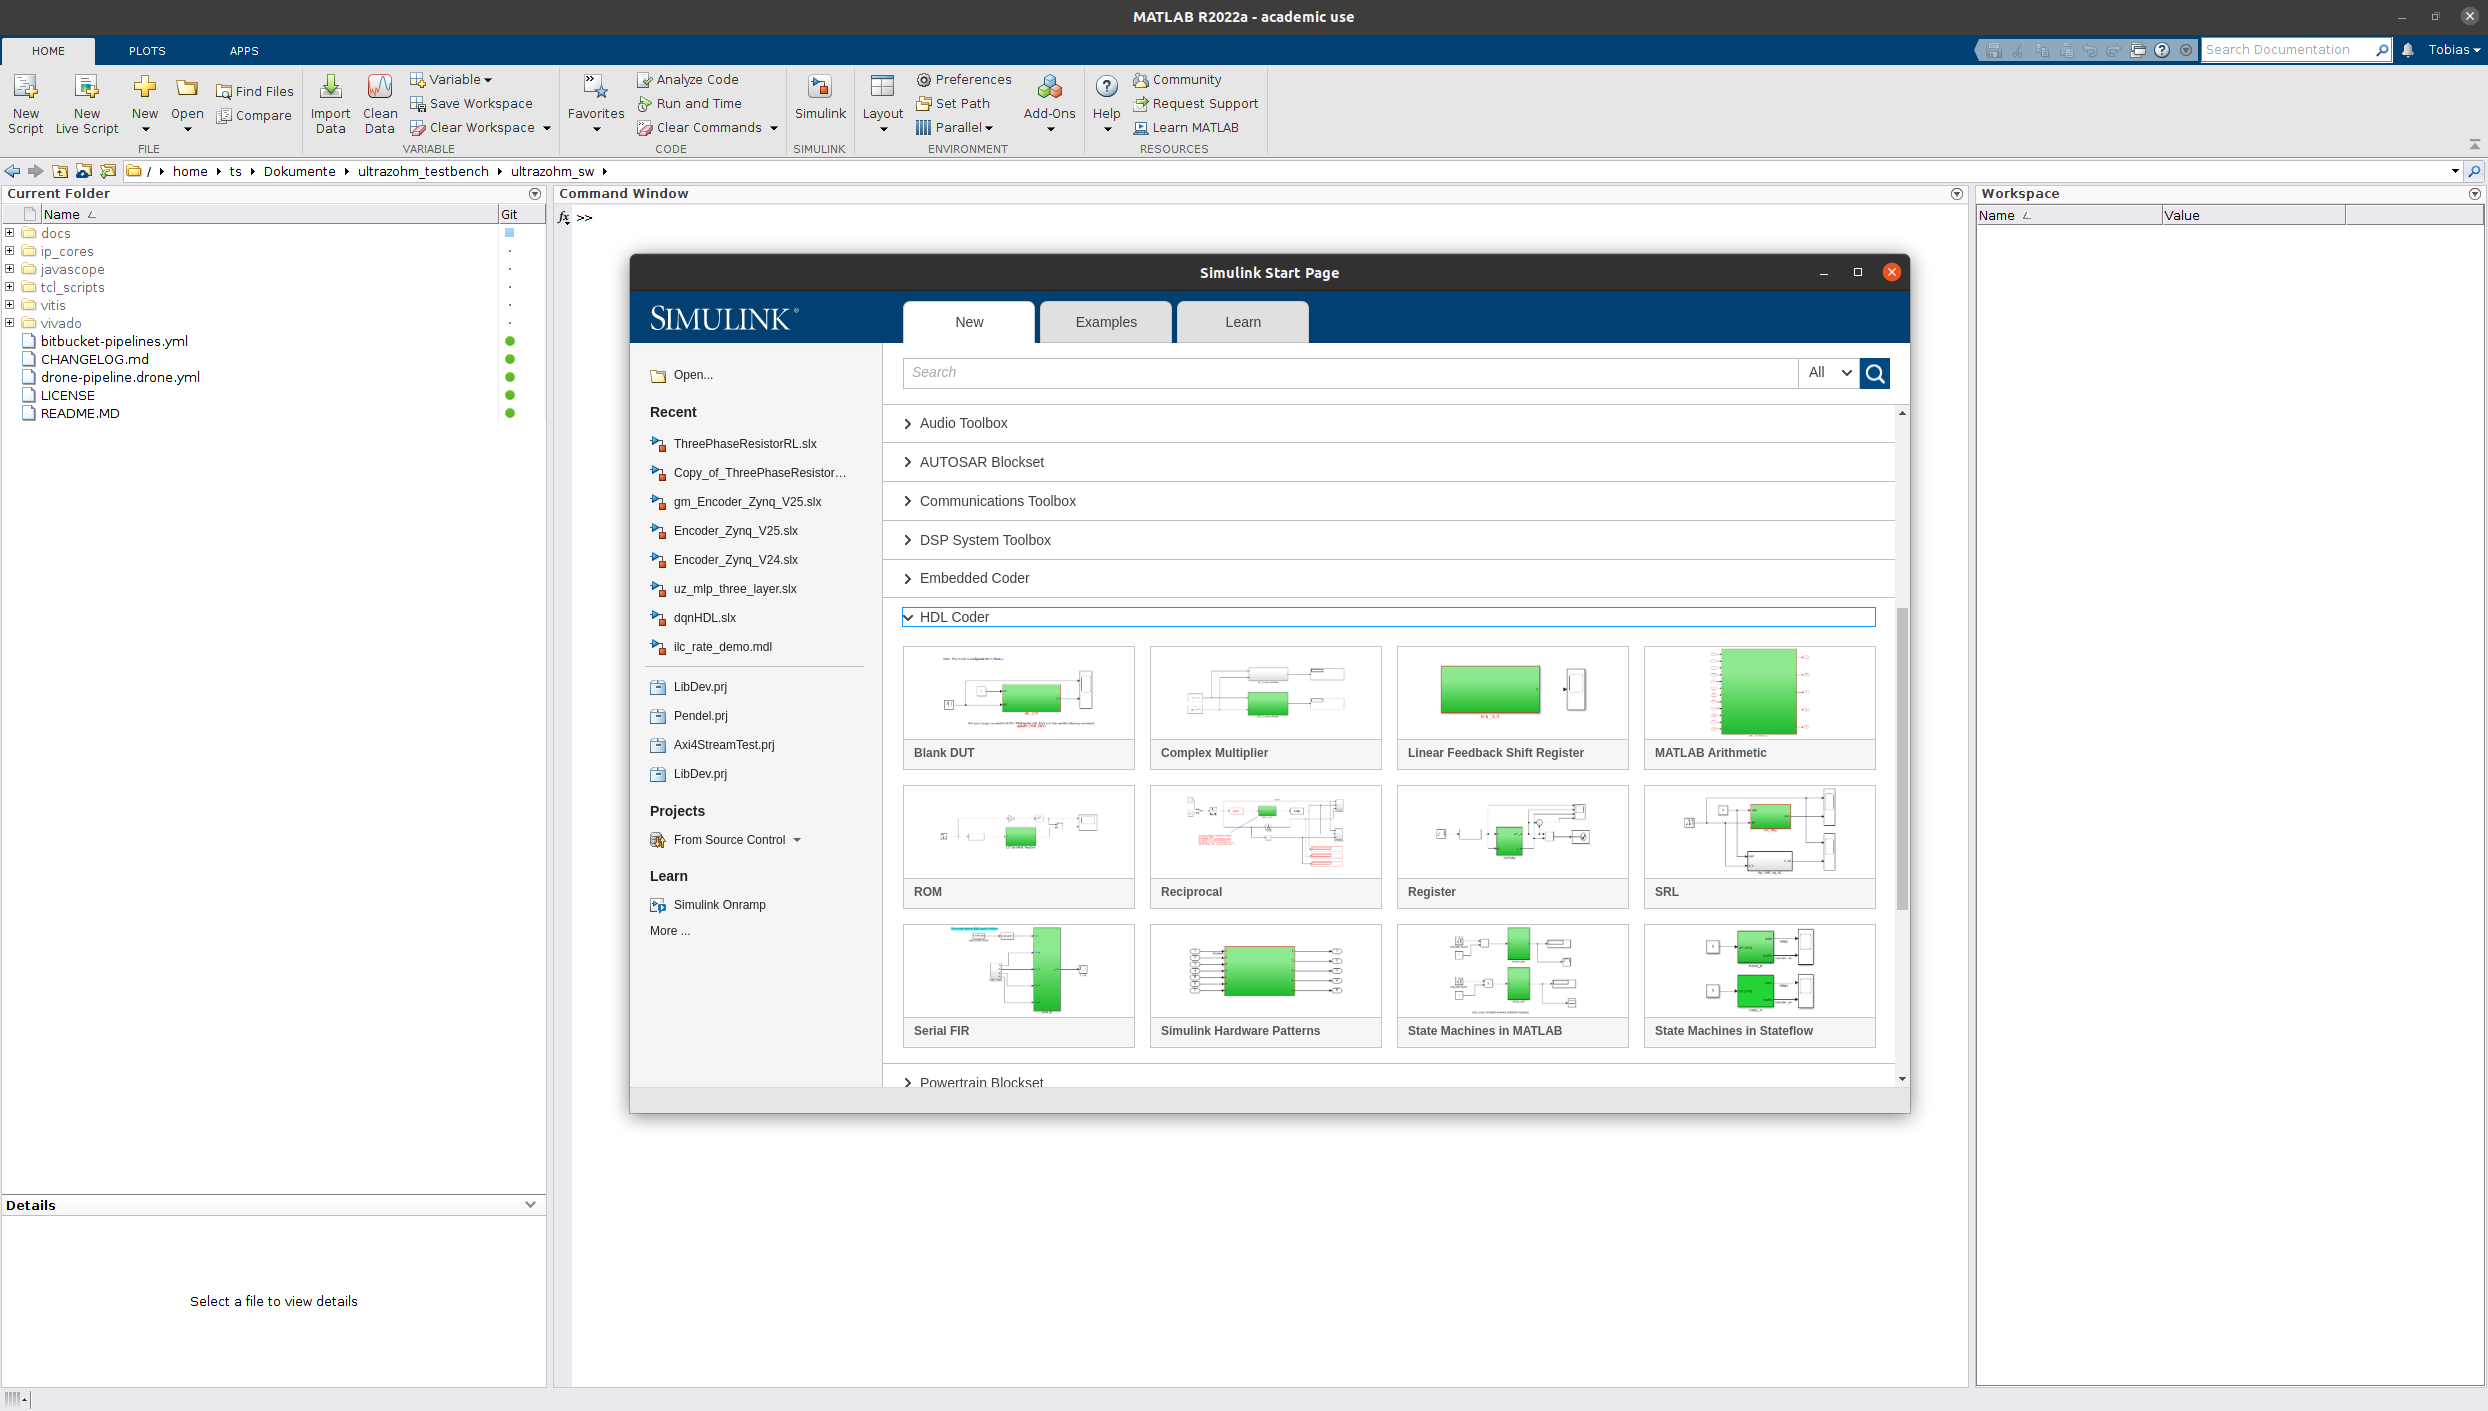
Choose HDL Coder, Blank DUT
A new Simulink model opens which has the recommended settings for HDL-Code generation already applied (see Mathworks hdlsetup
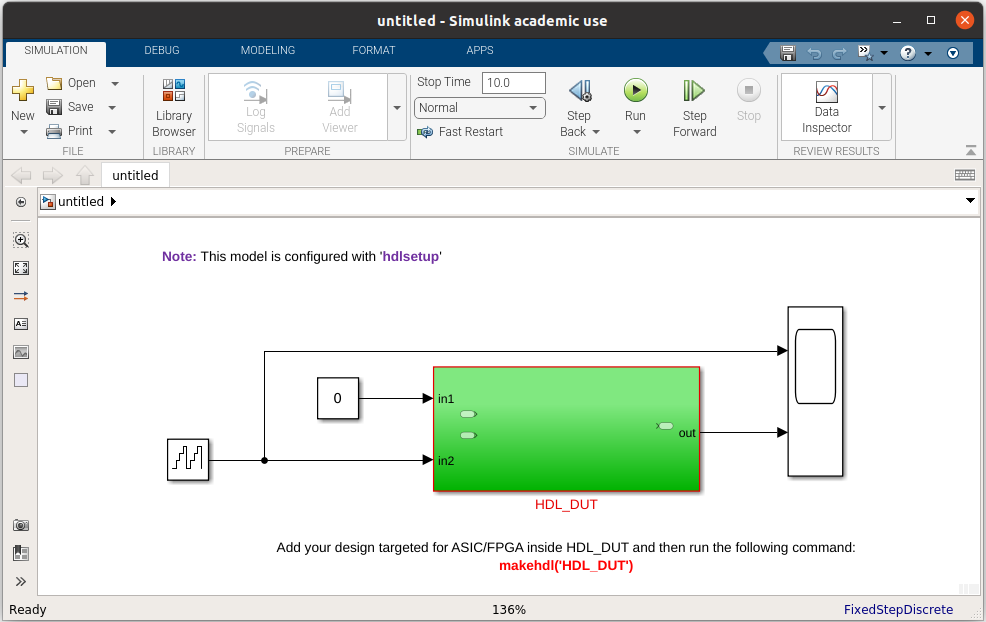
Delete everything in the model, rename the subsystem HDL_DUT to uz_axi_mytestIP
Save the model to
ultrazohm_sw/ip_cores/uz_axi_mytestIP/uz_axi_mytestIP.slx
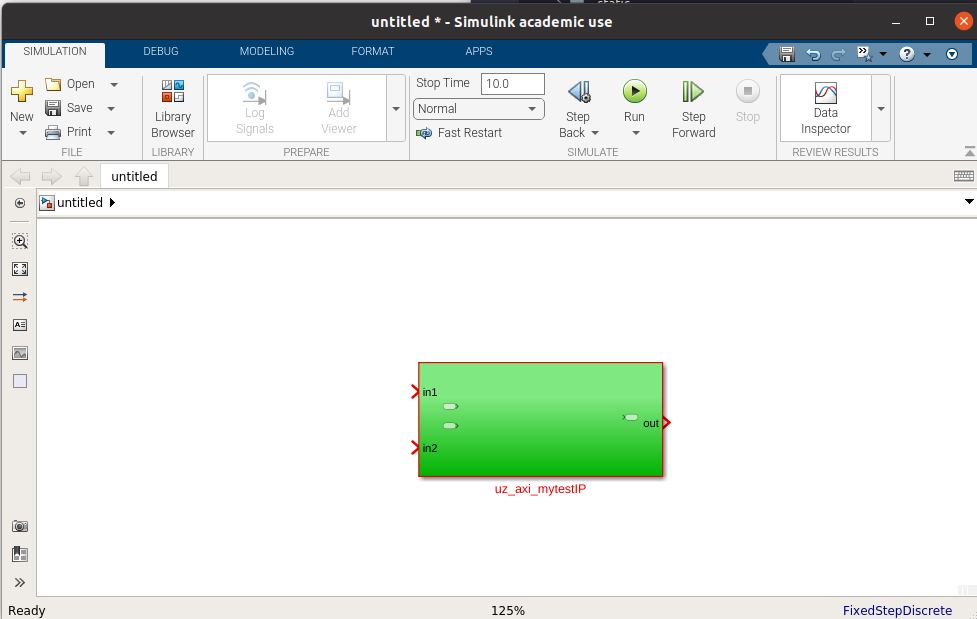
Rename the input and output ports and add a product to multiply input A times B
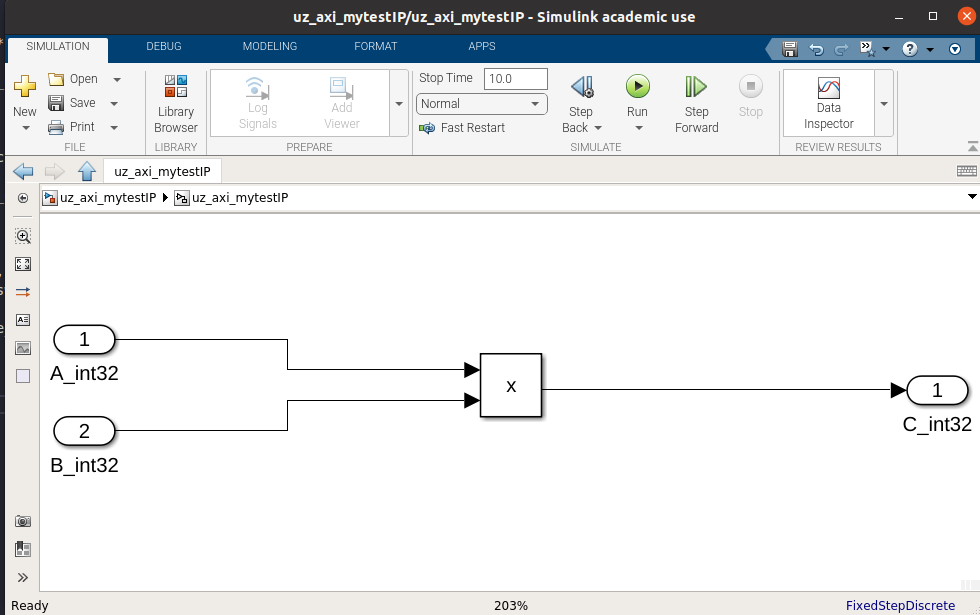
Add a basic test bench by adding two constant values and start the simulation
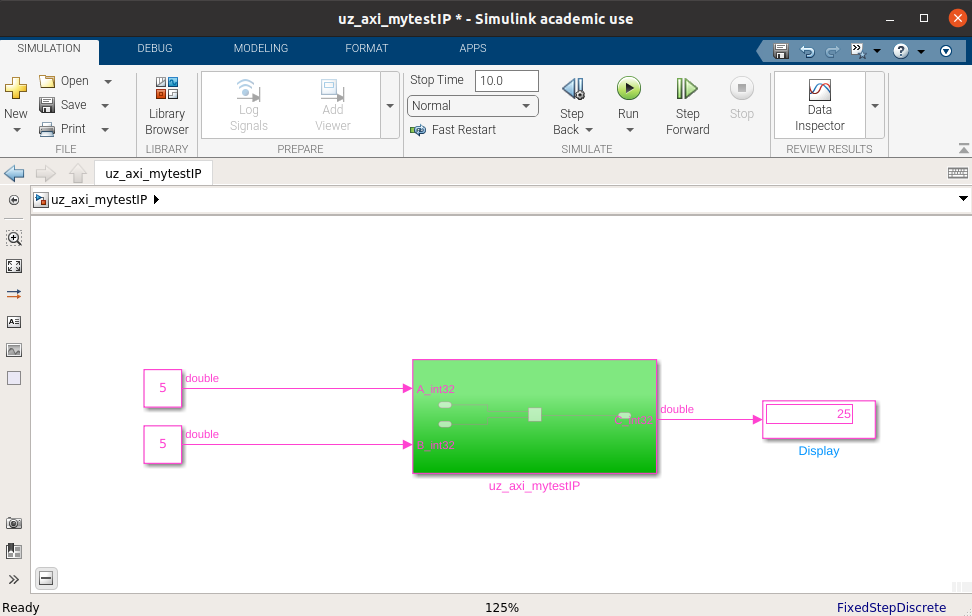
Note that the simulation time base is not discrete (indicated by pink colored signals) and that double precision is used
First, add a data type conversion block for each input and change that output to
int32The IP core interface will match the data type that is connected in the Simulink model
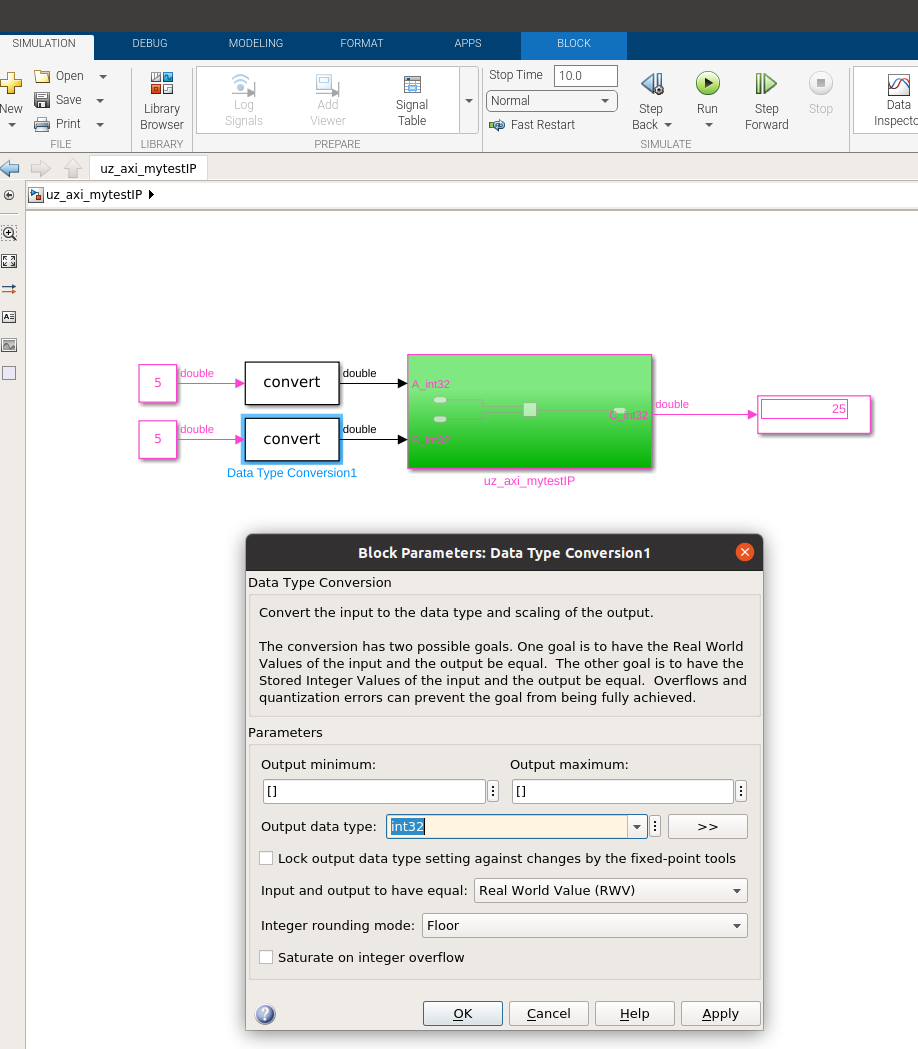
Next, add a rate transition to convert the input signals to discrete time
Specify the output port sample rate to 100 MHz
The IP core clk is implicitly the same rate as the sample time of the input signals
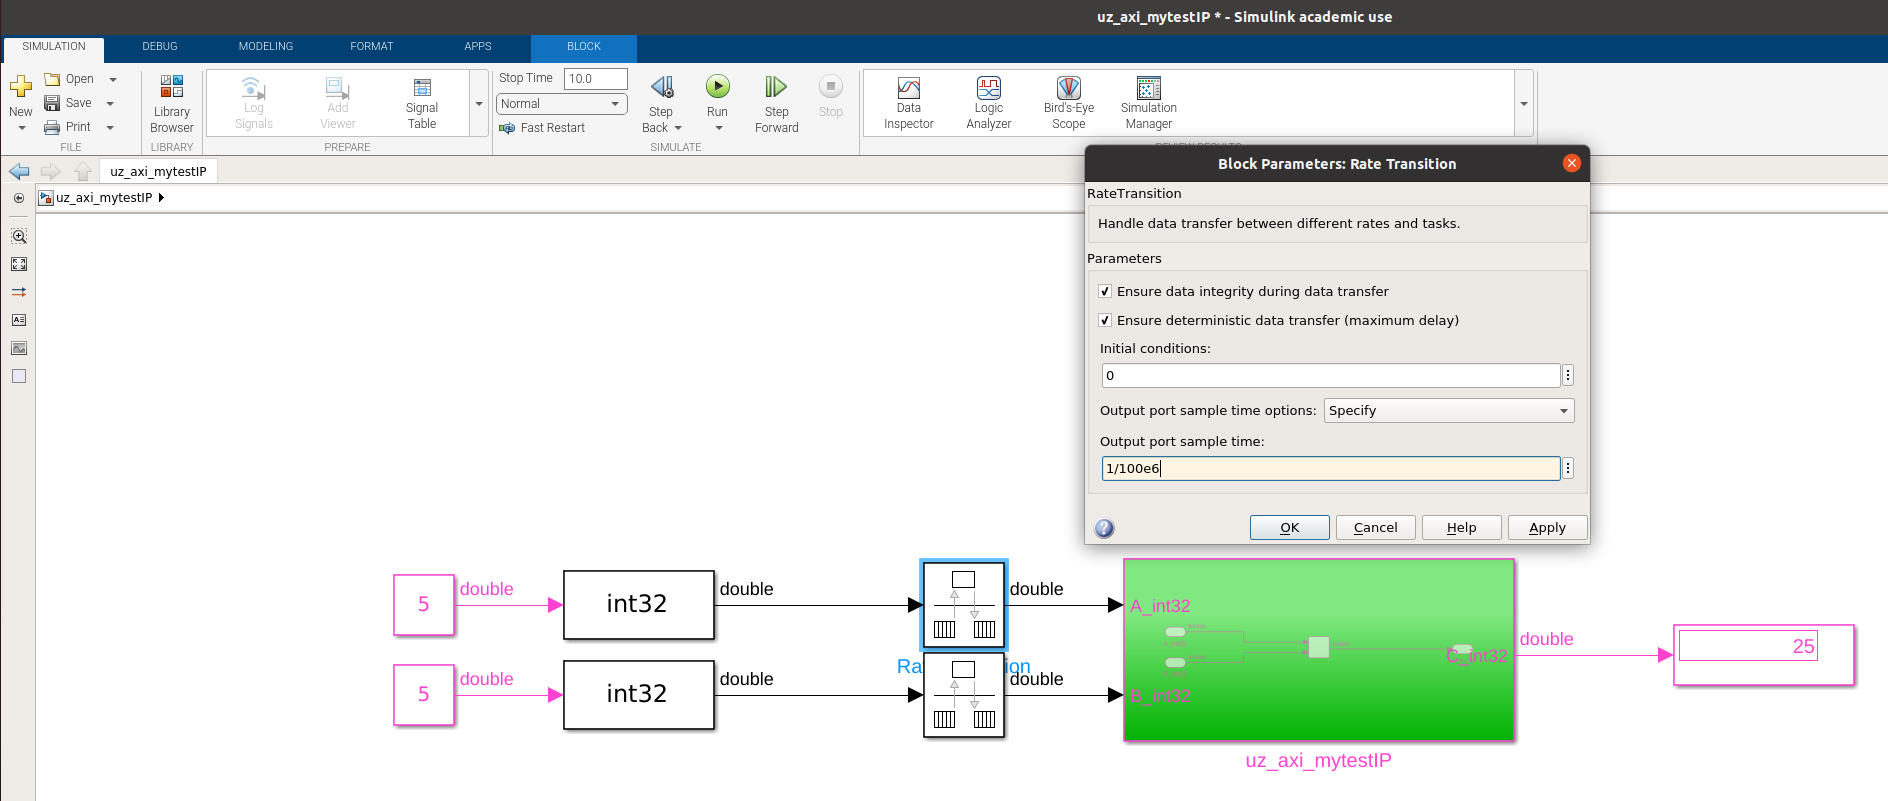
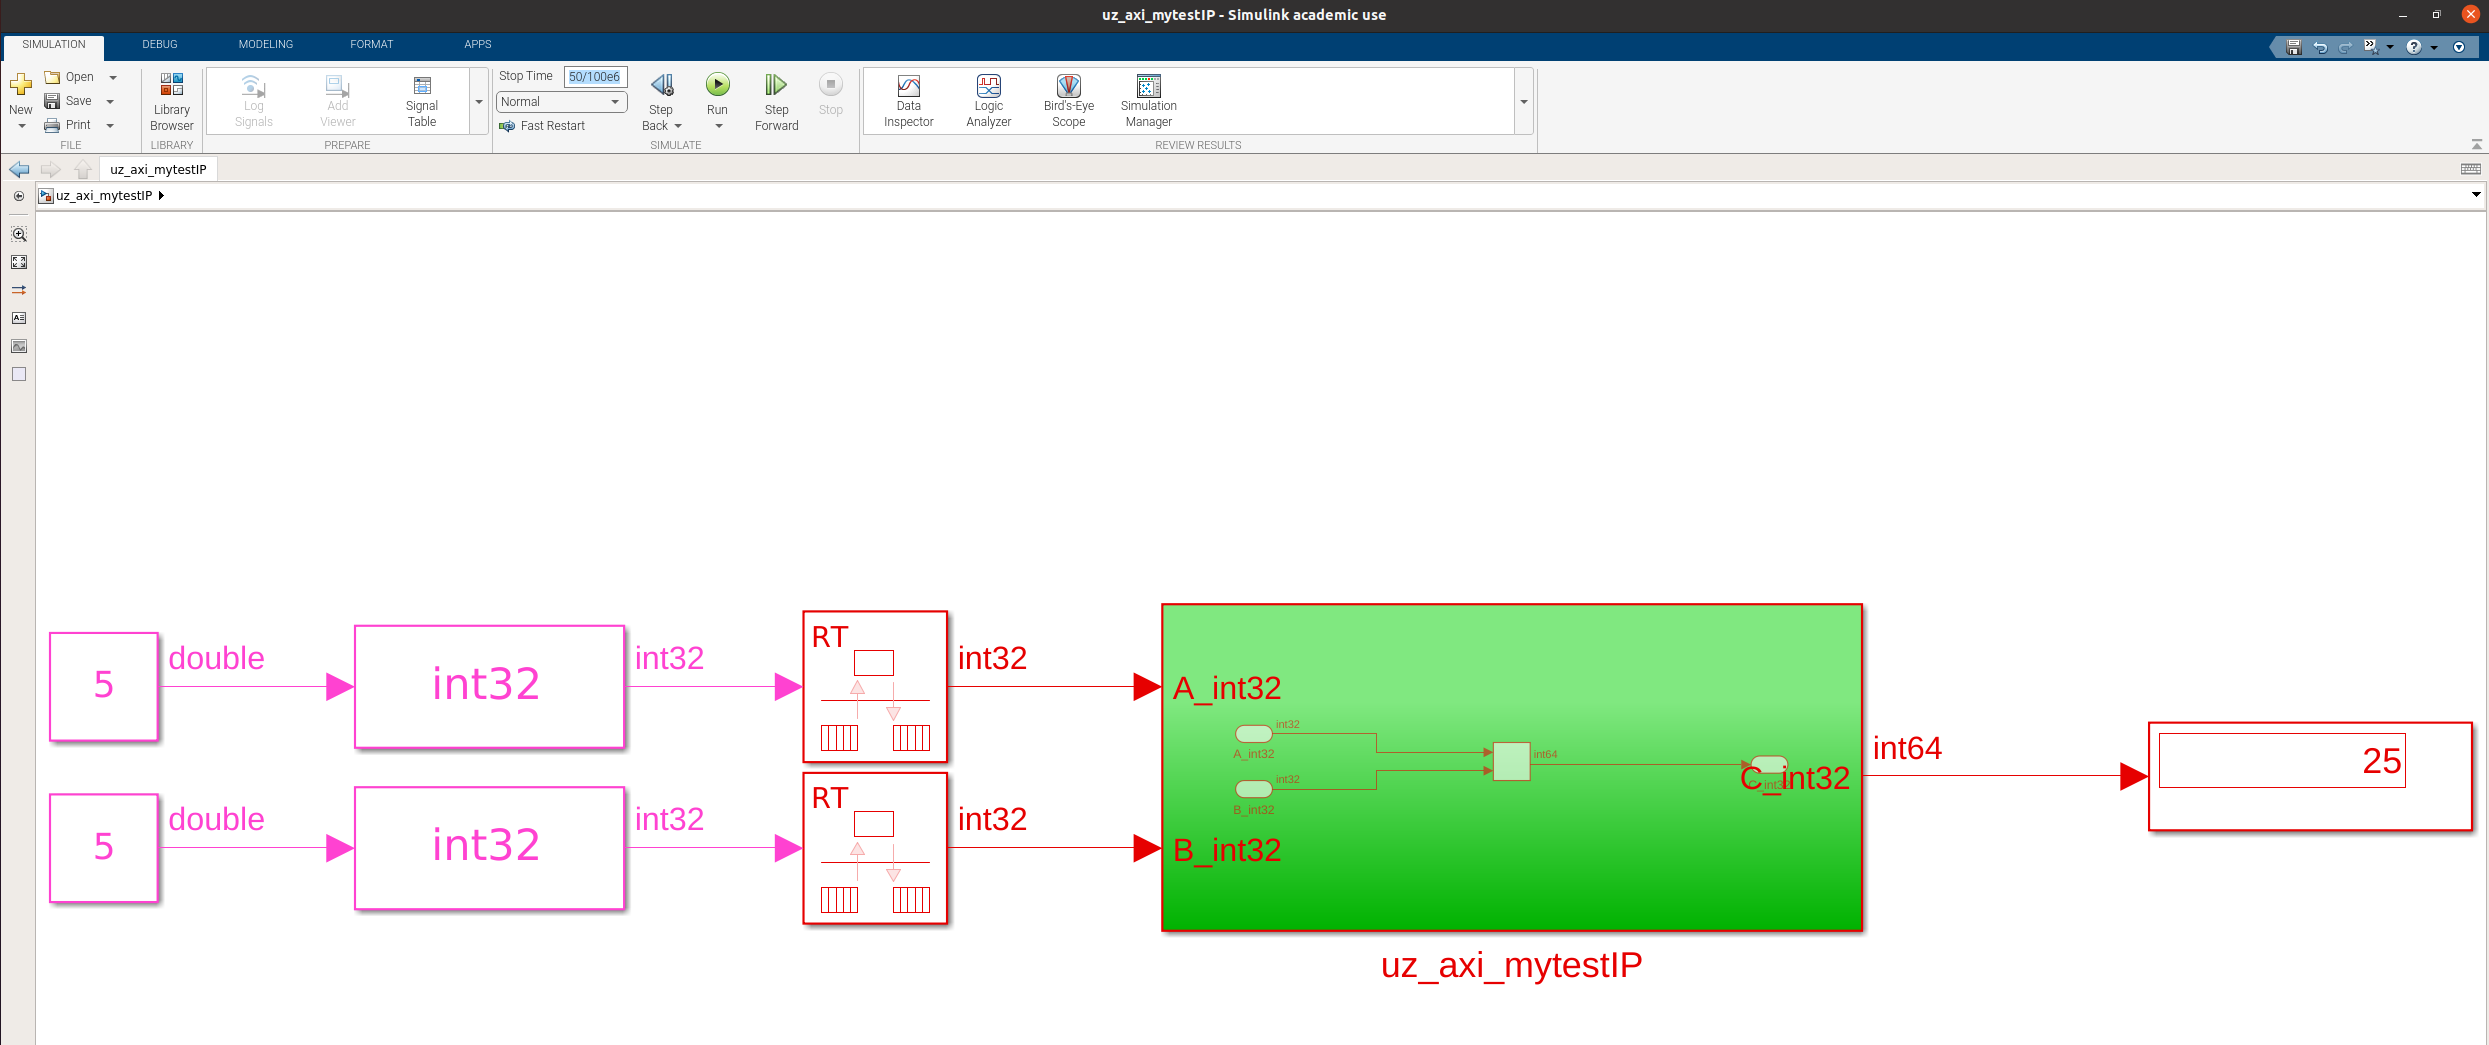
Set the Simulink stop time to
50/100e6to prevent the simulation from taking too longSimulate the model again
Note that a full precision multiplication is done, i.e., the output signal is now
int64
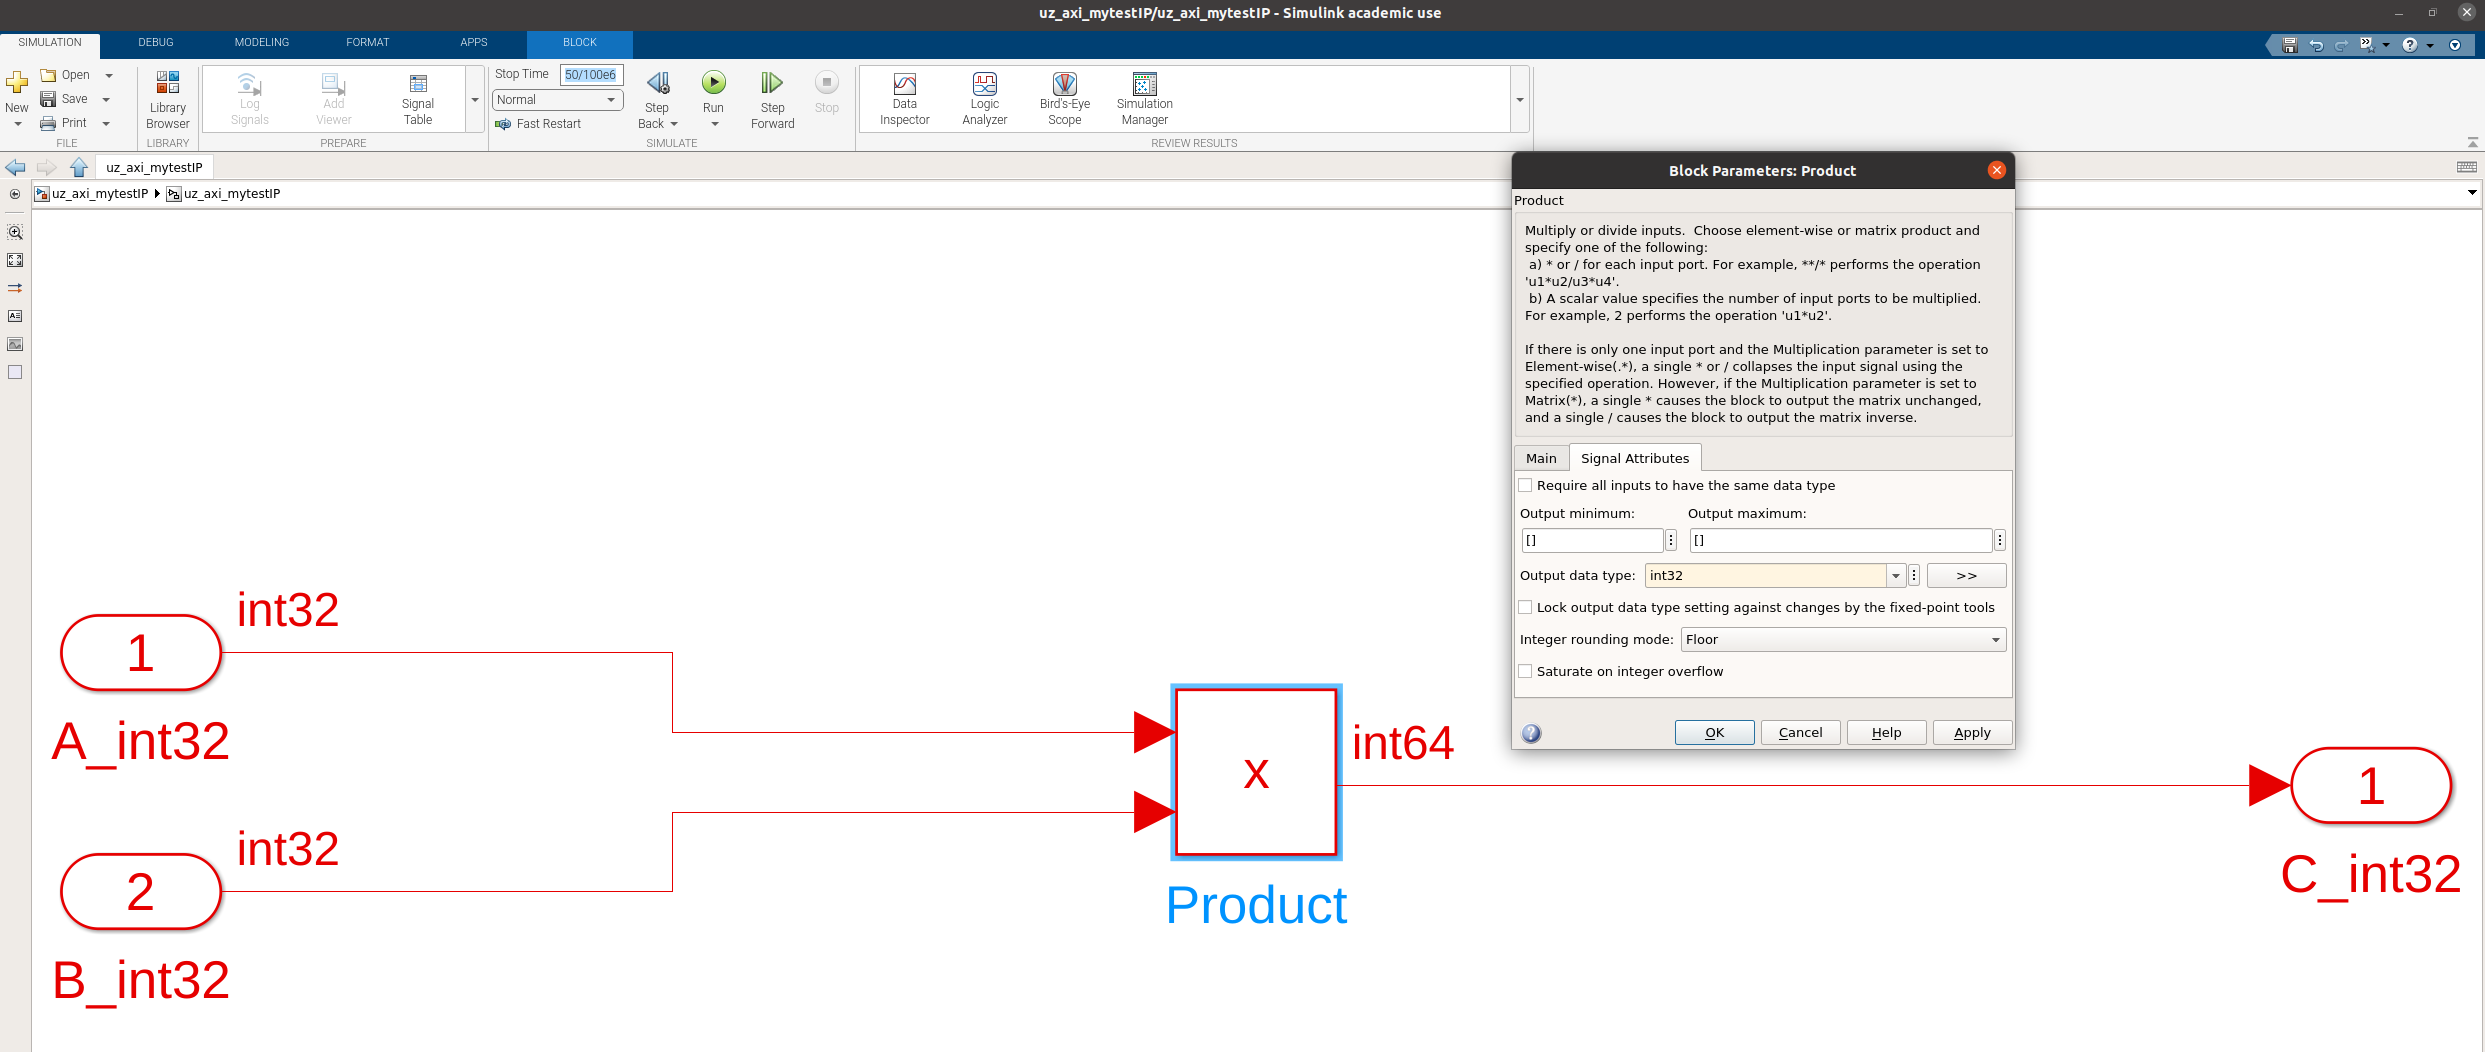
To change the data type of the output of the product, double click the product
Set the output to
int32Note: Setting the output to
int32means that the result can overflow since the result of the multiplication of twoint32values can be larger that the maximum representable value ofint32Additionally, the
Saturate on integer overflowis not checked. Thus, the value will wrap on overflow, i.e.,max(int32)+1will be a large negative numberTake data type considerations into account when designing real IP cores!
Simulink model is now ready to be generated
Right click on the
uz_axi_mytestIP(that is the part of the model that will become an IP core), choose HDL Coder -> HDL Workflow AdvisorIn the Workflow Advisor, extend the menu on the left
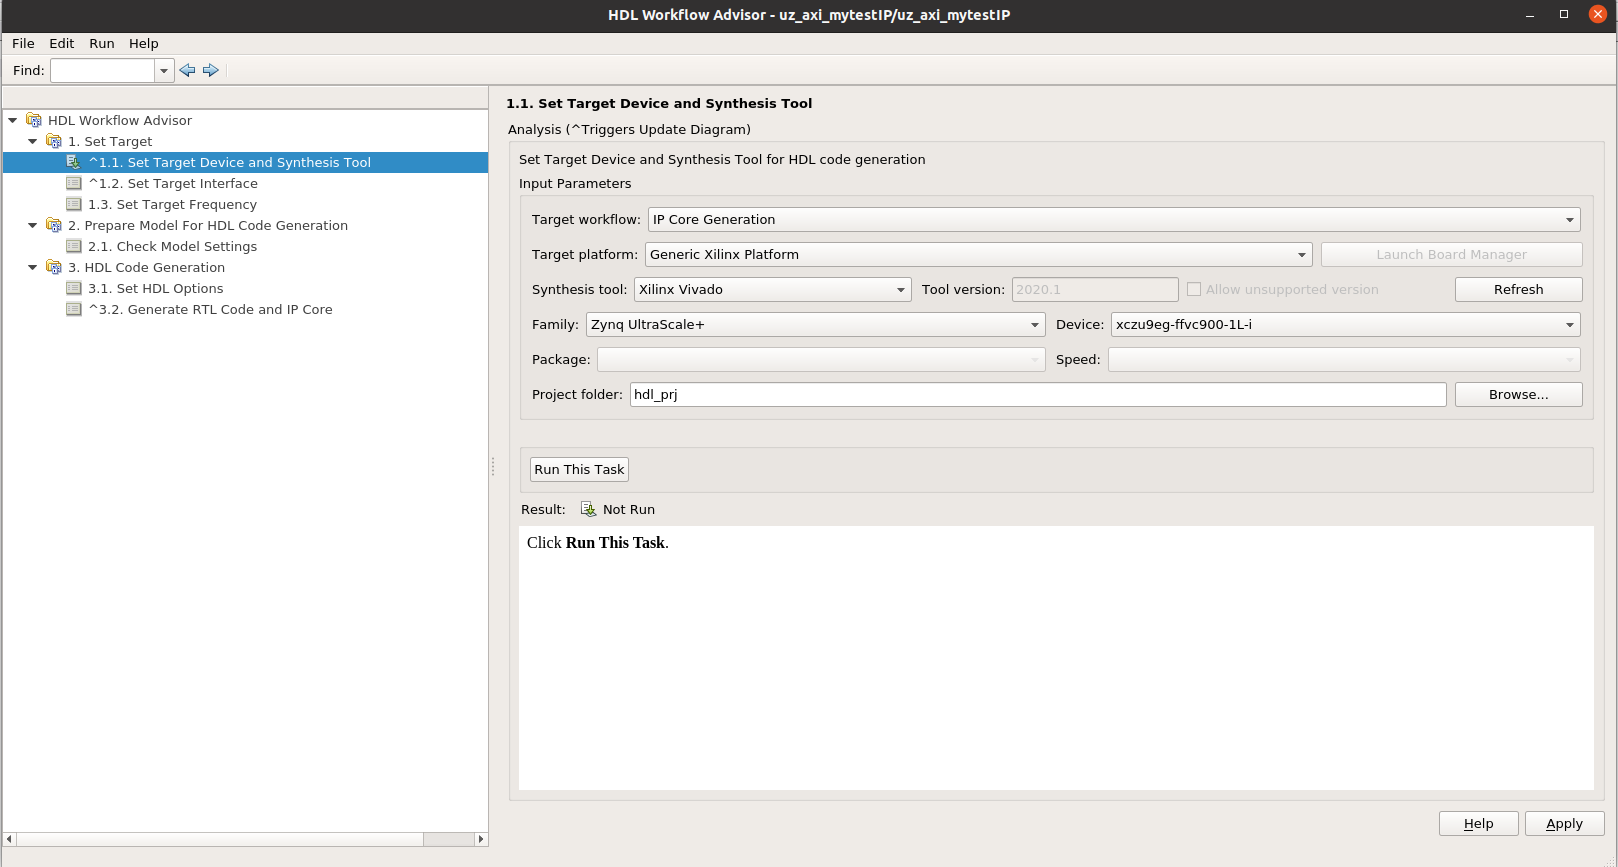
In
1.1 Set Target Device and Synthesis Tool, the following basic settings are applied:Target workflow: IP Core Generation
Target platform: Generic Xilinx Platform
Synthesis tool: Xilinx Vivado
Family: Zynq UltraScale+
Device: xczu9eg (rest of the number does not matter)
Project folder: path to ultrazohm_sw/ip_cores/uz_axi_mytestIP/hdl_prj
Click run this task
Result will fail: click on
turn on "Treat as atomic unit"Run task again, passes now
Click on
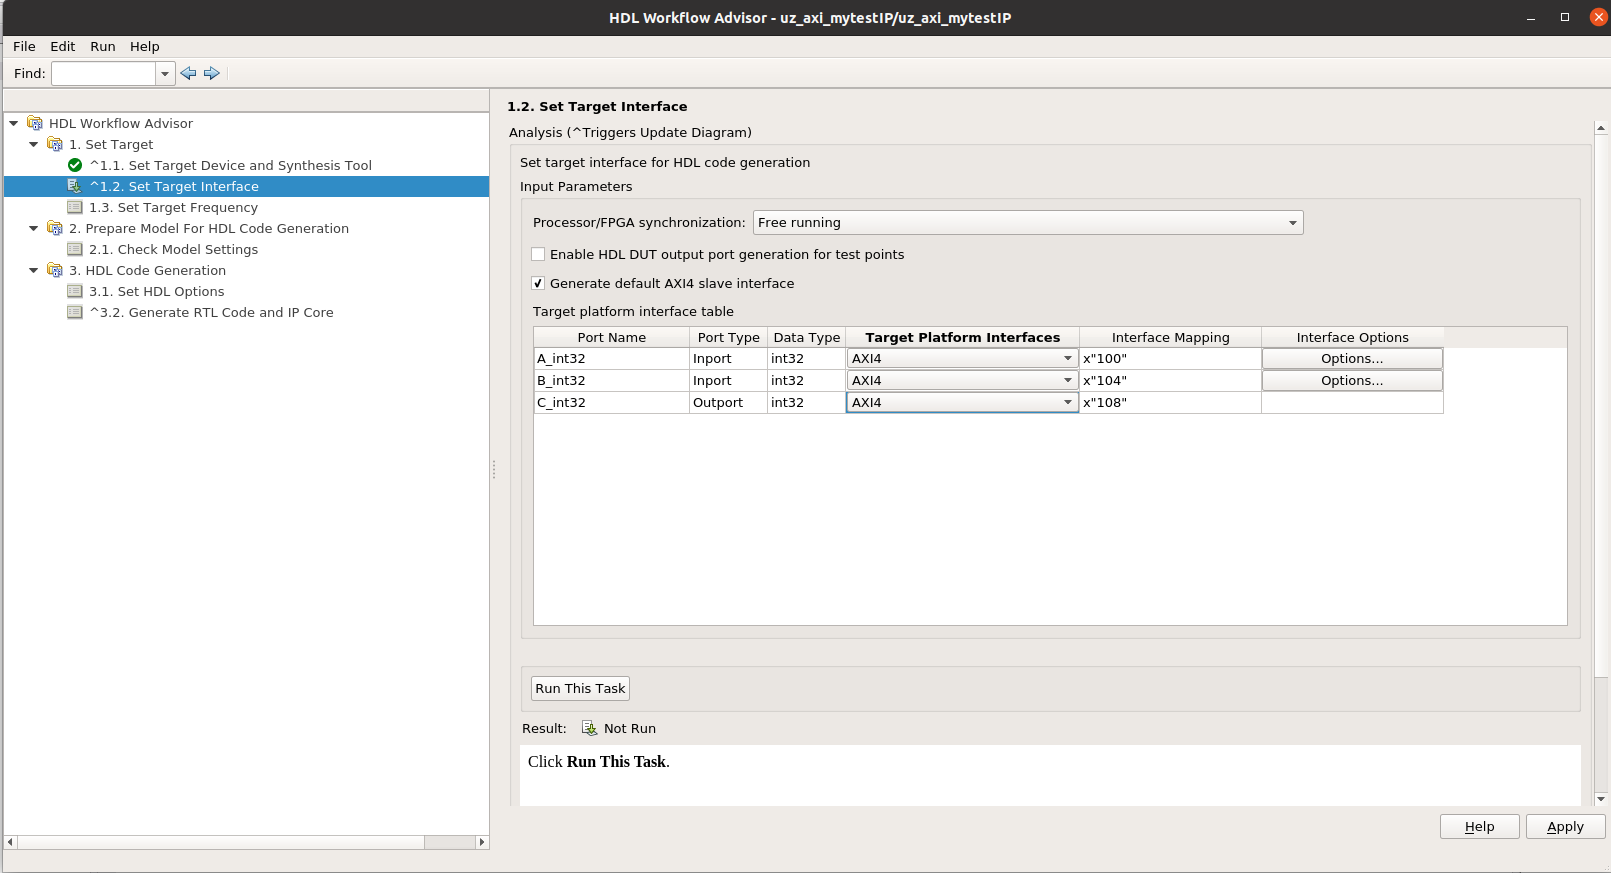
Set Target InterfaceThis setting specifies the interfaces of the IP core
All input and outputs of the subsystem are possible as an interface
Usually,
AXI4-LiteorAXI4is used as an interface between the IP core and the processor of the UltraZohm andExternal Portis used as an interface of the IP core towards the FPGA.If one port is AXI4, the other ports can not be AXI4-Lite
AXI4andExternal Portcan be mixed without problemsClick
Run This Task
The property
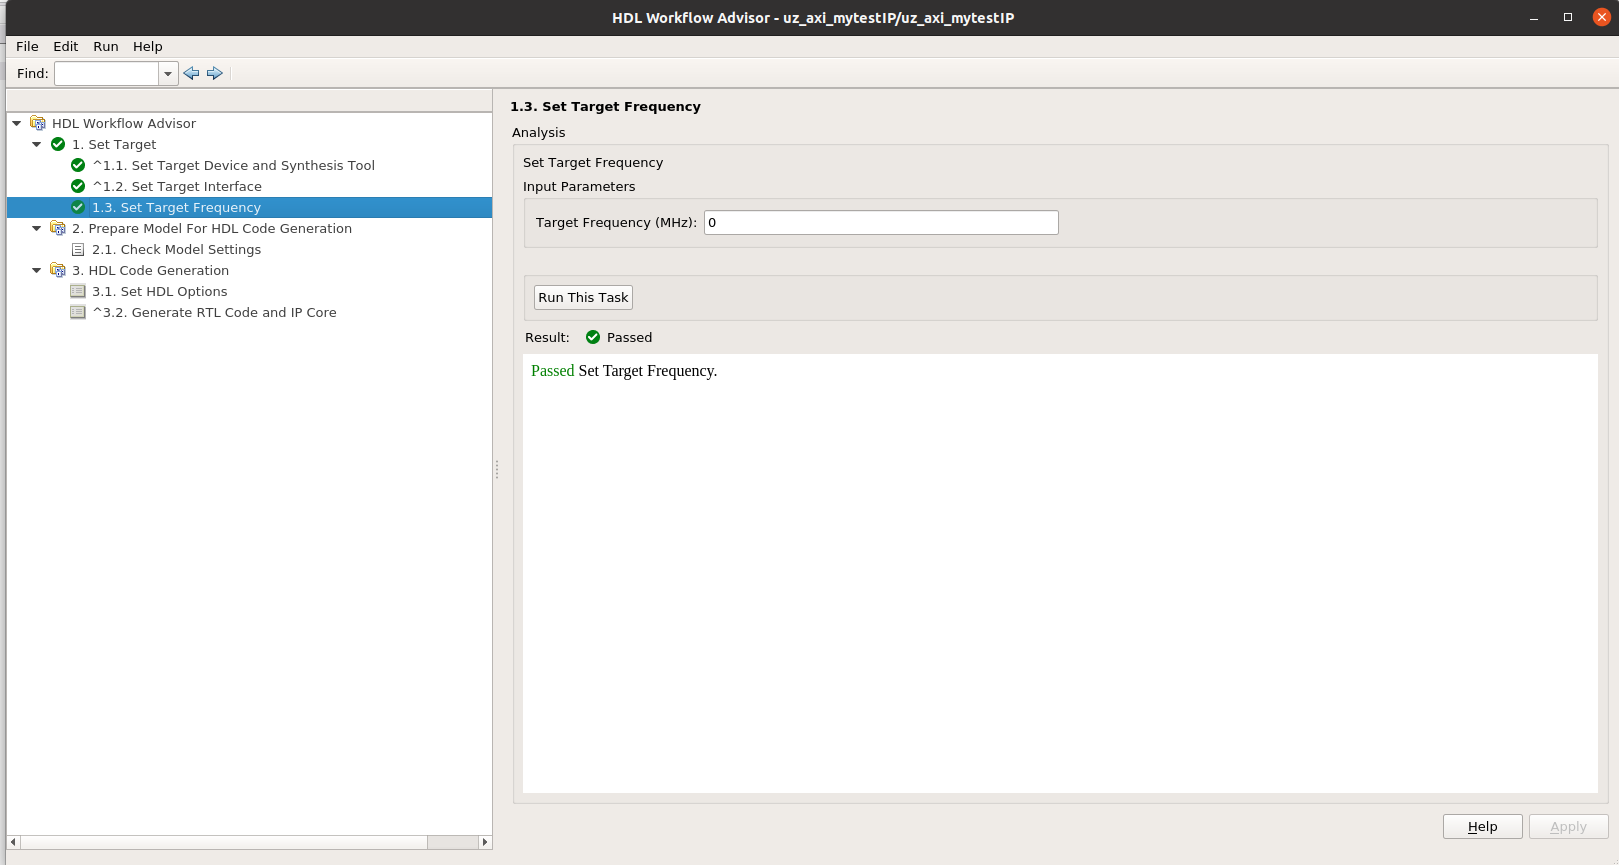
Target Frequencyis not used in this tutorial, set toOand clickRun This Task
Go to
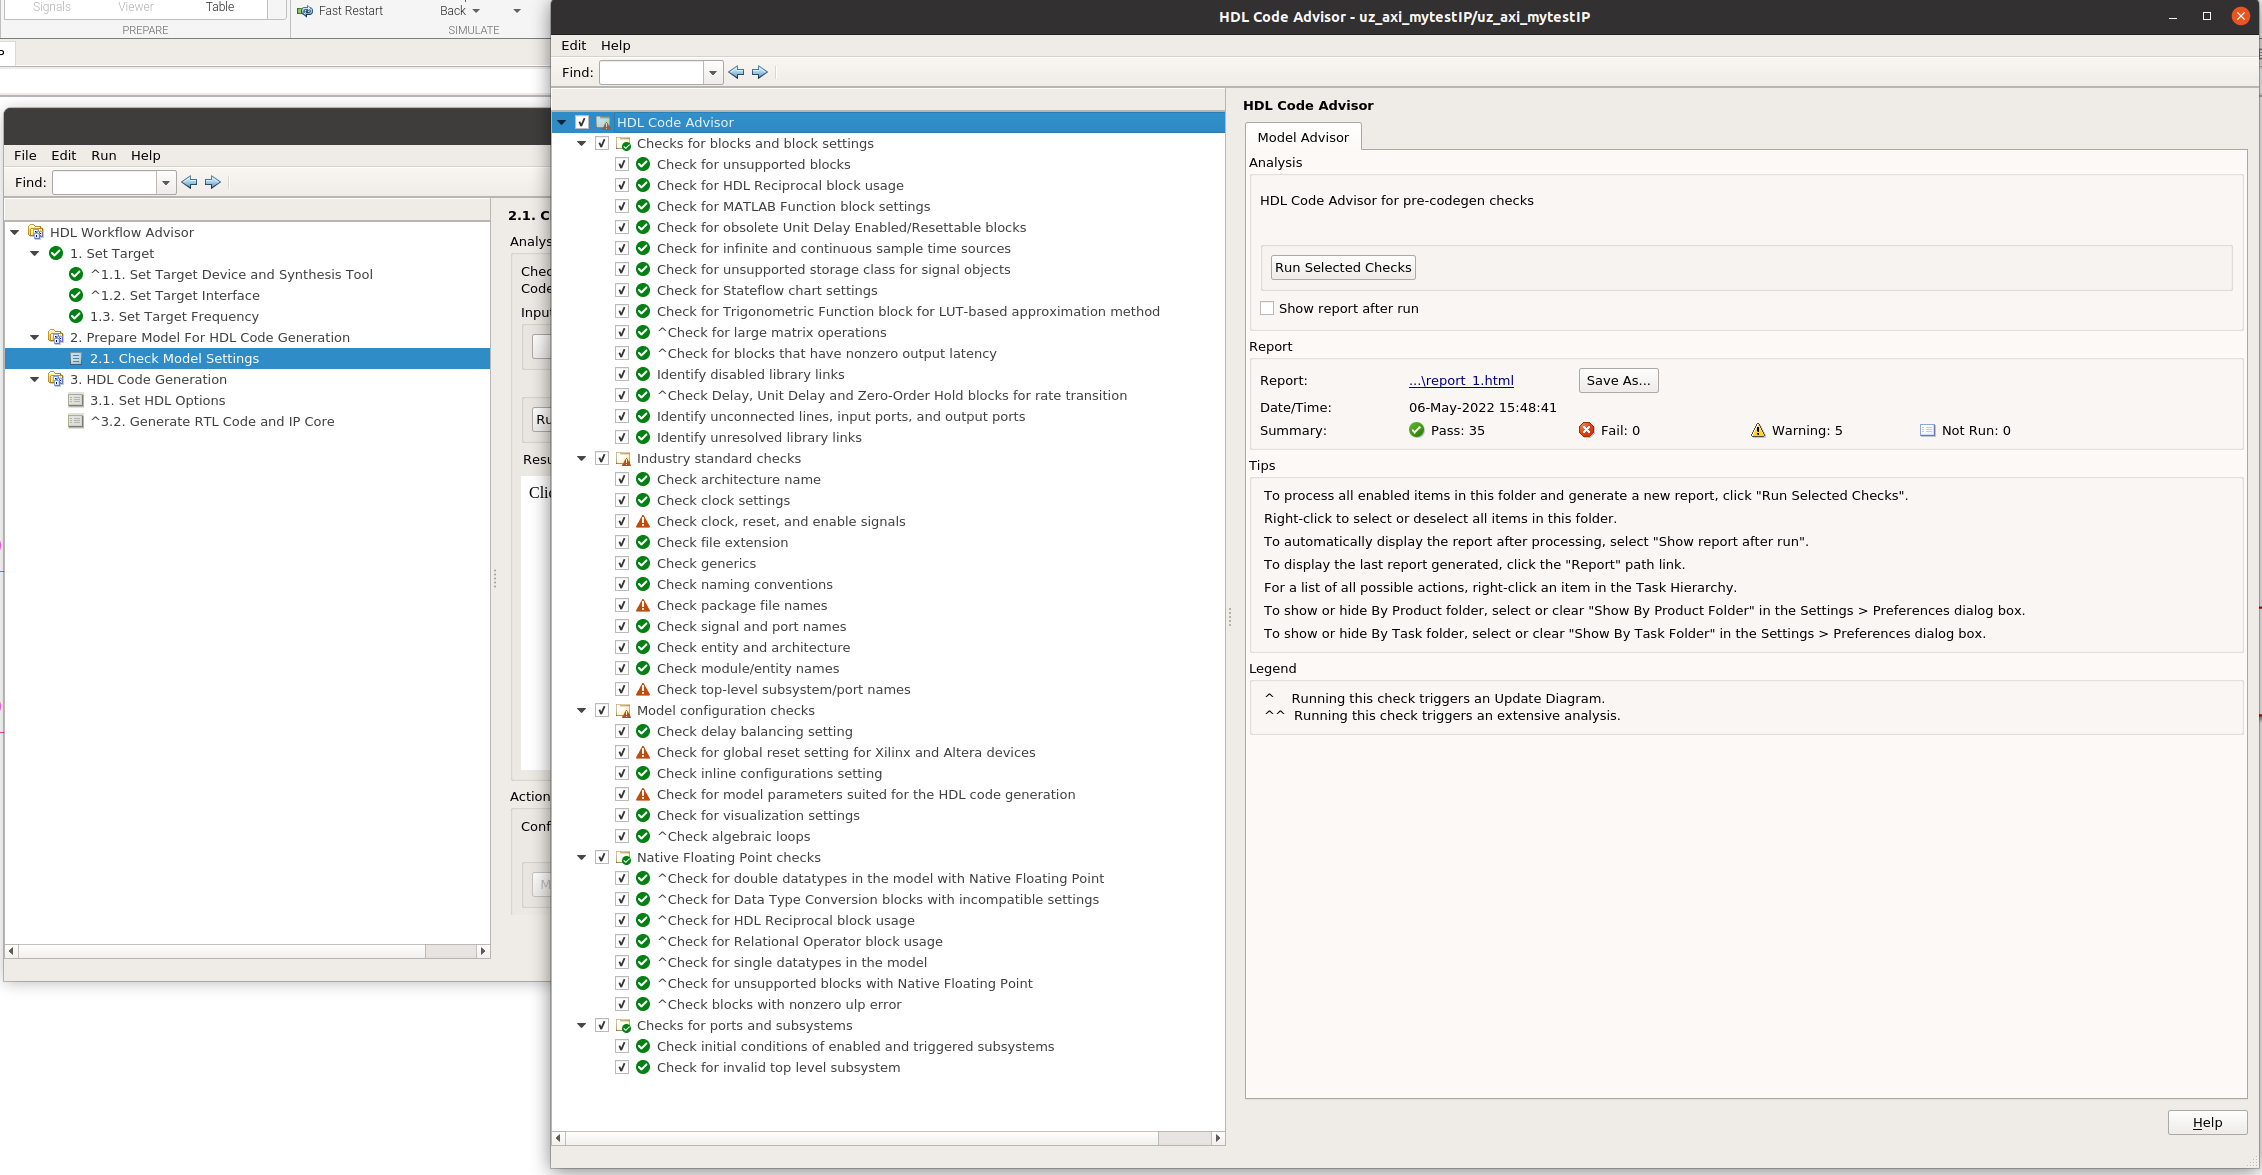
Check Model Settingsand clickHDL Code AdvisorRun all checks
There are several warnings
Most warnings are related to the names of the signals, fix the warnings at own will
Warning global reset settings for Xilinx devices has to be fixed!
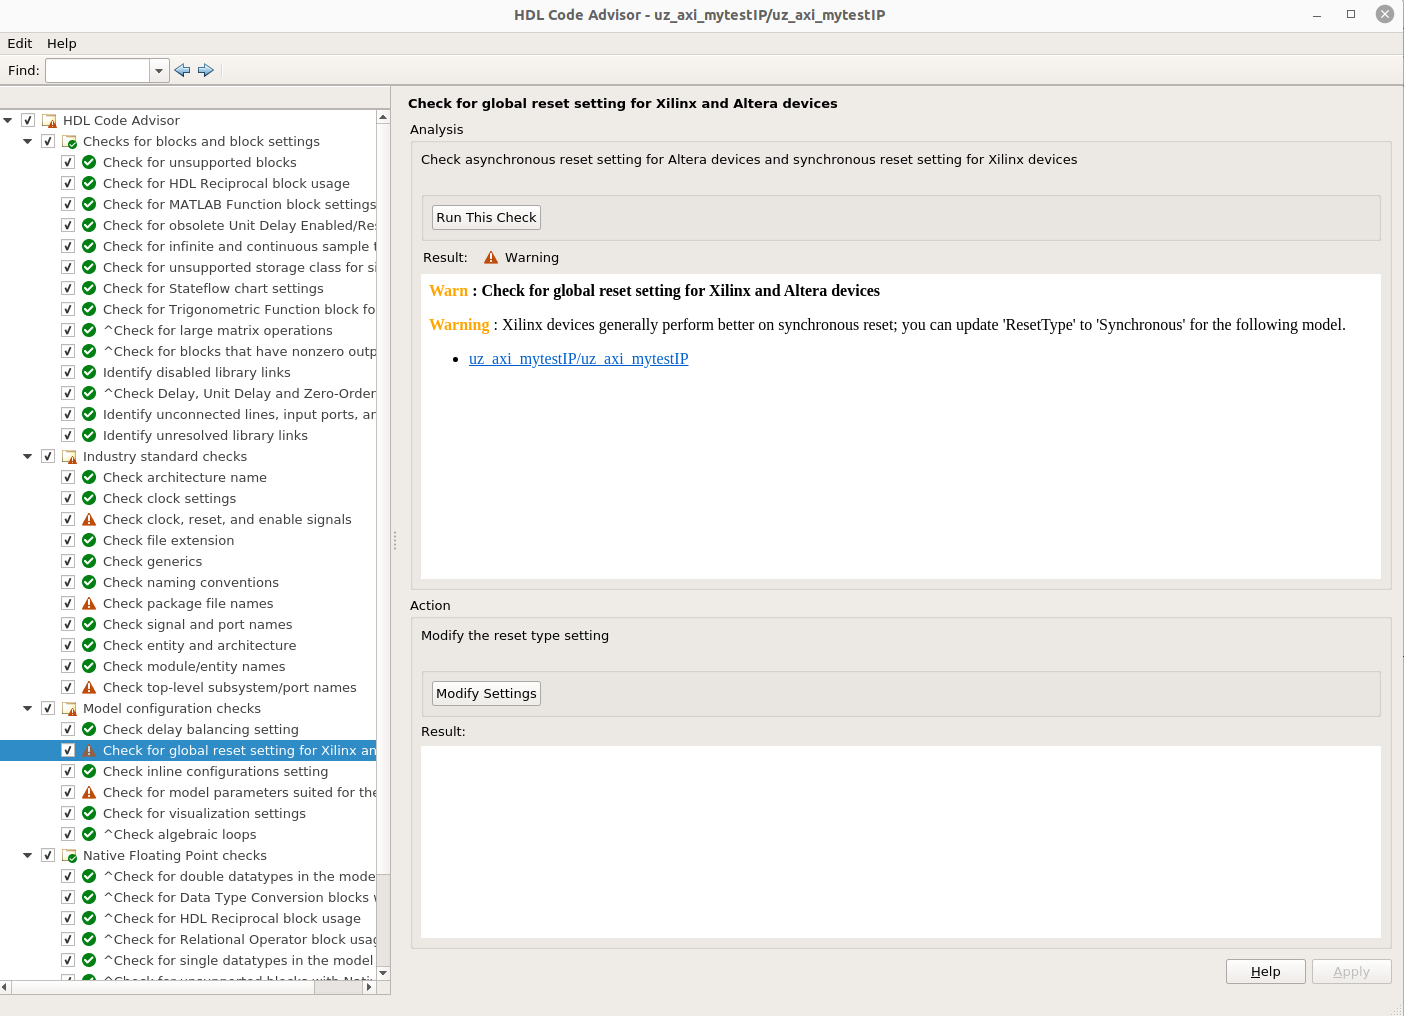
Go to Check for global reset setting for Xililnx and Altera devices
Click on Modify Settings and Run this Check again, test passes now
Close the HDL Code Advisor
In the HDL Workflow Advisor, click on Run This Task in the set 2.1 Check Model Settings
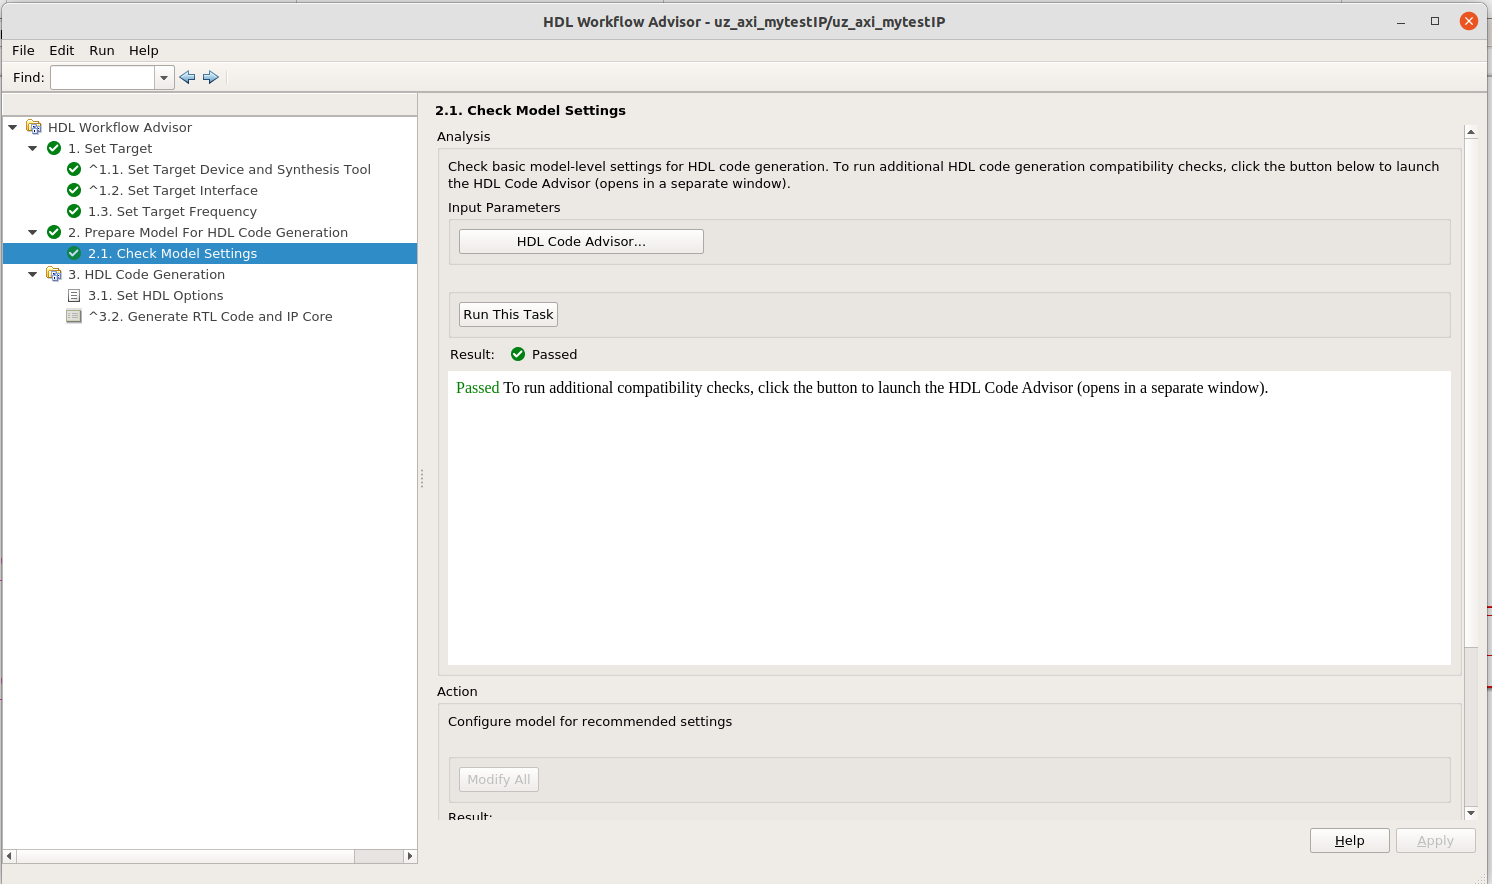
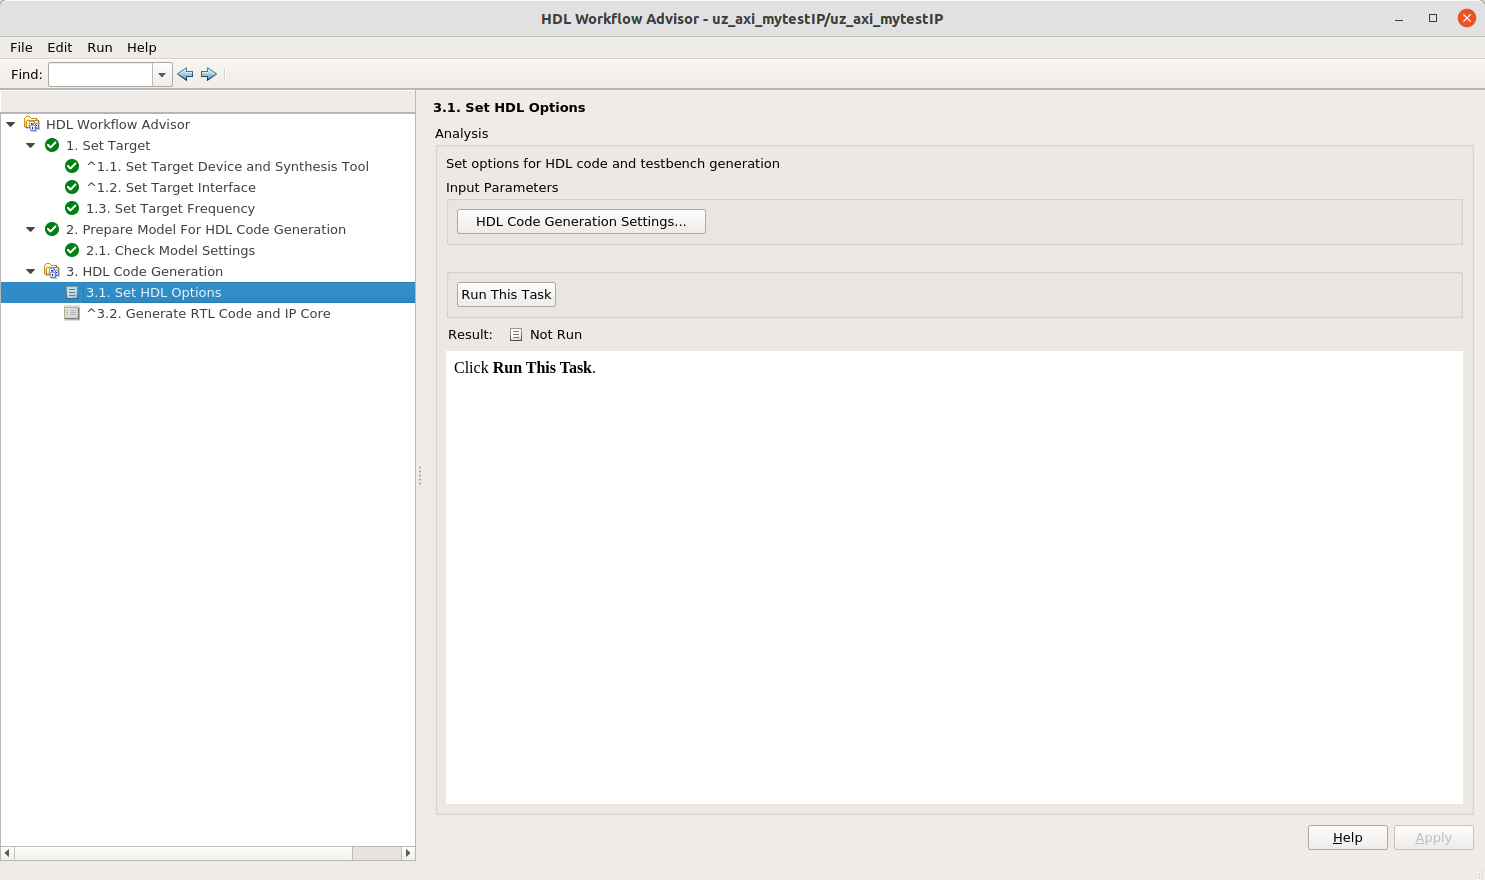
Go to 3.1 Set HDL Options and click on HDL Code Generation Settings…
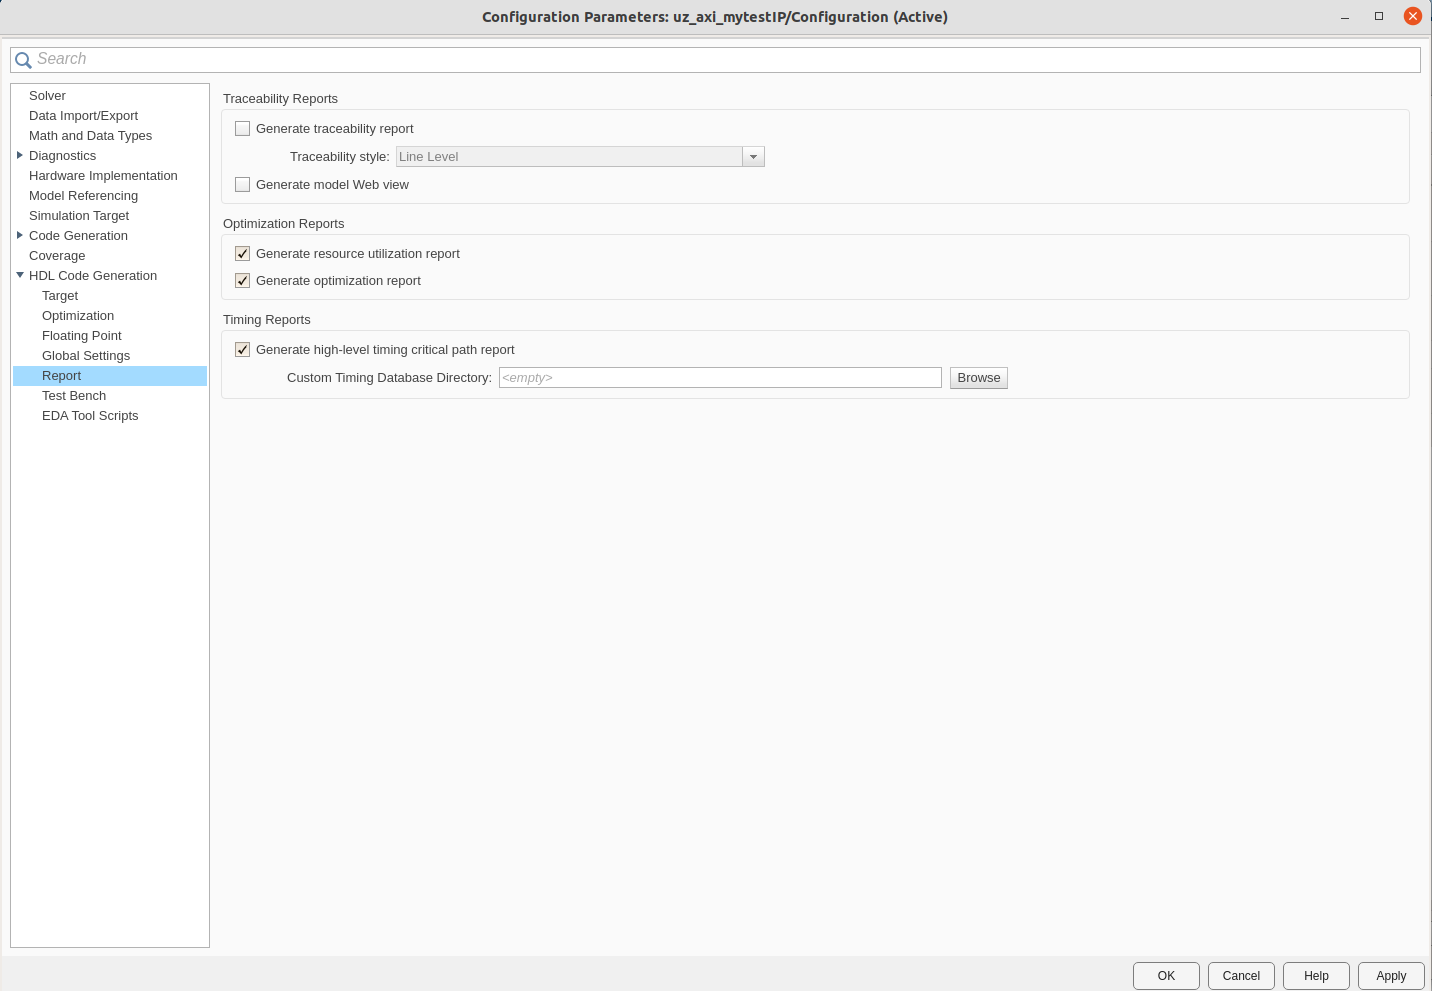
Go to HDL Code Generation -> Report and enalbe the Optimization and timing reports
Leave all other settings at default
Click Apply and then Run This Task in the HDL Workflow Advisor
Go to 3.2 Generate RTL Code and IP Core and click Run this Task
After a short time, the Code Generation Report opens and the task completes with Passed
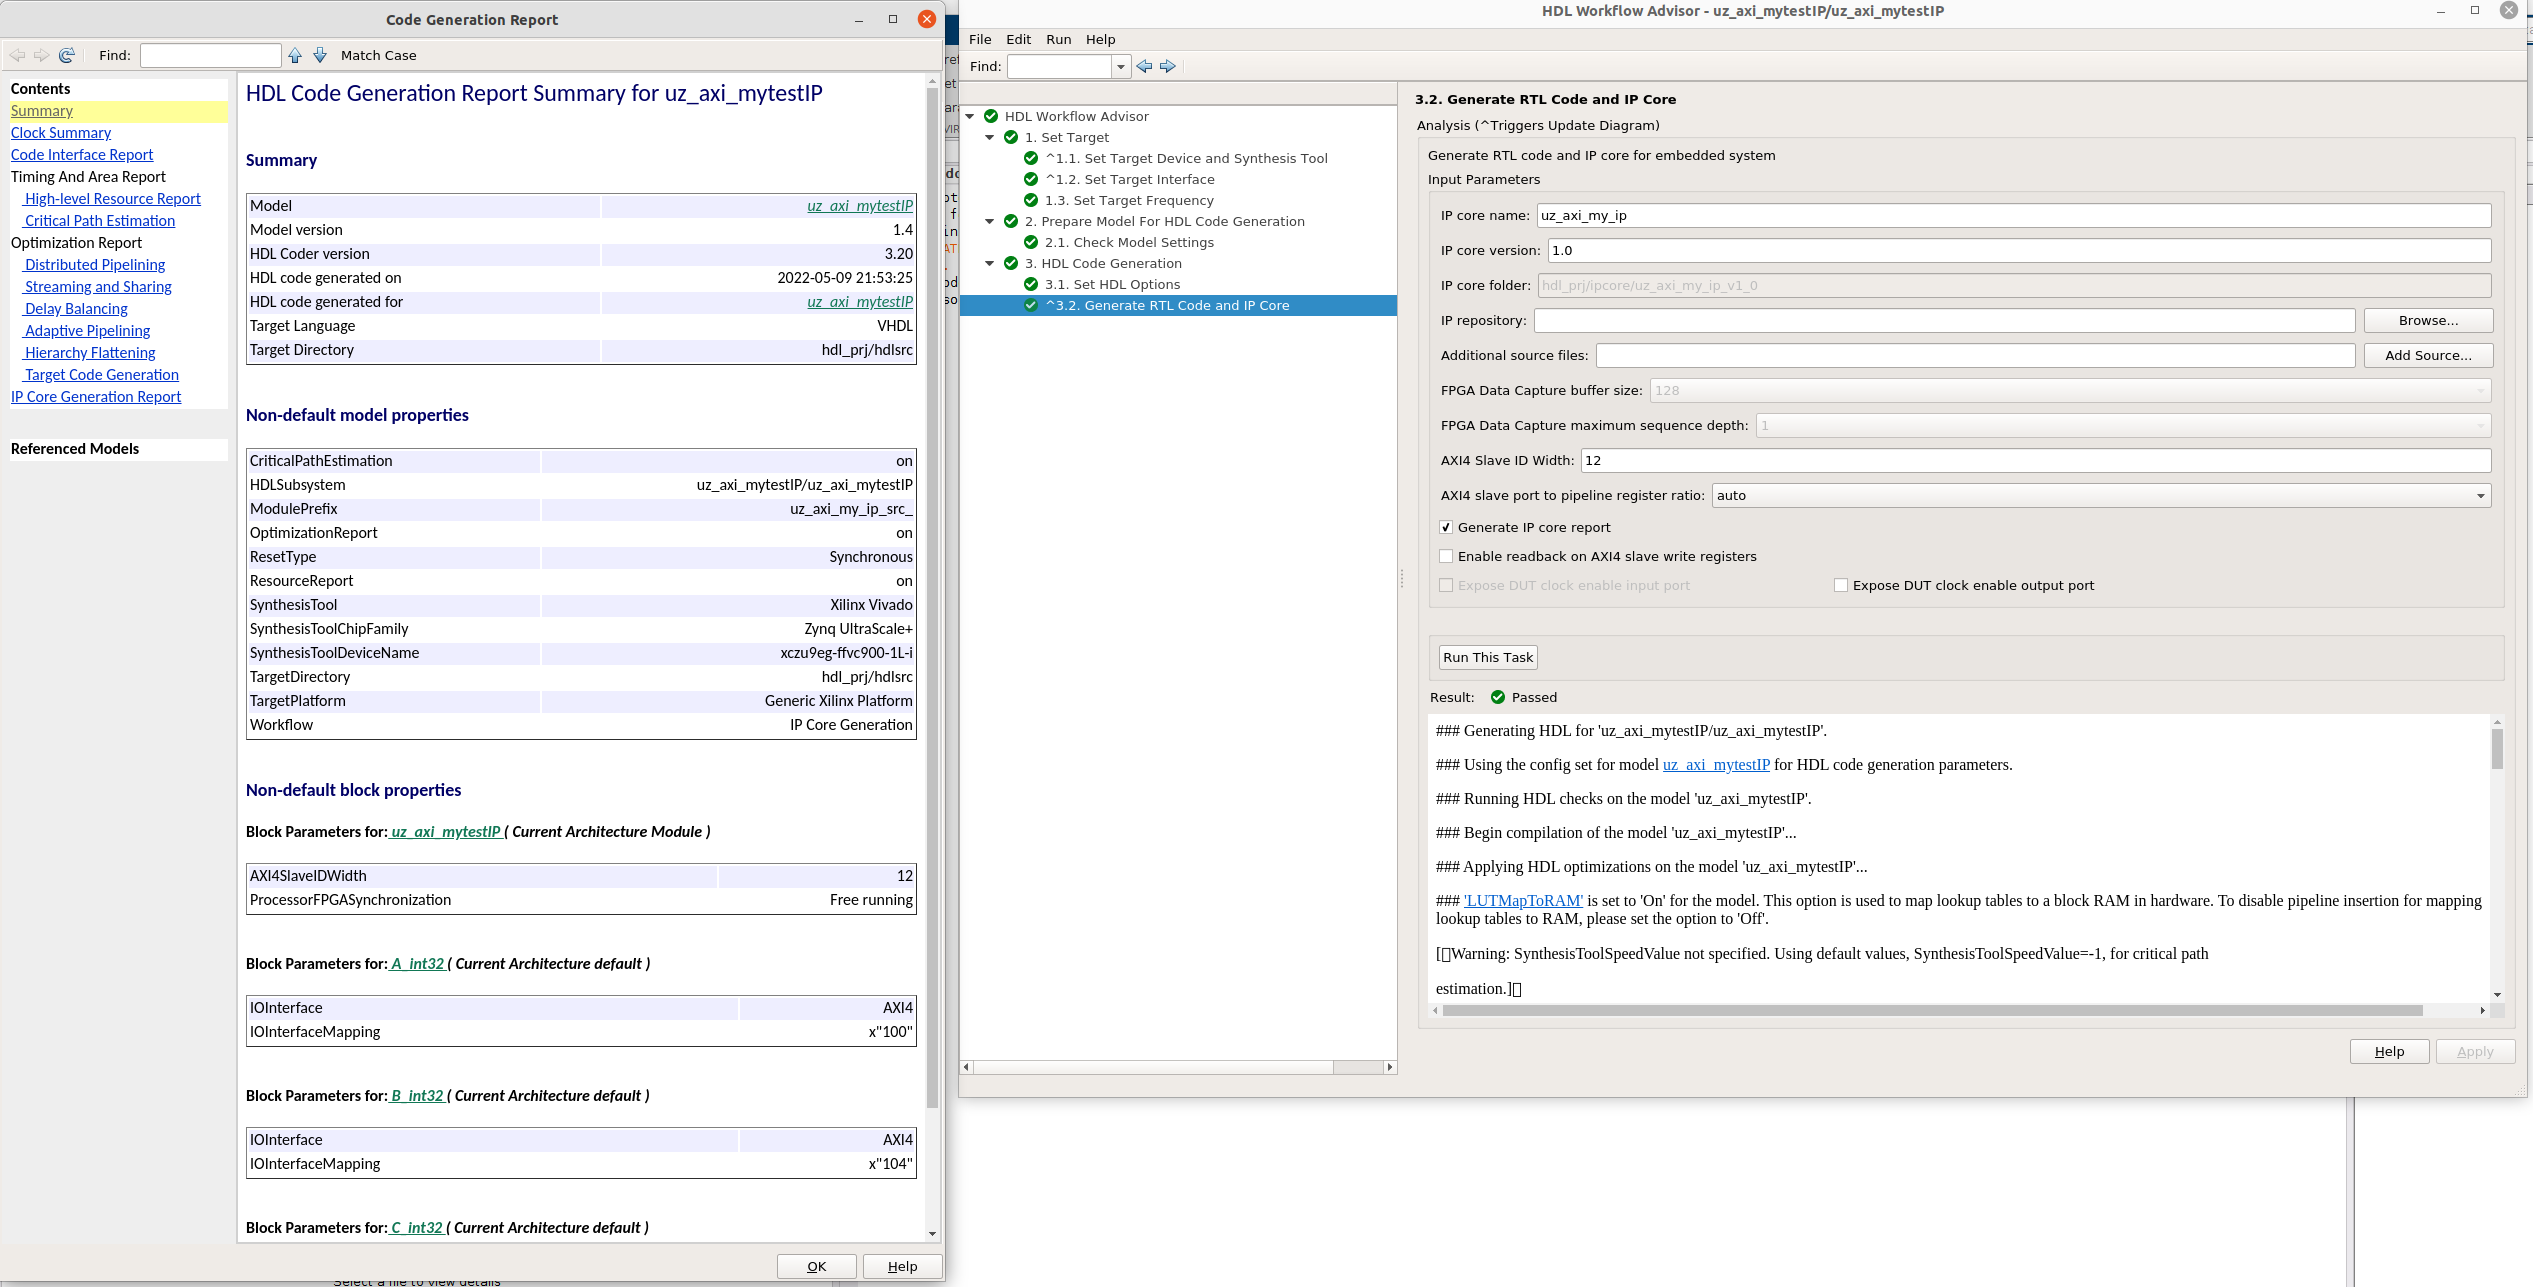
Check the reports that are generated
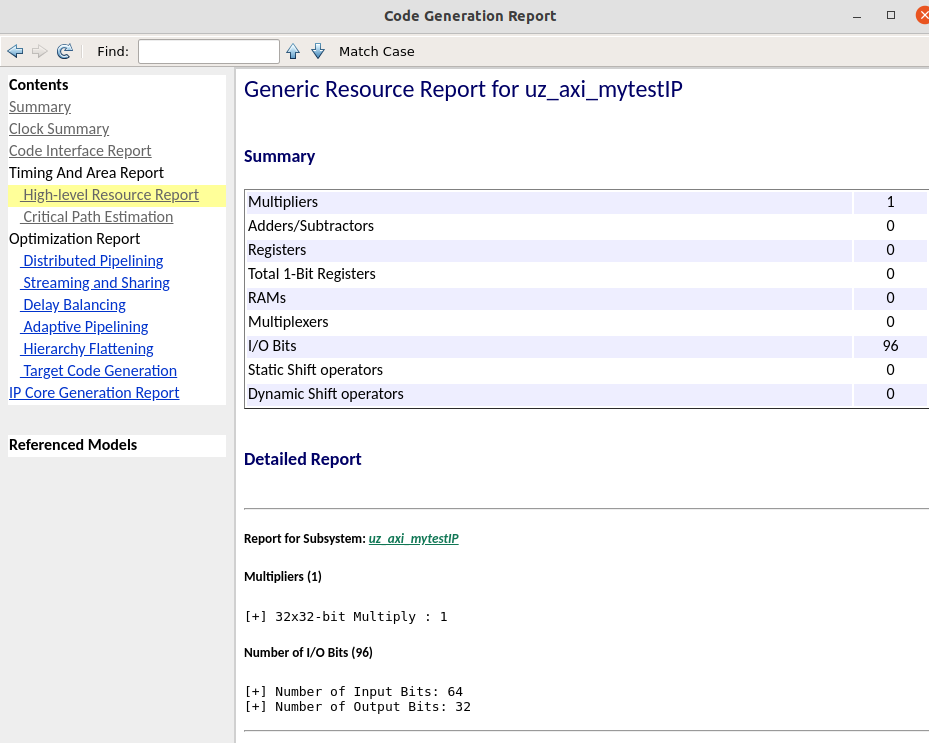
The resource reports gives an overview over the required resources
Note that this does not take into account the actual hardware that the FPGA features
In the IP core, one multiplier with 32x32 bits is required
However, the UltraScale of the UltraZohm has DSP48, which provides 27x18 bit multipliers
Thus, more than one DSP slice will be required to implement one 32x32 multiplier
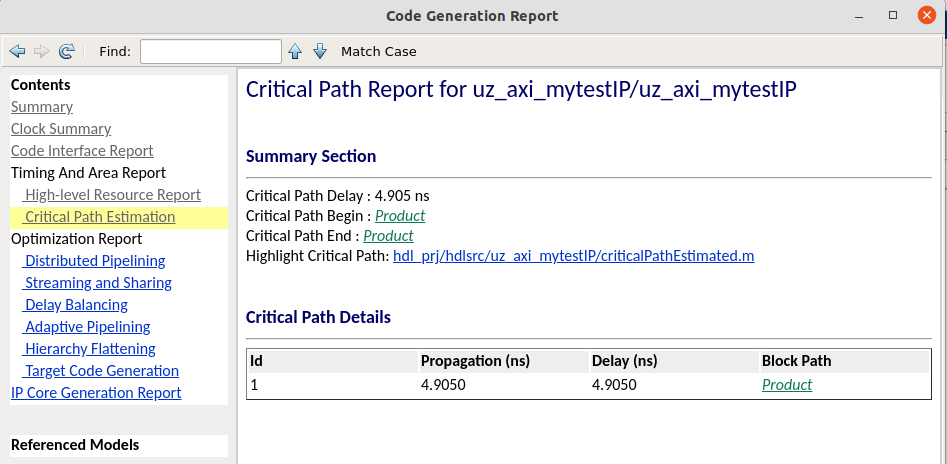
The critical path report is an estimation for the static timing
The estimated critical path has to be lower than the desired clock period, i.e., below 10ns for 100 MHz clock frequency
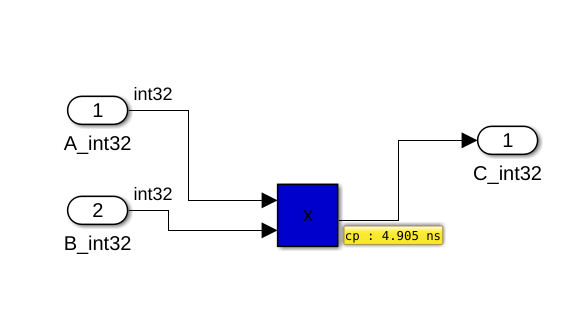
Click on Highlight critical path to see which path has the highest path delay
Note that the path delay is shown in the validation model (gm_), which includes all pipeline delays and multi-clock operations
The IP core is now ready. However, an delay block for inputs should be added
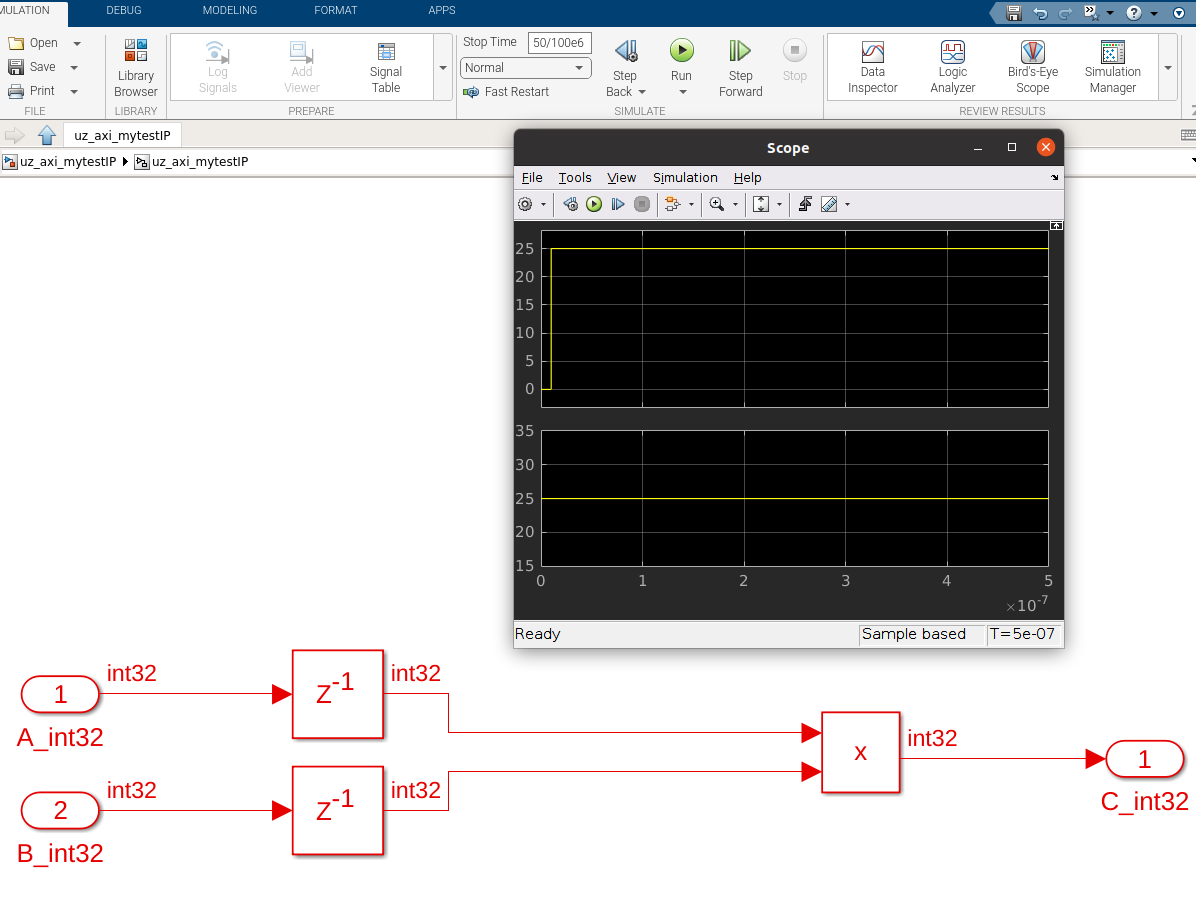
Add the multiplication of A*B outside of the IP core with the same data types and sample rates
Add a scope
Run the simulation and notice that both results are completely identical
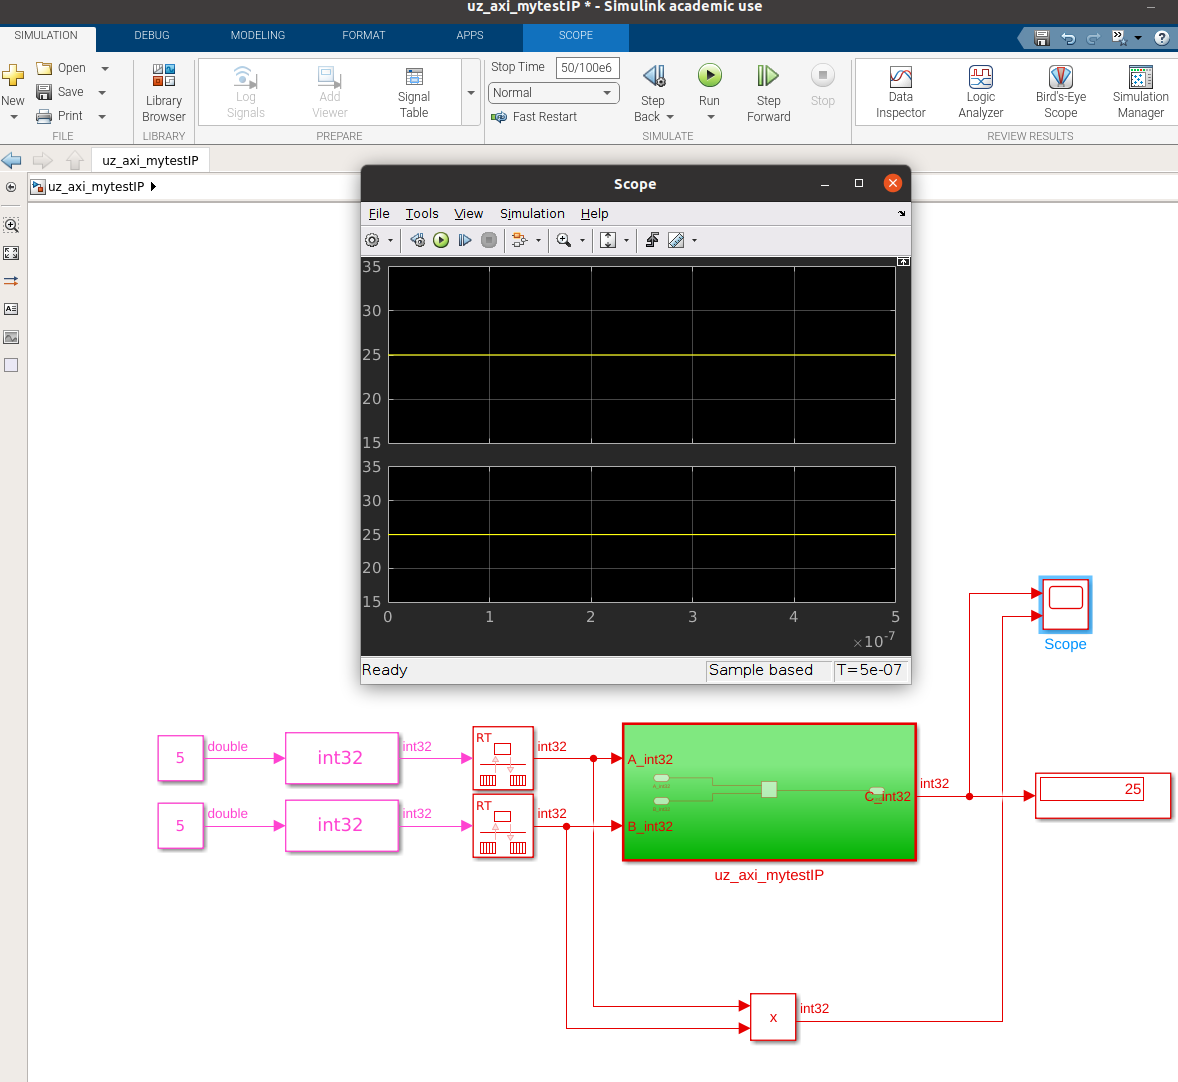
Add the input delay and run the simulation again
The calculation now takes one clock cycle but the timing for incoming signals from outside of the IP core is more robust
Having input/output registers is (almost) always a good strategy to make sure that incoming signals do not depend on the timing of external components and the IP core provides a stable signal after the output register for subsequent IP cores
Add a multiplication for unsigned int to the IP core

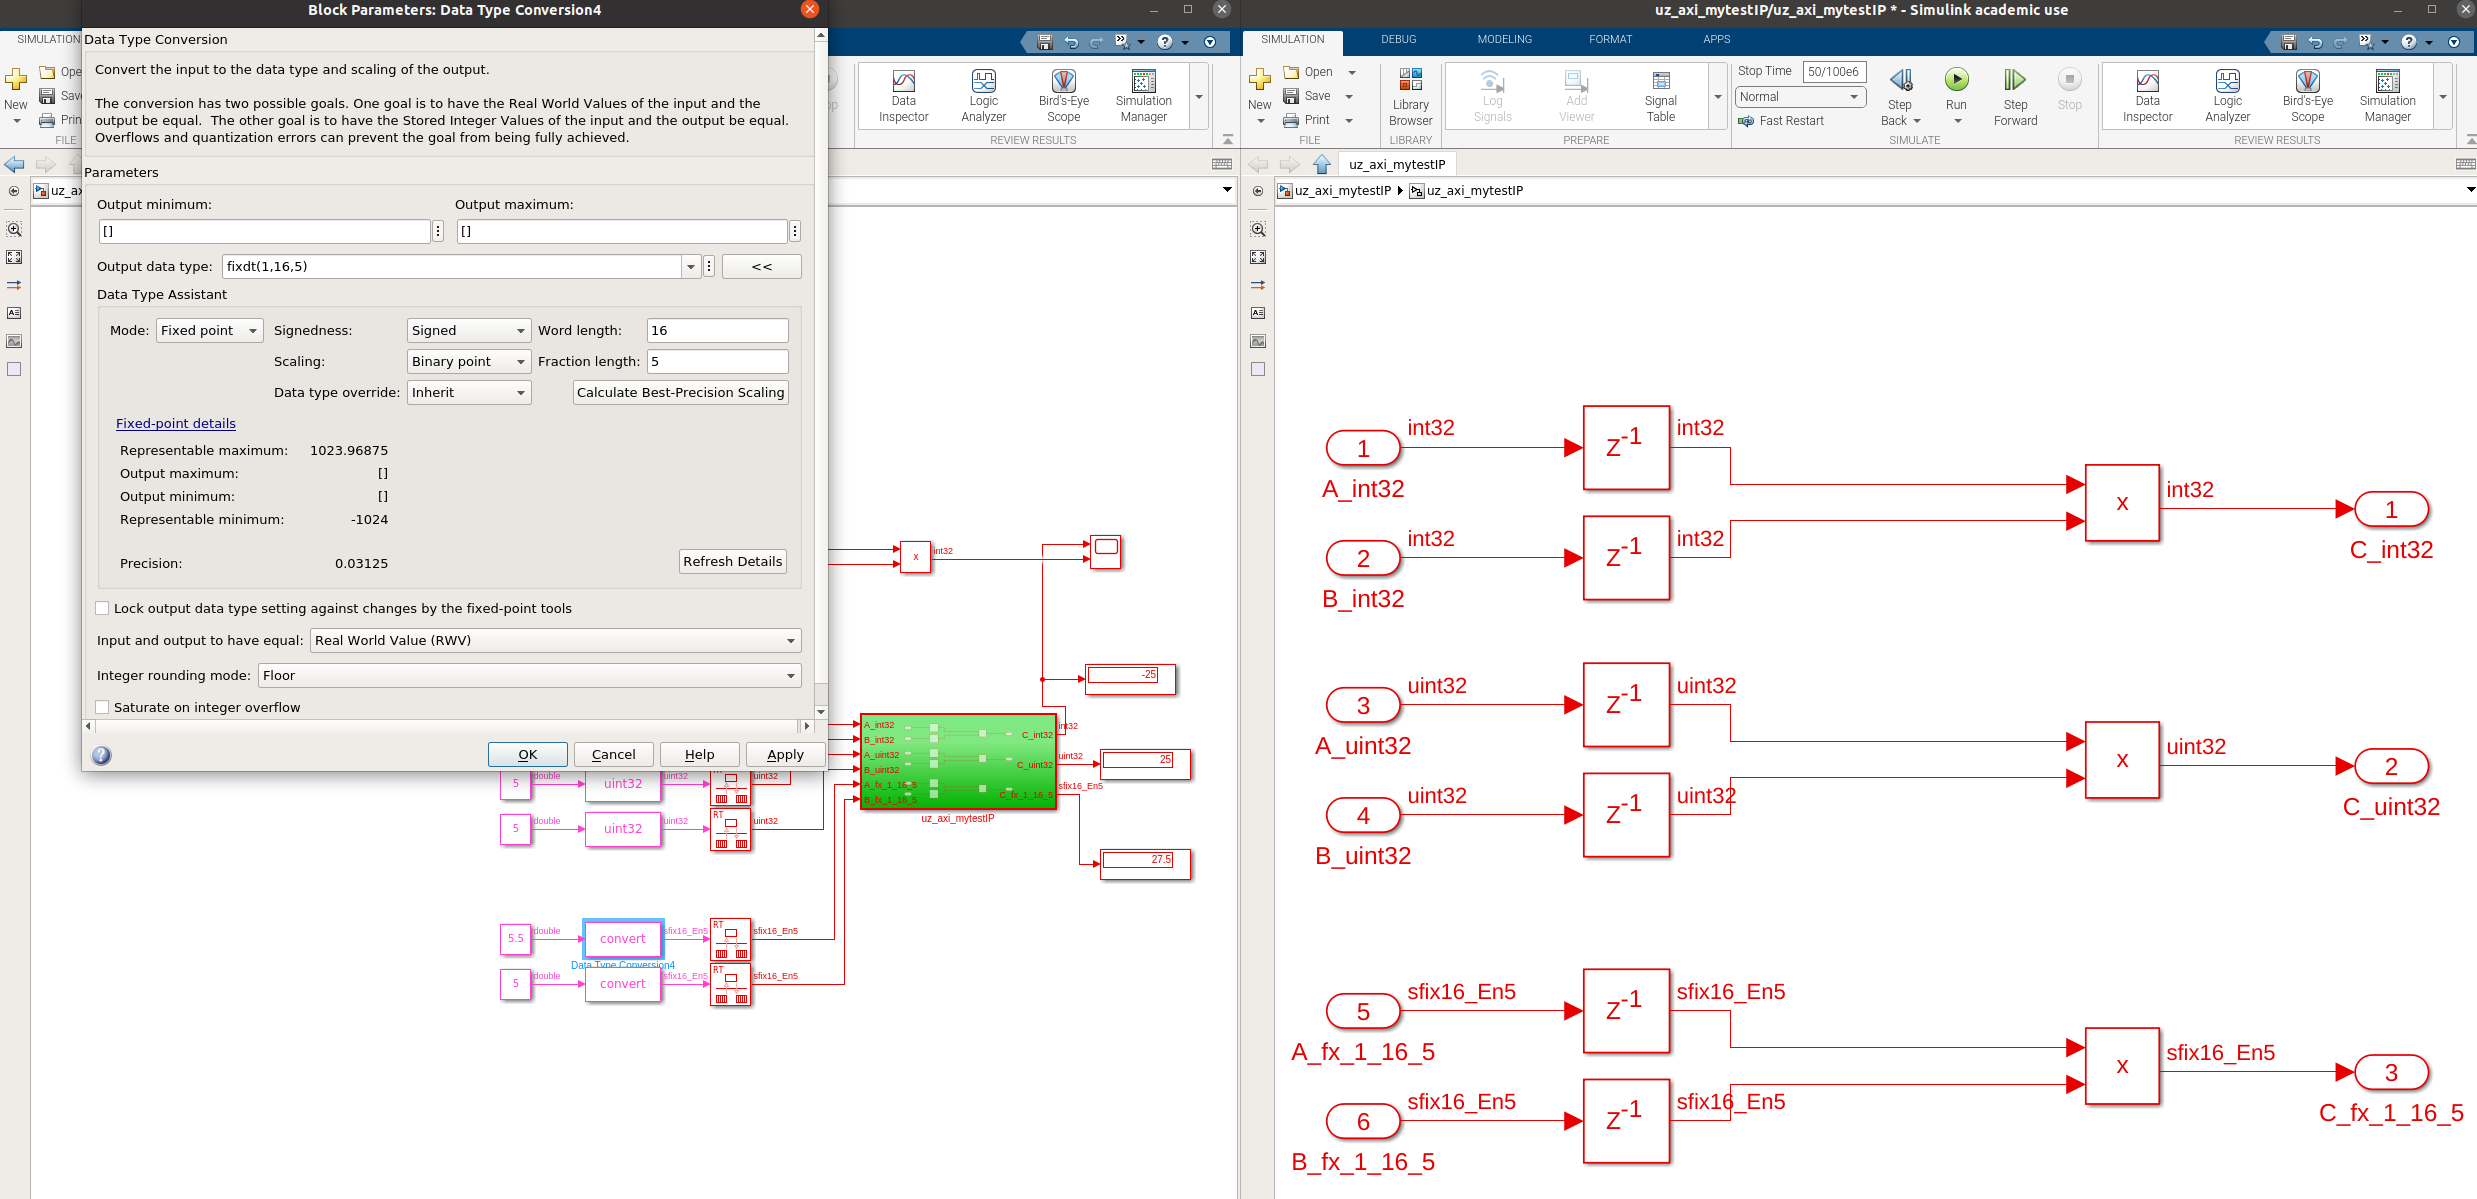
Lastly, add a multiplication of two fixed point values (see Fixed-point library for details of fixed point)
Use signed 16 bit with 5 bits for the fraction
Use the same output data type for the multiplication
Consider that this leads to the same overflow problems as discussed for int32 and uint32
In a real IP core, the data types have to be carefully designed regarding possible data range overflows
Using full precision multiplication (output data type large enough to represent the result of the two largest possible input value) is not possible most of the time since this leads to extremely large data types that can not be implemented in the FPGA
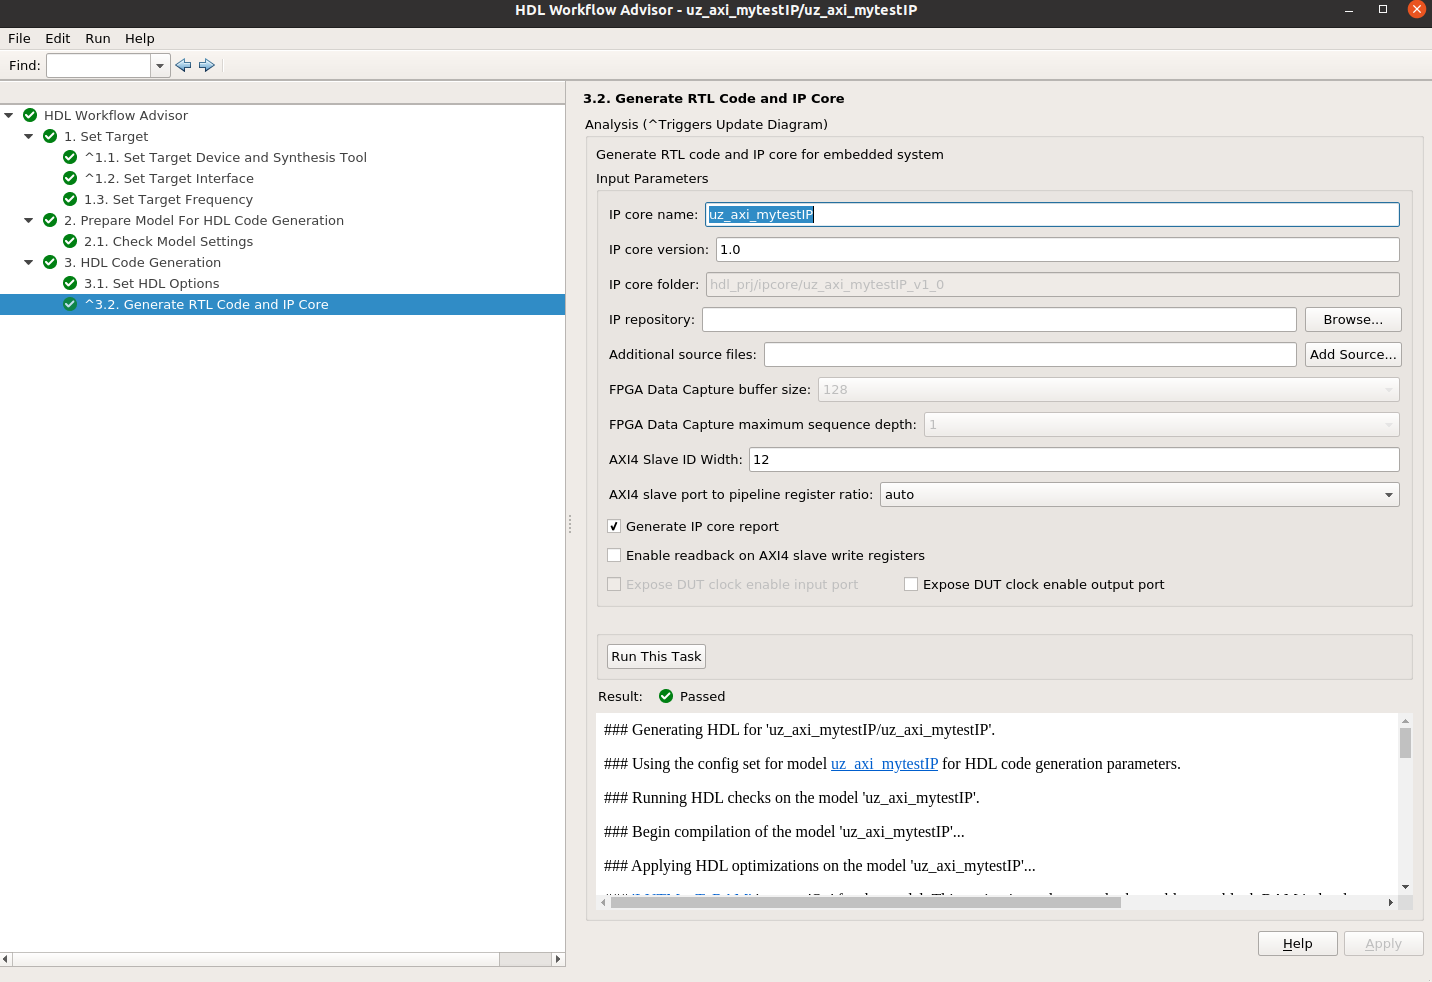
Run the HDL Workflow Advisor again, if there are warnings regarding the interface, run step Set Target Interface before step 1.1
Run all checks in step 2.1
Run all steps including 3.2 Generate RTL Code and IP Core
Change the IP core name to
uz_axi_mytestIPin 3.2 before running the step
In the Workflow Advisor, go to File, and Export to script
Save the
hdlworkflow.min the folder of the model to replicate the build at a later stage. Thehdlworkflow.mscript runs the code generation again with the same settings that were used when saving the file.Check the reports and the validation model (
gm_uz_axi_mytestIP)The IP Core is now generated
Add the IP core in Vivado
Open Vivado and the block design
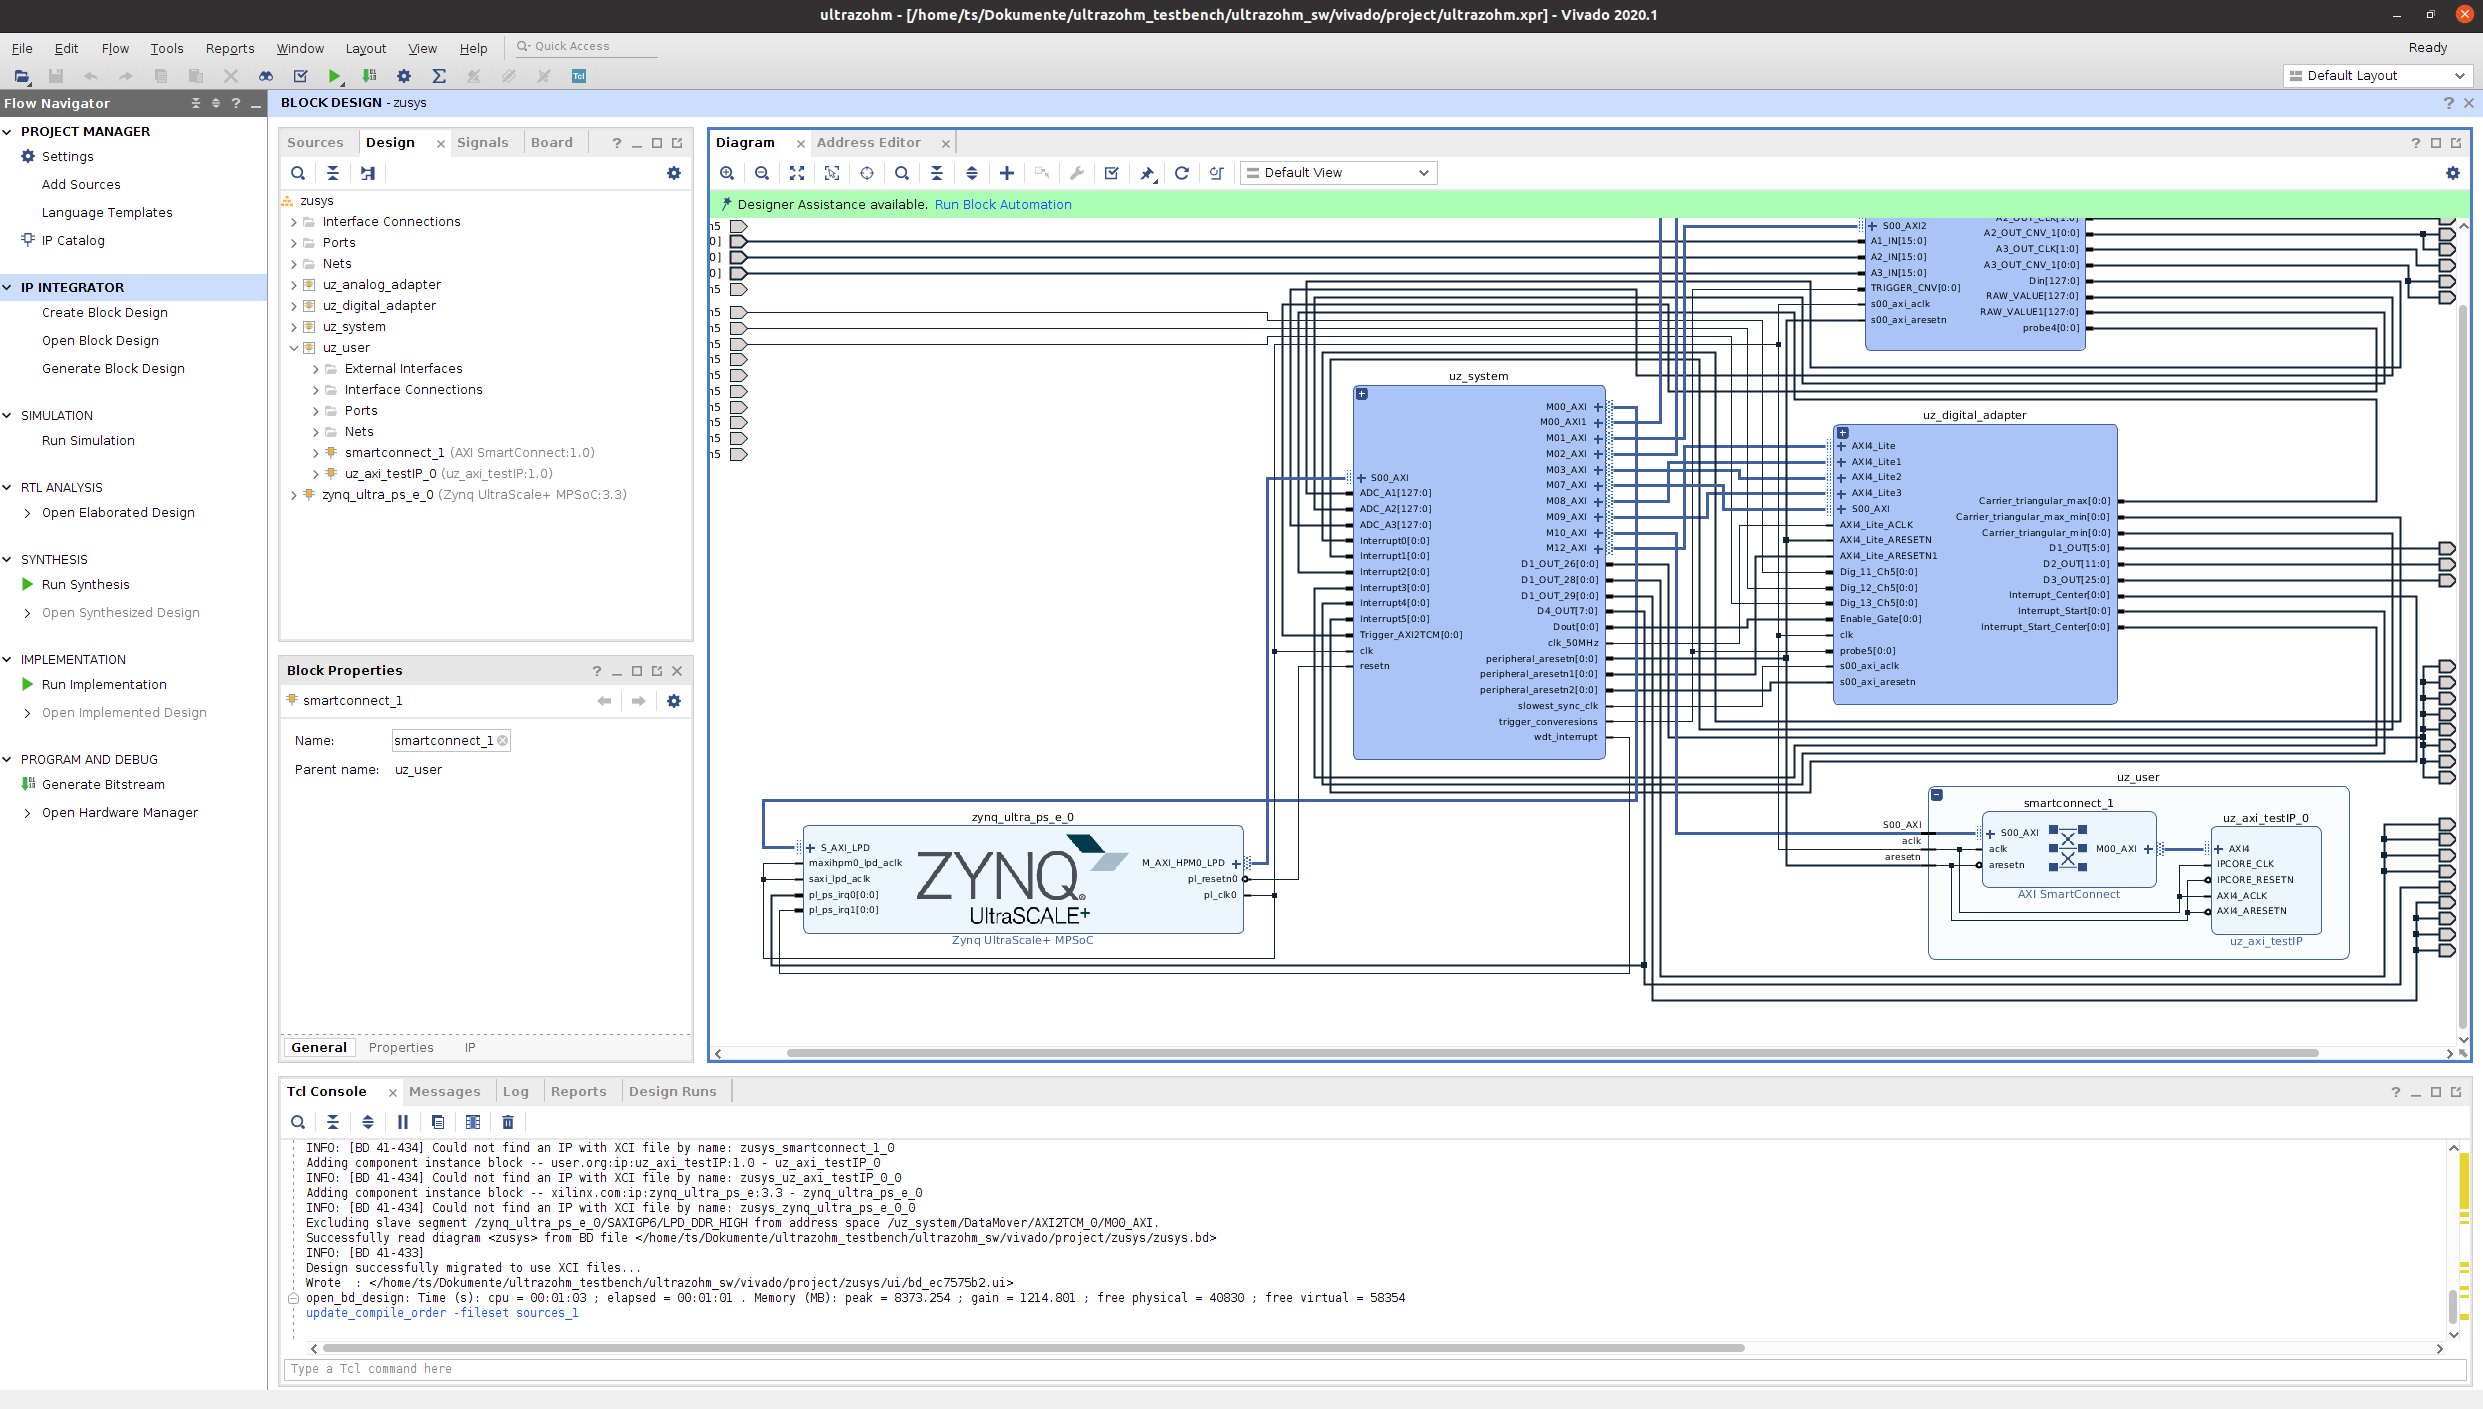
Right click into the block design and select IP settings
Refresh the IP catalogue
Extend uz_user subblock
Extend the smartconnect by one master port to connect AXI ports to the processor
Add the new IP core and connect it to the system
Go to the Address editor and assign a base address to the new IP core
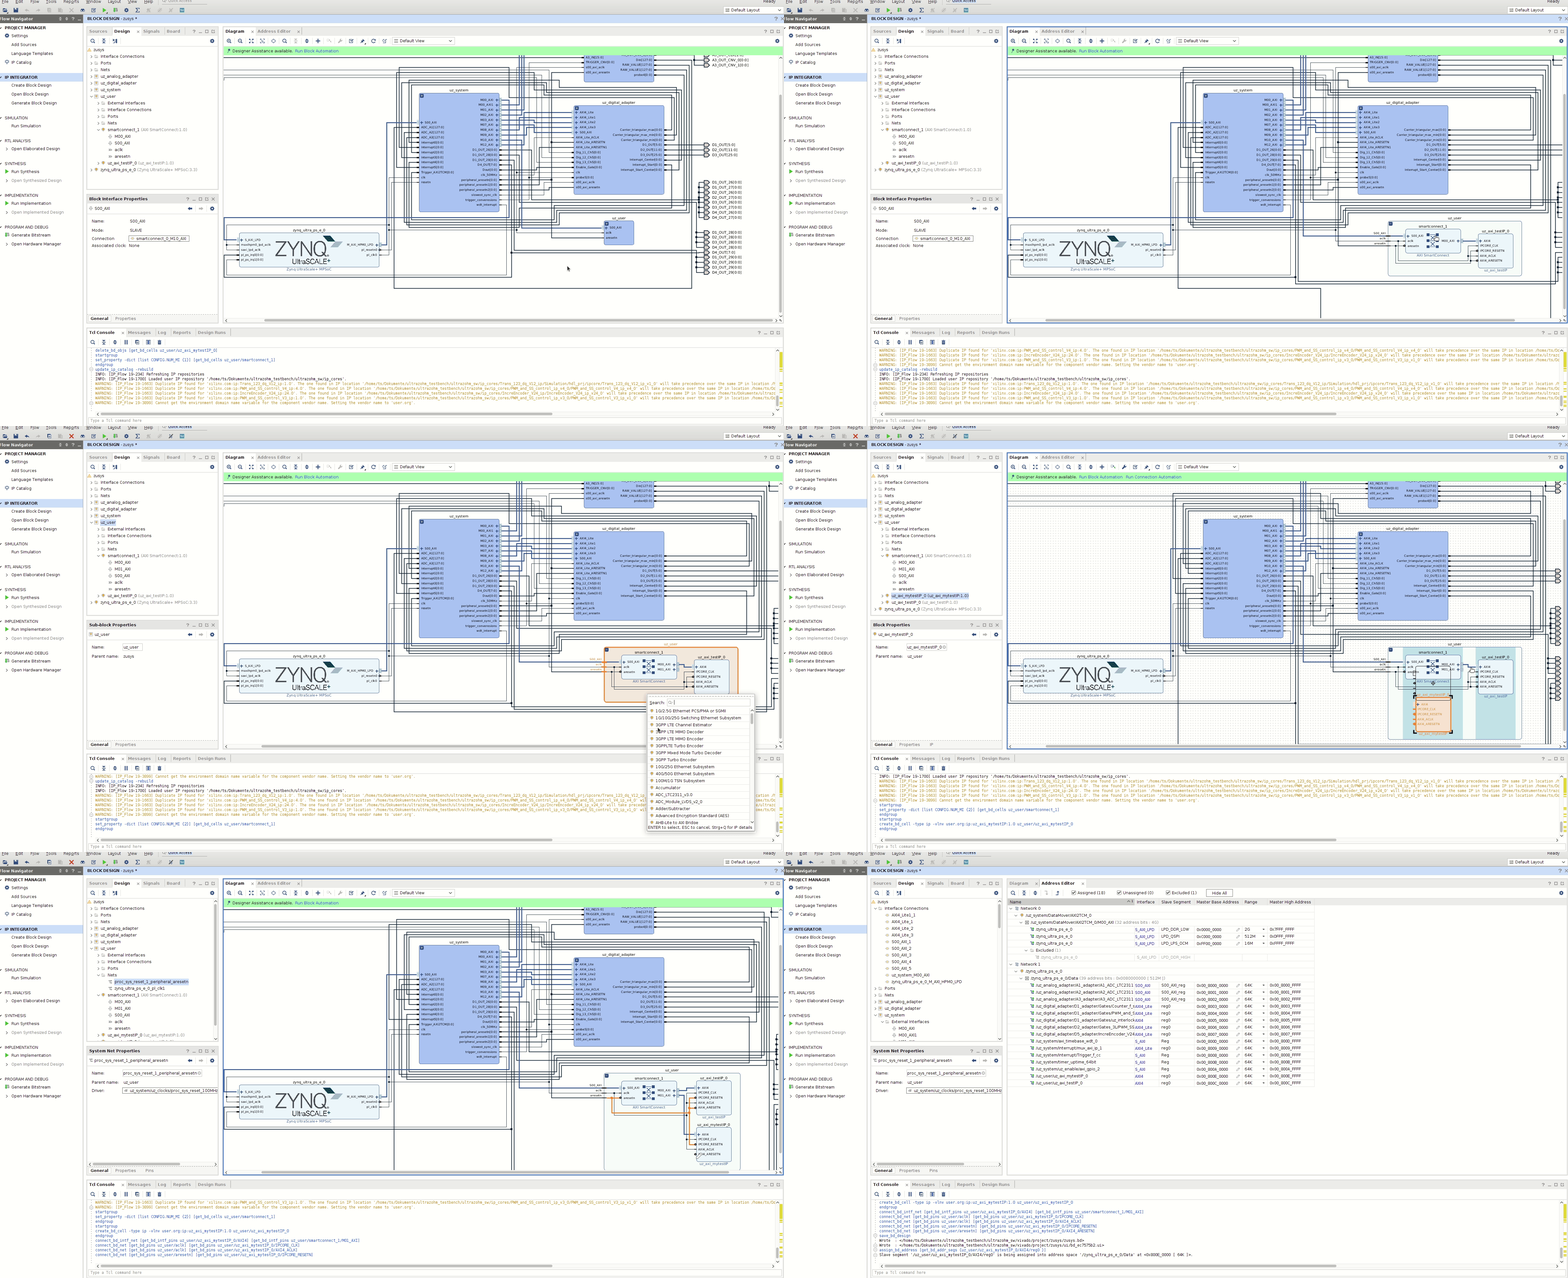
Build the bitstream, export the XSA and update the Vitis workspace as done in Generate the bitstream with Vivado
Follow the How to create a IP core driver tutorial to create a software driver for the IP core