Ordering Process with SMT Assembly#
This section will guide you through the ordering process at JLCPCB with the intend to choose SMT assembly. It is useful to mention that no additional setup costs arise for basic parts (resistors, diodes, capacitors). On the other hand for all extended parts there will be a setup cost of 3$ each.
Warning
For the order with SMT assembly JLC needs tooling holes on the PCB. These will be added by JLC if none are specified by the customer, but it is recommended to add them as described here.
Go to JLCPCB and sign in with your account
Go to your shopping cart and choose
Add new item
Fig. 207 JLC - Add New Item#
Click on
Add gerber fileand upload your Gerber and NC Drill files as .zip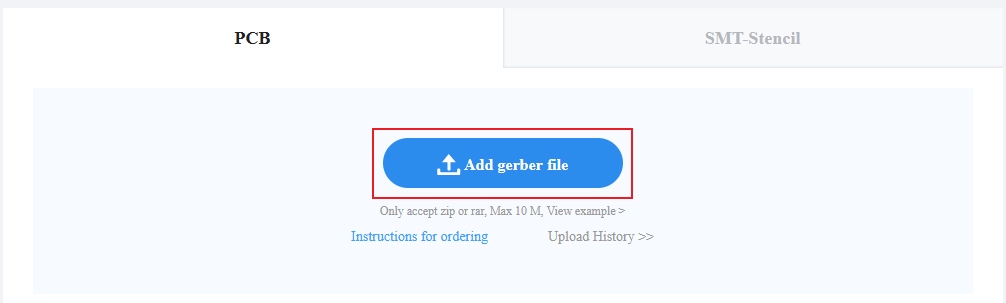
Fig. 208 JLC - Add Gerber File#
Choose your preferred settings and quantity for the PCB you want to order
Scroll down, choose
SMT Assembly, select the side that should be assembled (usually the top side) and click onConfirmNote
When choosing SMT assembly some settings are not available e.g. gold fingers. If necessary change them to fit JLC’s requirements

Fig. 209 JLC - SMT Assembly#
Now upload your BOM and Pick and Place (CPL) files and click on
Next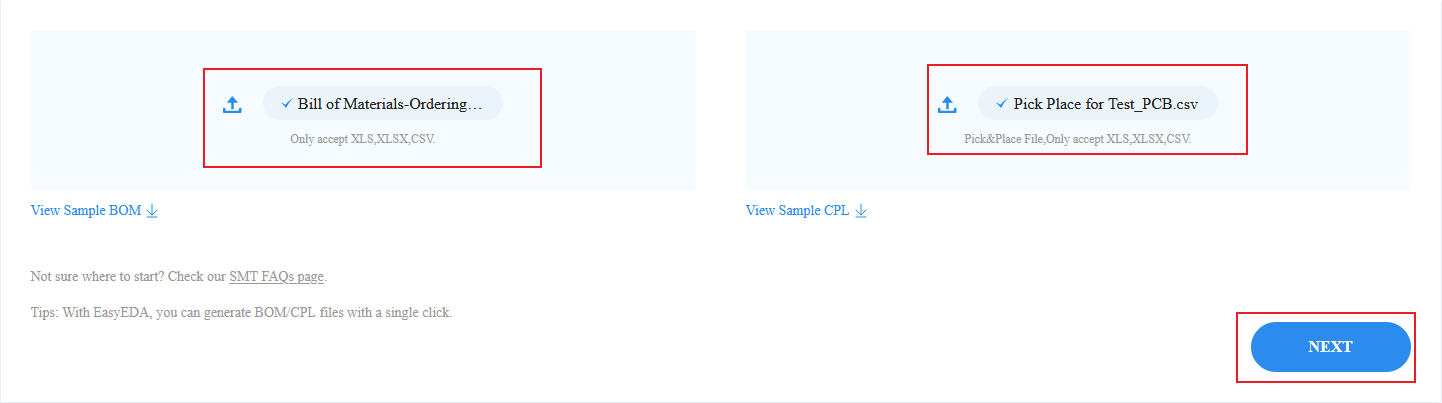
Fig. 210 JLC - Upload BOM and CLP#
Check if everything in the shown list is correct and click on
Next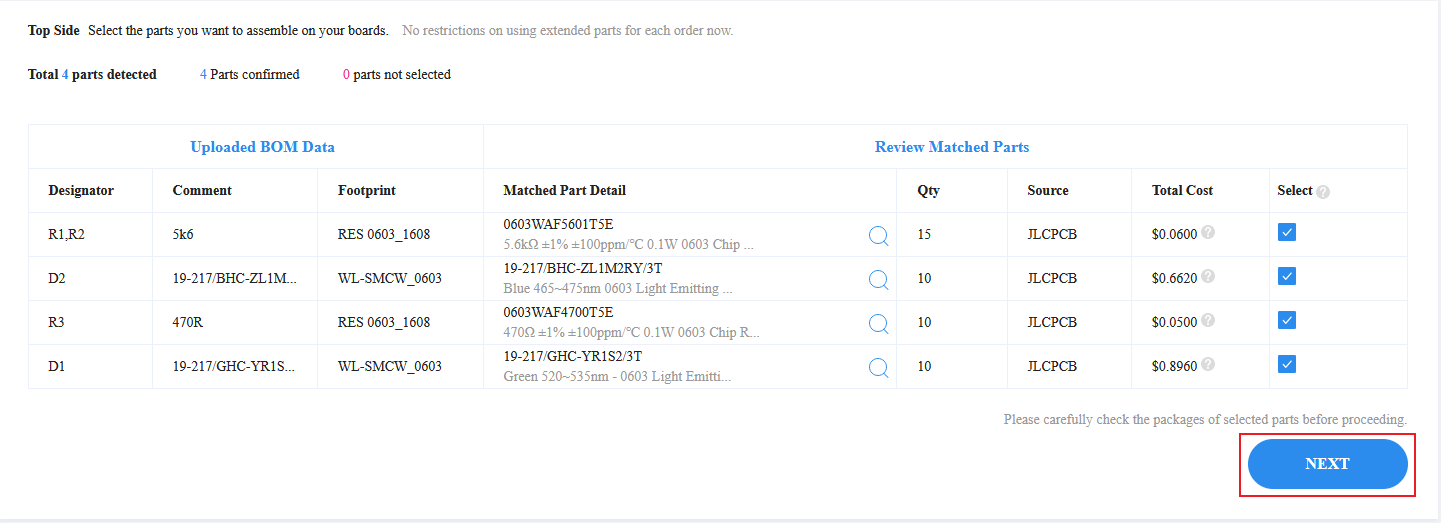
Fig. 211 JLC - Component Check#
Check the orientation of the components in the review window (e.g. red and white dot should be on the same side, if not adjust the rotation in the Pick and Place file in Altium)
Note
The orientation of parts will be checked by JLC after submission and adjusted manually according to the orientation mark (the dot ° on pin 1).
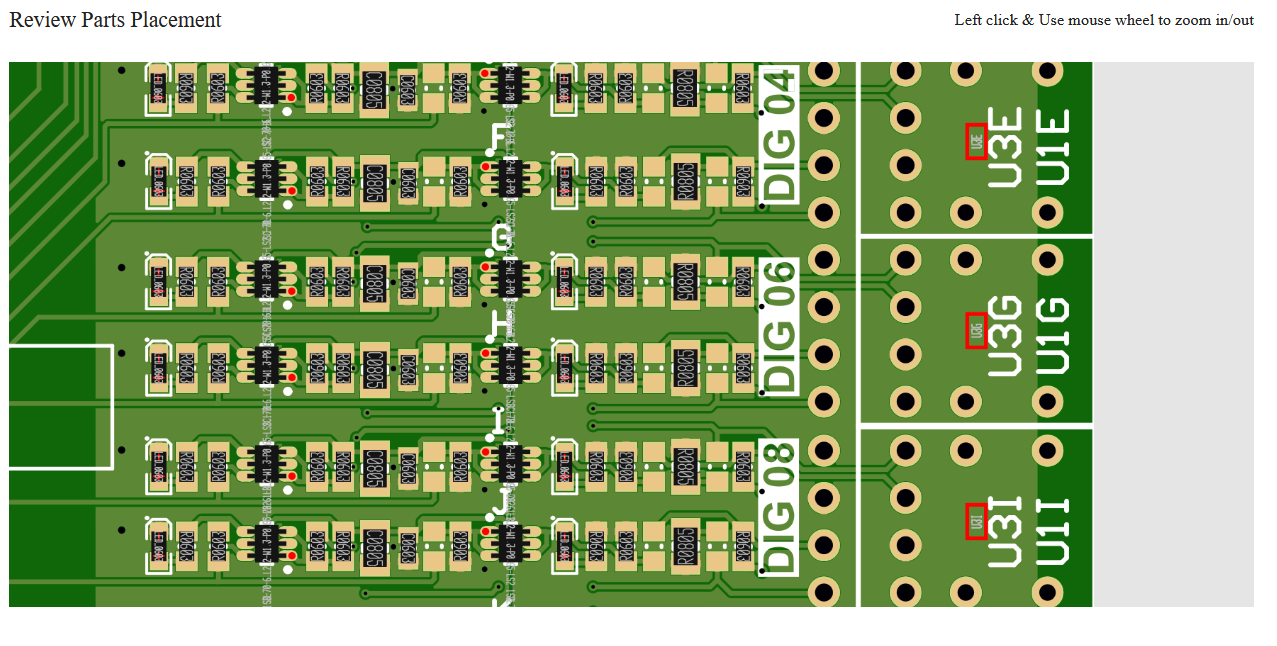
Fig. 212 JLC - Component Orientation#
Press
Save To CartClick on
Product Detailsto check your settings. You may also adjust the quantity of PCB’s before checkout if necessary. To proceed clickSecure Checkout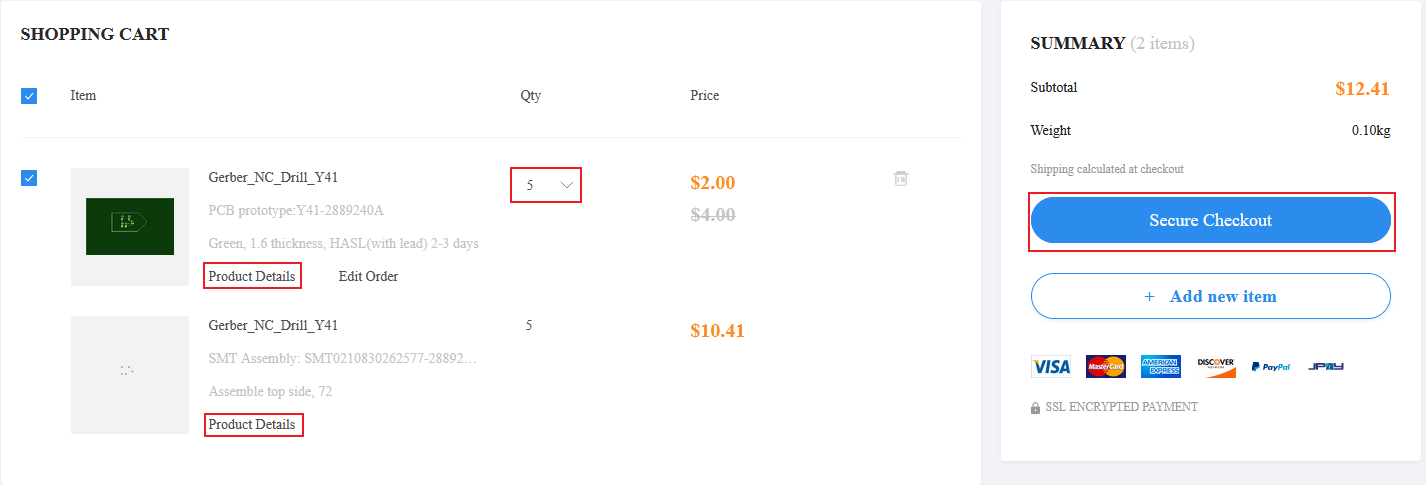
Fig. 213 JLC - Secure Checkout#
Follow the steps of the delivery and payment
Tip
The recommended payment is credit card, since paypal has very bad current exchange rates and the recommended delivery method is DHL Express Priority (DDP=Delivered Duty Paid).
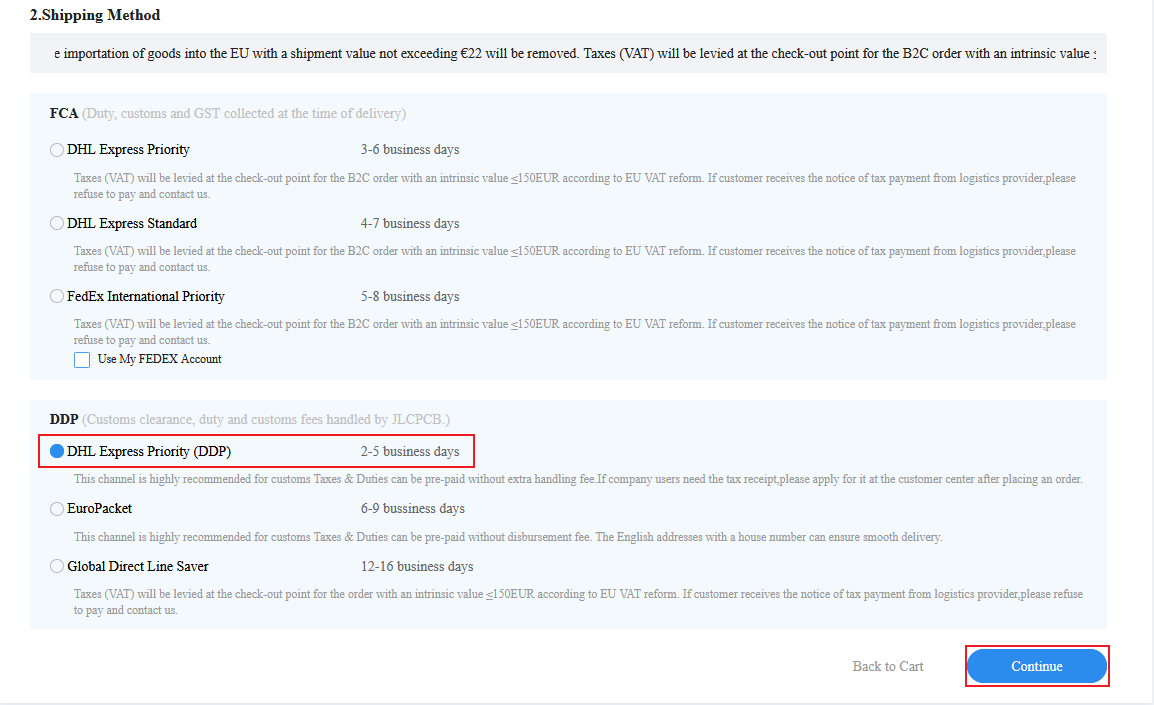
Fig. 214 JLC - Shipping#
Note
After JLC shipped the manufactured PCBs and you received the shipping number, a custom declaration (Zollvoranmeldung) has to be done for this shipment via DHL Express website. This is to avoid the package getting stock in customs.